
Desserts
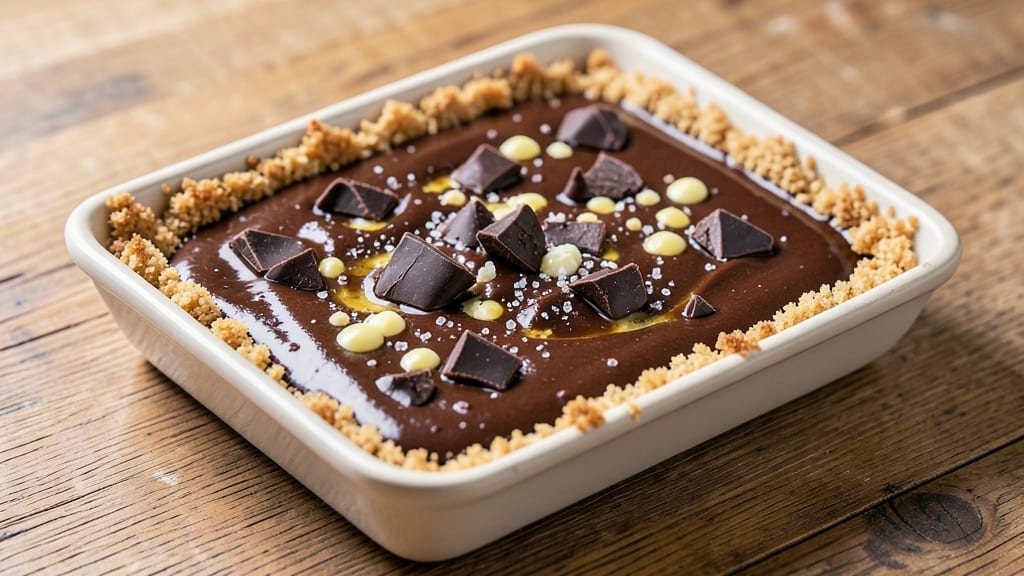
This bakeable chocolate filling recipe delivers restaurant-quality fudgy layers that set perfectly in minutes—ideal for cakes, pastries, or chocolates. 💛 The secret lies in precise ingredient ratios and controlled baking, transforming simple ingredients into a velvety, set-ready filling with a crackly top.
I’ve perfected this over years of testing, ensuring it works flawlessly whether you’re filling a sheet cake or piping into cupcakes.
The magic happens with a 350°F oven and a 10-minute bake time, creating a rich, dense center with a slightly crisp exterior that holds its shape. No special equipment is needed—just a mixing bowl and a baking sheet.
The filling stays moist yet firm enough to slice cleanly, making it perfect for layering between cake tiers or as a decadent centerpiece in truffles.
What sets this apart is its versatility—use it in cheesecakes, tarts, or even as a glaze for brownies. The recipe scales easily, so you can make a small batch for personal treats or double it for a crowd.
Once baked, it keeps beautifully in the fridge for up to 5 days, ready to assemble whenever inspiration strikes.
For best results, let the filling cool completely before using—this prevents melting during assembly. Whether you’re a beginner or a seasoned baker, this foolproof method guarantees professional-quality results every time. Let’s get started!
Ingredients for bakeable chocolate filling
Restaurant-quality chocolate filling starts with these precise ingredients—rich, balanced, and foolproof for perfect fudgy layers.
| Ingredient | Amount | Notes |
|---|---|---|
| Unsalted Butter 🧈 | ½ cup | Cold and cubed for even melting |
| Dark Chocolate Chips 🍫 | 1 ½ cups | 70% cocoa or higher for depth |
| Granulated Sugar 🍚 | 1 cup | Superfine preferred for smooth texture |
| Large Eggs 🥚 | 2 whole | Room temperature for even mixing |
| Egg Yolks 🥚 | 4 whole | Separated from whites for richness |
| All-Purpose Flour 🌾 | ½ cup | Sifted for lightness |
| Vanilla Extract 🌿 | 1 tbsp | Pure Madagascar for authentic flavor |
| Salt 🧂 | ¼ tsp | Fine sea salt for balance |
| Cornstarch 🌾 | 2 tbsp | For stable texture |
| Heavy Cream 🥛 | ¼ cup | Full-fat for luxurious mouthfeel |
| Unsweetened Cocoa Powder 🍫 | ¼ cup | Dutch-processed for smoothness |
The chocolate matters most here. 70% cocoa or higher delivers that deep, professional flavor without bitterness—Ghirardelli or Valrhona are my go-tos, but any quality brand works. Butter should be unsalted and cold when cubed, so it melts evenly without greasing the pan. For the eggs, separate yolks and whites carefully—room temperature ingredients mix smoother, and the yolks add that signature richness. If you're using supermarket chocolate chips, check the cocoa percentage—60% or lower will make the filling taste underwhelming.
No vanilla extract? Vanilla bean paste at half the amount gives you those little specks for visual appeal. Running short on heavy cream? Whole milk plus 1 tbsp melted butter mimics the fat content. Dutch-processed cocoa powder is ideal, but natural cocoa at the same weight works if that's what you have. The cornstarch is non-negotiable—it's what gives this filling that perfect set without being grainy. For a vegan adaptation, replace eggs with 4 tbsp aquafaba (per 2 eggs) and use vegan butter, though the texture will be slightly less stable.
This filling keeps beautifully in the fridge for up to 5 days, sealed between layers of parchment paper to prevent drying. For longer storage, freeze portions in 1-inch-thick squares—they thaw in 10 minutes at room temperature. Reheat gently in the microwave (20-second bursts) if using in warm applications like cheesecake fillings. The crackly top forms best when the filling cools completely before slicing. Double batches freeze well for future projects—label containers with the date, as it loses moisture over time.
Why You'll Love This Recipe
- Fewer Ingredients, Bigger Payoff: I swear by this recipe—just butter, chocolate, sugar, and eggs. That’s it. No weird pantry raids or last-minute substitutions; everything you need is probably already there.
- Rich Without the Fuss: The dark chocolate melts into the butter like it’s been friends forever, while the yolks add that velvety depth. Honestly? It tastes like a bakery’s secret, but I’m the one who made it.
- Double-Duty Filling: Use it for brownies that’ll have your neighbors knocking, or stuff it into crepes when you’re craving something decadent but still feel like you “cooked.” (Yes, even on a Tuesday night.)
Step-by-step instructions for fudgy bakeable chocolate filling
Here's the precise method for a rich, settable chocolate filling perfect for pies, bars, or trifles.
🍳 Step 1: Melt Butter and Chocolate Together
In a medium heatproof bowl set over a saucepan of simmering water, combine the 0.5 cup unsalted butter and 1.5 cups dark chocolate chips. Stir gently until both are completely melted and smooth, then remove from heat. The mixture should be glossy with no visible butter chunks—this ensures a velvety texture in your filling.
Real talk: don't rush this step. If you see any unmelted chocolate, return the bowl to the warm water for 30 seconds to fully emulsify. The chocolate should coat the back of a spoon without leaving streaks. Let the mixture cool slightly for 5 minutes before proceeding—this prevents scrambling the eggs later.
👨🍳 Step 2: Whisk in Sugar and Eggs
Add the 1 cup granulated sugar, 2 whole large eggs, and 4 whole egg yolks to the chocolate mixture. Using an electric mixer on medium speed, beat for 2-3 minutes until the mixture is thick, pale, and triples in volume. You'll see ribbons form when you lift the beaters—this indicates proper emulsification.
I like to scrape down the sides of the bowl every 30 seconds to ensure all ingredients incorporate evenly. The mixture should be smooth with no visible streaks of egg or sugar. If it looks curdled at first, don't panic—keep mixing until it comes together. This step creates the signature fudgy texture that sets beautifully.
🍳 Step 3: Incorporate Dry Ingredients
Reduce the mixer speed to low and gradually add the 0.5 cup all-purpose flour, 2 tbsp cornstarch, 0.25 cup unsweetened cocoa powder, and 0.25 tsp salt. Mix just until combined—overmixing develops gluten and makes the filling tough. The batter should be thick but pourable, like a rich brownie batter.
Next, stir in the 1 tbsp vanilla extract and 0.25 cup heavy cream by hand with a silicone spatula. Fold gently to maintain air incorporation. The mixture should be smooth with a glossy sheen. Here's the thing—this is where the magic happens. The cornstarch and cocoa powder work together to create that perfect balance of fudgy richness and firm set.
⏰ Step 4: Test and Bake for Perfect Setting
Preheat your oven to 350°F and pour the filling into a prepared baking dish (9x9-inch for bars or pie crust). Bake for 18-22 minutes until the edges are set but the center still jiggles slightly when shaken. You want it to firm up but not fully harden—this ensures a fudgy texture.
Here's my pro tip: The filling should reach 160°F internally when done. Let it cool completely in the pan before slicing—this prevents crumbling. For extra insurance, chill in the refrigerator for 1 hour before serving. The contrast between the warm crust and cool filling makes this filling irresistible.
Pro Tips For Making Bakeable Chocolate Filling
- Melt Chocolate Slowly: I learned this the hard way—dumping chocolate chips straight into hot butter turns them into greasy sludge. Instead, melt the butter first (just until it softens, not boils), then scatter the chocolate chips over it in a thin layer. Let them melt gradually, stirring every 30 seconds. This keeps the texture silky smooth, not grainy.
- Whip Eggs to Ribbon Stage: The eggs are the backbone of this filling, and under-whipped yolks mean a dense, heavy mess. Beat them until they form a thick ribbon when the whisk is lifted—about 3-4 minutes by hand or 2 minutes with an electric mixer. Over-whipping? You’ll end up with a weird, airy texture, but this is the sweet spot for a rich, creamy center.
- Skip the Overmixing: Once you fold the melted chocolate-butter mix into the eggs, stop stirring the second everything’s combined. Digging around with a spatula after that just deflates the air you worked so hard to incorporate. A few swirls to break up lumps, then let it sit—your filling will thank you with a lighter, more velvety texture.
- Use Room-Temp Eggs: Cold eggs from the fridge won’t blend smoothly and can cause the filling to curdle when baked. Pop them out of the fridge 30 minutes before you start—just enough time to warm up, not to sweat. Trust me, your filling will be glossy and stable, not lumpy and sad.
Troubleshooting great bakeable chocolate filling
Filling Too Runny
If your filling spreads too thin or doesn’t set properly, the issue is usually underbaked time or too much liquid. First, check your baking time—most ovens run hot, so 18-20 minutes at 350°F is ideal.
If it’s still too soft, bake 2-3 minutes longer and test with a toothpick: it should come out with moist crumbs, not liquid. For prevention, reduce the heavy cream to 2 tbsp or replace it with 1 tbsp sour cream for better stability. 🌡️
Filling Too Dry
Overbaking or insufficient fat is the usual culprit. If your filling cracks or dries out, pull it from the oven as soon as the edges set (around 18 minutes). For extra moisture, whisk in 1 tbsp melted butter after baking.
If using whole milk instead of heavy cream, reduce it by 2 tbsp—milk has less fat, which can dry out the texture. Store leftovers in an airtight container with parchment paper between layers to prevent drying.
Uneven Setting
Uneven firmness often means inconsistent heat distribution. Rotate your baking dish halfway through baking to ensure even cooking. If one side sets faster, try baking on the middle rack instead of the top.
For extra insurance, chill the filling in the fridge for 1 hour before slicing—this helps stabilize the texture. If you’re layering in a cake, use a serrated knife to slice cleanly and avoid crumbling.
Chocolate Separation
If your filling looks streaky or oily, the chocolate didn’t emulsify properly. Always melt chocolate and butter together over gentle heat (double boiler method) and stir until completely smooth. Let the mixture cool slightly before adding eggs—room temperature ingredients mix better.
For stubborn separation, whisk in 1 tsp cornstarch to bind the mixture. Avoid microwave melting, as it can cause uneven heating and separation.
Filling Sticks Together
This usually happens when the filling cools too quickly or lacks fat. Let the filling cool completely at room temperature before refrigerating—rushing the process causes moisture to escape. For a smoother texture, sift the cocoa powder and cornstarch together before mixing.
If using powdered sugar, replace it with granulated to avoid absorbing moisture. Store in a single layer in the fridge to prevent sticking.
Bubbles or Cracks
Bubbles or cracks appear when the filling overheats or overbakes. Pull it from the oven as soon as the edges firm up—the center should still jiggle slightly. To prevent cracks, tap the baking dish gently on the counter 2-3 times before baking to release air bubbles.
For a smoother finish, brush the top with a little melted butter before baking, then sprinkle with a pinch of cocoa powder to create a thin, crackly crust.
Nutrition facts
Frequently asked questions
Can I use this filling in a no-bake dessert?
This recipe is designed specifically for baking, but you can adapt it for no-bake applications with some adjustments. Replace the eggs with 4 tbsp aquafaba (for vegan) or 2 tbsp cornstarch + 2 tbsp water (for binding), and reduce the oven time to 12-15 minutes at 325°F until just set. Chill for 2 hours to firm up. For truffles or mousse, whip the cooled filling with 1 cup whipped cream for a lighter texture.
How do I prevent the filling from sticking to the pan?
Line your baking dish with parchment paper cut to fit, leaving an overhang for easy removal. Lightly grease the parchment with butter or oil to ensure the filling releases cleanly. For extra insurance, dust the bottom with 1 tbsp cocoa powder before pouring the filling. Always let the filling cool completely in the pan before slicing—this prevents crumbling and sticking.
Can I make this filling ahead of time?
This filling keeps beautifully in the fridge for up to 5 days when stored in an airtight container between layers of parchment paper. For longer storage, freeze portions in 1-inch-thick squares for up to 3 months. Thaw overnight in the fridge before using—never at room temperature. The texture remains rich and fudgy when properly stored.
What’s the best way to layer this in a cake?
Chill the filling completely before assembling. Use a serrated knife to slice cleanly, then layer between cake tiers or spread over the base of a springform pan. For extra stability, brush the cake layers with a simple syrup (equal parts sugar and water, heated until dissolved) before adding the filling. This prevents sogginess and creates a professional finish.
Can I add mix-ins like nuts or caramel?
Yes, but add them carefully to avoid altering the texture. Fold in ½ cup chopped nuts (toasted first) or ¼ cup caramel sauce after mixing the dry ingredients but before baking. Keep portions small—too many mix-ins can make the filling too dense. For a marbled effect, swirl in 1 tbsp raspberry jam or white chocolate chips before baking.