
Desserts
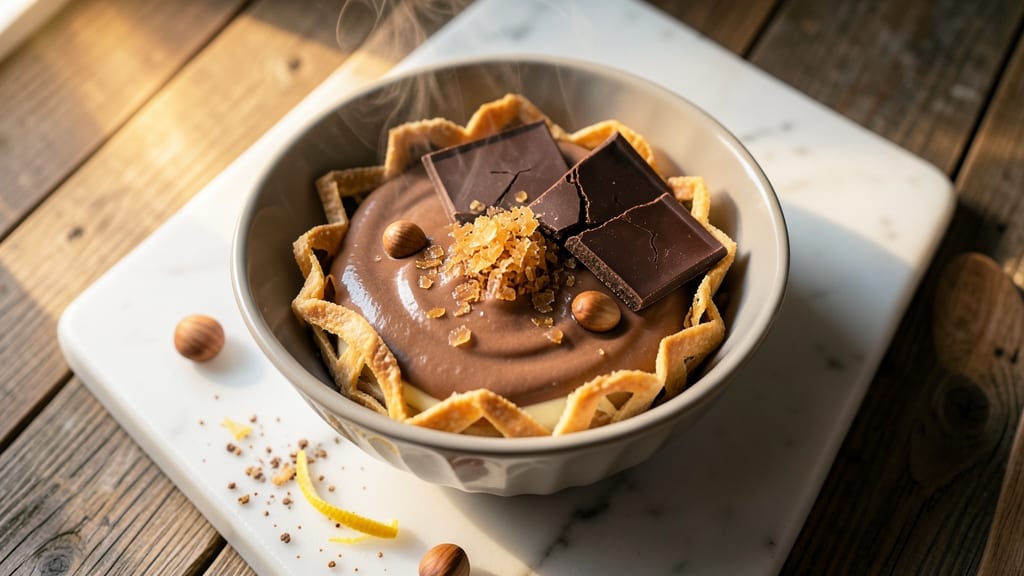
This baked chocolate custard recipe delivers the ultimate dessert experience—rich, velvety layers with a perfect set that satisfies every chocolate lover. The secret lies in tempering the chocolate properly and baking it in a water bath for silky smoothness. I've perfected this technique over years of trial and error, ensuring no graininess or overcooking. What sets this recipe apart is the balance between a creamy center and a lightly set exterior that holds its shape when sliced. The custard base is enriched with egg yolks and cream, creating that signature luscious texture we all crave. A light dusting of cocoa powder on top adds an elegant finish while keeping the focus on the decadent chocolate flavor. By the time you're done, you'll have a dessert that looks impressive enough for a dinner party but is simple enough for a weeknight treat. The aroma alone will have everyone gathered around the kitchen, and the first bite delivers that perfect combination of rich chocolate and velvety smoothness. Serve it warm with a dollop of whipped cream or chilled with fresh berries for a restaurant-quality experience at home. Here's how to achieve that perfect set every time.
Ingredients for baked chocolate custard
This decadent dessert needs just 11 ingredients for velvety perfection—no shortcuts, all chocolatey magic.
| Ingredient | Amount | Notes |
|---|---|---|
| Dark Chocolate Bars 🍫 | 8 oz | 70% cocoa or higher, chopped |
| Large Egg Yolks 🥚 | 6 whole | Fresh, room temperature |
| Heavy Whipping Cream 🥛 | 1 ½ cups | Full-fat for richness |
| Granulated Sugar 🍚 | ¾ cup | Superfine preferred |
| All-Purpose Flour 🌾 | ¼ cup | Sifted for smooth batter |
| Unsalted Butter 🧈 | ½ cup | Cold, cubed |
| Vanilla Extract 🌿 | 1 tbsp | Pure, high-quality |
| Pinch of Salt 🧂 | ¼ tsp | Kosher or sea |
| Cocoa Powder 🍫 | ¼ cup | Unsweetened, natural |
| Whole Milk 🥛 | ½ cup | Room temperature |
| Large Eggs 🥚 | 2 whole | Separated, whites whipped |
The chocolate is everything here. Ghirardelli or Lindt squares melt beautifully—avoid anything with nuts or fillings. Chop it into tiny pieces (a food processor speeds this up) so it melts completely. For the yolks, room temperature is key—cold ones won't blend smoothly. The cream? Full-fat only—none of that light stuff. I always grab the heavy whipping cream from Trader Joe's because it's consistently rich. The butter? European-style if you can find it, but regular unsalted works too—just keep it cold until the last minute.
No dark chocolate? Semisweet chocolate chips work in a pinch (though they won't be as rich), and cocoa powder can stretch it further if you're really stuck. Running low on egg yolks? Use 2 whole eggs plus 2 extra yolks—the whites get folded in later for structure. The vanilla extract matters—nothing fake here. If you're out, vanilla bean paste is a worthy upgrade. For the flour, sift it first—lumps make the custard grainy. And the cocoa powder? Natural (not Dutch-processed) gives that authentic chocolate flavor.
Prep ahead like a pro: Measure everything first—this isn't a recipe to eyeball. The custard mixture should be smooth as silk, so whisk everything vigorously. Once baked, it keeps 3-4 days in the fridge, but honestly? It's even better the next day when the flavors meld. For serving, chill completely before slicing—warm custard is a mess. Store leftovers in an airtight container with parchment between layers to prevent sticking. Freeze for up to 2 months if you're planning ahead.
Why You'll Love This Recipe
- One-Bowl Wonder: I swear by this—just melt chocolate, whisk yolks, cream, and flour together, then bake. No fancy gadgets, no mess, and honestly, the only cleanup is licking the bowl.
- Rich Without Guilt: That first bite? Silky, deep chocolate flavor but not cloying—thanks to the flour’s subtle thickening and sugar’s caramelized edge. It’s the kind of dessert that makes you close your eyes.
- Make-Ahead Magic: Bake it Sunday, store it all week. Reheat slices in the microwave (30 seconds!) for a no-fuss breakfast or midnight craving. My lazy mornings thank me every time.
- Budget Luxury: Dark chocolate bars and a few eggs stretch farther than you’d think. This recipe feeds four for under $5, but tastes like a fancy patisserie treat. (Between us, my kids don’t even notice the flour.)
Step-by-step instructions for baked chocolate custard
Here's how to create velvety layers with a perfect set every single time.
Melt Chocolate and Butter for a Smooth Base
In a heatproof bowl set over a saucepan of simmering water, combine the 8 oz dark chocolate bars, 0.5 cup unsalted butter, and 0.5 cup whole milk. Stir gently until the chocolate and butter melt completely, creating a glossy, smooth mixture. Remove from heat and let cool slightly—you want it warm but not hot when you add the eggs.
Here's the thing—if you add hot chocolate to cold eggs, you'll get scrambled eggs instead of silky custard. I like to cool it for about 5 minutes until it's just warm to the touch. Whisk in 0.25 cup cocoa powder and 0.25 tsp pinch of salt until fully dissolved. The mixture should be thick but pourable, with no visible lumps.
Temper Eggs and Sugar for Perfect Texture
In a separate bowl, whisk together the 6 whole large egg yolks, 0.75 cup granulated sugar, and 1 tbsp vanilla extract until the sugar dissolves completely. The mixture should be pale yellow and slightly thickened. This step is crucial—it ensures your custard has that signature velvety texture without being too sweet.
Slowly pour the warm chocolate mixture into the egg mixture while whisking constantly. This gradual addition prevents the eggs from scrambling from the heat. The goal is to create a smooth batter that coats the back of a spoon. If you see any streaks of raw egg, whisk a bit longer until fully combined.
Whip Egg Whites to Stiff Peaks
In a clean, grease-free bowl, beat the 2 whole large eggs (separated from yolks) with an electric mixer until soft peaks form. Gradually add 1.5 cups heavy whipping cream while mixing on high speed until stiff, glossy peaks form. This light, airy mixture will create those beautiful, cloud-like layers in your custard.
I always test the peaks by lifting the whisk—if the meringue holds its shape and doesn't flatten, it's ready. Fold one-quarter of the egg white mixture into the chocolate batter to lighten it, then gently fold in the remaining egg whites until just combined. Be careful not to deflate the meringue—this is where you get those perfect, airy layers.
Bake Until Set with Golden Top
Preheat your oven to 325°F. Pour the batter into a 9-inch round baking dish (or similar size) that's been lightly greased with butter. Bake for 45-50 minutes until the custard is just set—a toothpick inserted in the center should come out clean, but the top should still be slightly jiggly.
Here's the moment that matters: the custard needs to be perfectly set but still slightly wobbly in the center. If it's too firm, it'll be dry and dense. If it's too soft, it won't hold its shape when served. The edges should be golden brown, and the top should have a beautiful crackly crust.
Chill and Serve for Maximum Richness
Remove the custard from the oven and let it cool at room temperature for 10 minutes, then refrigerate for at least 4 hours (overnight is even better). This chilling time allows the flavors to meld and the texture to firm up beautifully. When ready to serve, run a knife around the edges and invert onto a plate.
You'll be amazed at how perfectly it releases—those velvety layers should hold their shape beautifully. Serve with fresh berries or a dusting of cocoa powder for the ultimate indulgence. Each bite should deliver rich chocolate flavor with that perfect balance of sweetness and creaminess that makes this classic dessert unforgettable.
Pro Tips For Making Baked Chocolate Custard
- Temper the Chocolate: Chop the dark chocolate into small, even pieces—no bigger than a dime—and melt it gently over a double boiler. If you dump it straight into hot cream, you’ll end up with grainy, clumpy custard that ruins the whole dish. I learned this the hard way when my first batch looked like it had sand in it.
- Whisk Until Pale: Beat the egg yolks and sugar over a double boiler until they’re thick, pale, and triple in volume—about 8-10 minutes. Stopping early means your custard will taste raw and floury, no matter how long you bake it. (Yes, even if you’re impatient like me.)
- Strain the Mixture: After mixing all ingredients, pour the custard through a fine-mesh sieve into your baking dish. This removes any lumps from the flour or chocolate, giving you a silky-smooth texture. Skipping this step is how you end up with a custard that feels like it needs chewing.
- Bake Until Just Set: Pull the custard out of the oven when the center is barely wobbling—like Jell-O that’s almost but not quite firm. Overbaking turns it into rubber, and underbaking leaves it undercooked. A toothpick test works, but so does the old "finger wiggle"—if it moves like a wobbly pudding, you’re golden. (Your future self will thank you.)
Troubleshooting great baked chocolate custard
Grainy Texture Fix
If your custard turns grainy after baking, it’s usually from overheating the eggs or not whisking enough. I’ve found that under-whisking the egg yolks and sugar is the most common culprit—make sure the mixture is completely smooth before combining with the chocolate.
Also, never let the chocolate mixture boil while melting it; keep the heat on low-medium and stir constantly. For extra insurance, strain the batter through a fine-mesh sieve before baking to catch any tiny lumps. 💫
Cracked Top Solutions
A cracked top often means the custard baked too long or the oven was too hot. First, reduce your oven temperature to 325°F—this is non-negotiable for this recipe.
If cracks still appear, try covering the custard loosely with aluminum foil during the last 15 minutes of baking to slow the top from drying out too quickly.
For a truly elegant finish, dust with unsweetened cocoa powder right after baking while the top is still warm—this adds a professional touch and helps hide minor imperfections.
Undercooked Center
An undercooked center (jiggly when done) happens when the custard isn’t baked long enough or the oven isn’t hot enough. Extend baking time by 5-10 minutes if needed, but check for doneness with a toothpick—it should come out clean but slightly moist.
If your oven runs hot, try baking at 300°F instead. For extra insurance, place the baking dish in a water bath (a larger pan filled with 1 inch of hot water) to ensure even heat distribution. This method guarantees a perfectly set center every time. ⏰
Soggy Bottom Layer
A soggy bottom is usually caused by not greasing the baking dish properly or using a non-stick dish that’s too thin. Always butter the dish thoroughly and sprinkle with flour or cocoa powder for extra insurance. I recommend using a 9-inch metal baking dish—glass can cause uneven heating.
If you’re worried about sticking, parchment paper lined on the bottom works too, but don’t forget to poke holes in it to prevent steam buildup. For an extra-professional touch, chill the custard completely before unmolding to ensure clean slices. 🧈
Egg Curdling
If your custard looks curdled (lumpy or separated), it’s likely from adding hot chocolate to cold eggs or over-whisking the egg whites. To fix this, strain the batter through a fine-mesh sieve before baking—this catches any lumps.
For prevention, temper the eggs by slowly mixing the warm chocolate into the egg yolks while whisking constantly. If the egg whites were over-whipped, start over—they should hold their shape but still be slightly glossy, not dry or grainy.
A hand mixer works better than a stand mixer for this step to avoid over-beating. 🥚
Dry or Dense Texture
Dry or dense custard usually means overbaking or using too much flour. First, reduce baking time by 5 minutes and check for doneness earlier.
If the texture is still off, the issue might be the flour-to-liquid ratio—try reducing the flour to 0.2 cup (instead of 0.25 cup) for a lighter result. For extra richness, replace 0.25 cup of the heavy cream with crème fraîche—it adds tanginess and keeps the custard moist.
Always chill the custard completely before slicing to let the flavors meld and the texture firm up properly. 💡
Nutrition facts
Frequently asked questions
Why does my chocolate custard turn grainy?
Graininess usually happens when the egg yolks aren't whisked enough or the chocolate gets too hot before mixing. Always whisk the yolks and sugar until completely smooth, and let the melted chocolate cool slightly before combining. For extra insurance, strain the batter through a fine-mesh sieve before baking.
Can I make this custard without a water bath?
Technically yes, but a water bath ensures even cooking and prevents cracking. If you skip it, bake at 325°F for 40-45 minutes and check frequently. For best results, use a metal baking dish—glass can cause uneven heating. The custard will still set, but the texture may be slightly less velvety.
How do I fix a cracked top?
Cracks happen when the custard dries too quickly. Try covering it loosely with aluminum foil during the last 15 minutes of baking. For a polished look, dust with unsweetened cocoa powder right after baking while the top is still warm. This hides minor imperfections and adds a professional finish.
Can I use milk chocolate instead of dark?
Milk chocolate works, but the flavor will be sweeter and less rich. For balance, reduce the sugar to 0.5 cup and add 1 tbsp extra cocoa powder to deepen the chocolate taste. The texture remains the same, but the color will be lighter. For best results, stick with 70% dark chocolate or higher.
How long can I store baked chocolate custard?
Store in an airtight container in the fridge for up to 4 days, with flavors improving over time. For longer storage, freeze for up to 2 months. Thaw overnight in the fridge before serving. The texture stays creamy if properly sealed—just avoid condensation by wrapping tightly.