
Desserts
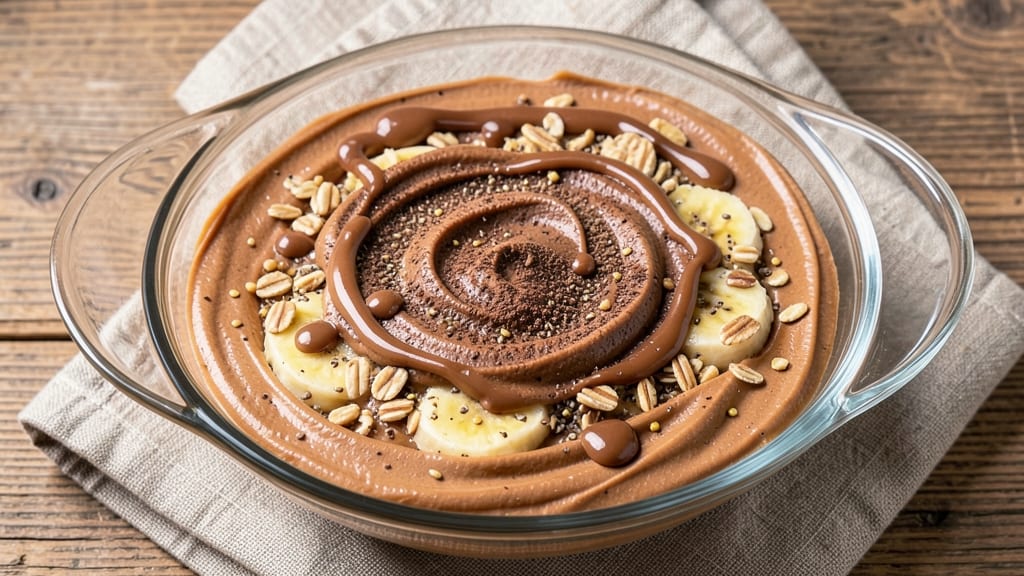
This banana chocolate protein bar recipe transforms simple pantry staples into a satisfying, no-bake treat that tastes like dessert but fuels your body. The secret lies in the peanut butter core, which adds rich flavor and extra protein while keeping the bars moist and chewy.
I developed this recipe after realizing how easy it is to create a balanced snack that’s perfect for post-workout recovery or a quick energy boost.
What makes these bars special is their foolproof, no-bake method—no oven, no fuss, just a few minutes of mixing and chilling. The combination of ripe bananas, cocoa powder, and plant-based protein powder creates a naturally sweet, chocolatey base, while oats and flaxseed add texture and fiber.
The peanut butter core isn’t just for flavor; it’s a game-changer for binding everything together without needing extra eggs or dairy.
By the time you’re done, you’ll have fudgy, protein-packed bars with crisp edges and a creamy center—no one will guess they’re packed with nutrition. These bars stay fresh for up to a week in the fridge, making them ideal for meal prep or on-the-go snacking.
Plus, they’re customizable: swap peanut butter for almond butter, add dark chocolate chips, or boost the protein with extra powder.
The best part? They’re ready in under 30 minutes, with no baking required. Whether you’re fueling a workout, satisfying a sweet tooth, or prepping for the week, these bars deliver on flavor and nutrition without compromise. Let’s make them!
Ingredients for banana chocolate protein bar
Twelve simple ingredients transform into protein-packed bars with a peanut butter core—no oven needed.
| Ingredient | Amount | Notes |
|---|---|---|
| Ripe Bananas 🍌 | 2 cups | Mashed, about 3 medium bananas |
| Peanut Butter 🥜 | 1 cup | Natural, unsweetened, creamy |
| Plant-Based Protein Powder 💊 | 1 cup | Vanilla or unflavored, vegan |
| Cocoa Powder 🍫 | ½ cup | Unsweetened, Dutch-processed |
| Old-Fashioned Rolled Oats 🌾 | 2 cups | Gluten-free if needed |
| Ground Flaxseed 🌿 | ¼ cup | For binding and omega-3s |
| Maple Syrup 🍯 | ¼ cup | Pure, grade B preferred |
| Vanilla Extract 🌸 | 1 tsp | Pure alcohol-free if preferred |
| Sea Salt 🧂 | ¼ tsp | Fine grain for balance |
| Dark Chocolate Chips 🍫 | ½ cup | Vegan, 70% cocoa minimum |
| Coconut Oil 🥥 | 2 tbsp | For peanut butter core |
| Almond Butter 🥜 | ¼ cup | Optional for variation |
The bananas are the star here—ripe means naturally sweet and creamy, but not mushy. I grab mine from the grocery store’s produce section, checking for yellow with brown spots—that’s the sweet spot. Trader Joe’s usually has the best selection, but any organic store works. The peanut butter? Natural, unsweetened is non-negotiable—those sugar-loaded versions ruin the balance. For the protein powder, Orgain or Naked Nutrition are my go-tos, but any vegan blend works. The cocoa powder should be Dutch-processed for smoothness, and Ghirardelli or Valrhona are worth the splurge if you’re feeling fancy.
No peanut butter? Almond butter or sunflower seed butter works perfectly—just add an extra tablespoon of maple syrup to balance the flavor. Short on protein powder? Extra flaxseed or hemp seeds boosts nutrition without changing texture. The dark chocolate chips can be swapped for vegan white chocolate chunks if you prefer, but stick to 70% cocoa or higher for that rich chocolate flavor. The coconut oil in the peanut butter core is key—melt it first so it blends seamlessly. Pro tip: Toast the oats for 5 minutes before mixing for a nuttier taste (but it’s optional).
These bars keep for up to 1 week in the fridge, wrapped tightly in parchment paper. For longer storage, freeze for 3 months—just thaw at room temperature for 10 minutes before enjoying. I portion mine into mini muffin liners for easy grab-and-go snacks. The peanut butter core stays creamy if you store them in a cool, dry place, but the bars will soften slightly in humidity. Double the batch and freeze half—trust me, you’ll want seconds.
Why You'll Love This Recipe
- No-Fuss Mixing: I swear by the 5-minute stir—just mash those bananas, fold in the peanut butter and protein powder, then dump in the oats and cocoa. The texture comes together like magic, no food processor required.
- Rich, Decadent Crunch: That peanut butter base is ridiculously satisfying, but the cocoa powder takes it to another level—deep, chocolatey, with just enough chew from the oats. Honestly, it tastes like a dessert, but my kids think it’s a snack.
- Meal Prep MVP: I make a big batch on Sundays and stash them in the freezer. Grab one on the way out the door for a workout, or toss a few in a lunchbox—no reheating, no fuss. They’re just as good cold as they are at room temp.
- Budget-Protein Power: Bananas and oats are cheap, and a little protein powder stretches a long way. I’ve made these for under $1 per bar, and they keep my family fueled without breaking the bank. Plus, no weird ingredients—just pantry staples.
Step-by-Step instructions for banana chocolate protein bars
Assemble these energy-packed bars in minutes—no oven required, just pure nutrition.
Create the Peanut Butter Core
In a small microwave-safe bowl, combine the 1 cup peanut butter and 2 tablespoons coconut oil. Microwave in 20-second bursts until the mixture becomes smooth and fully melted—about 45-60 seconds total. Stir well between bursts to ensure even melting. The texture should be like thick, creamy peanut butter without any graininess.
Let this mixture cool slightly for 5 minutes while you prepare the rest of the ingredients. This cooling step prevents the peanut butter from melting the chocolate chips later in the recipe. If it cools too much, simply microwave for another 10 seconds to restore the smooth consistency.
Mix the Bar Base Ingredients
In a large mixing bowl, mash the 2 cups ripe bananas with a fork until completely smooth—no lumps should remain. The mixture should resemble thick banana pudding. Add the 1 cup plant-based protein powder, 0.5 cup cocoa powder, 2 cups old-fashioned rolled oats, 0.25 cup ground flaxseed, 0.25 cup maple syrup, 1 teaspoon vanilla extract, and 0.25 teaspoon sea salt. Stir vigorously with a wooden spoon or silicone spatula for 3-4 minutes until everything is thoroughly combined.
Here's the thing—this mixture needs to hold together when pressed, so don't rush the mixing. You'll notice the oats start to absorb the liquid, creating a thick, dough-like consistency. If it feels too dry, add 1 tablespoon of water at a time until it reaches a workable texture that can be pressed into a pan.
Combine and Fold in Chocolate
Transfer the peanut butter mixture from Step 1 to the bowl with the bar base. Gently fold everything together using a spatula until fully incorporated. The peanut butter will create pockets of rich flavor throughout. Finally, fold in the 0.5 cup dark chocolate chips and 0.25 cup almond butter (if using) until evenly distributed. The chocolate chips should be scattered throughout, not clumped together.
This is where the magic happens—you're essentially creating a layered texture with the peanut butter core and chocolate bursts. If you're using almond butter, you'll notice a slightly nuttier flavor profile that complements the peanut butter beautifully. Give the mixture one final stir to ensure everything is well combined.
Press into Pan and Chill
Line an 8x8-inch baking pan with parchment paper, leaving an overhang on all sides for easy removal. Press the mixture firmly and evenly into the pan using your hands or a small offset spatula. Pack it down tightly so the bars hold their shape when cut. You want the surface to be smooth but not overly compacted—just enough to create clean edges when sliced.
Once pressed, smooth the top with the back of a spoon and gently press down any air bubbles. Place the pan in the refrigerator and chill for at least 2 hours or until completely firm. This chilling time is crucial—it allows the bars to set properly so they hold together when sliced. For best results, chill overnight for even firmer bars that slice cleanly.
Cut and Enjoy
After chilling, remove the pan from the refrigerator and carefully lift the bars out using the parchment overhang. Using a sharp knife, cut the mixture into 12 equal bars (about 2x2 inches each). For cleaner cuts, dip the knife in hot water between slices and wipe dry—this prevents the bars from sticking.
Store the bars in an airtight container in the refrigerator for up to 1 week or freeze for 3 months. These bars are perfect for post-workout energy, a quick snack, or even a dessert option. Each bite delivers a satisfying combination of creamy peanut butter, rich chocolate, and the natural sweetness of bananas—all while packing a serious protein punch.
Pro Tips For Making Banana Chocolate Protein Bar
- Mash Bananas First: I learned this the hard way—adding whole bananas to the mix means you’ll end up with uneven texture and undercooked centers. Mash them thoroughly with a fork (or blend briefly) until they’re smooth and lump-free before mixing with wet ingredients. This ensures every bite has that same creamy, cooked-through consistency.
- Use Warm Peanut Butter: Cold peanut butter can make the dough stiff and harder to press. Microwave it for 10–15 seconds or stir in a splash of warm water (just a teaspoon) to loosen it up. The dough will bind better, spread more evenly, and the bars won’t crumble when cutting.
- Don’t Overmix the Dough: Once you add the dry oats and protein powder, stop stirring after just 2–3 turns. Overworking it turns the bars dense and chewy instead of soft and fudgy. The goal is to combine, not aerate—think "just enough to coat," not "until it looks like cookie dough."
- Press Firmly, Then Chill: Use the bottom of a measuring cup or small glass to pack the dough into the pan—press down hard for even layers. After shaping, pop the bars in the fridge for 10 minutes before slicing. This keeps them from falling apart when you cut them, and the edges stay clean instead of crumbling. (Yes, even if you’re impatient like me.)
Common mistakes when making perfect results
Overmixing the Base
I’ve seen this happen more times than I can count—overmixing the banana-oat mixture turns your bars into dense, dry bricks instead of chewy, fudgy treats. Once you’ve combined all ingredients in Step 2, mix just until everything is evenly incorporated—about 3-4 minutes max.
Overmixing breaks down the oats into a fine powder, which weakens the bar’s structure. If your mixture feels too dry, add 1 tablespoon water at a time, but don’t overcompensate. The goal is a thick, dough-like consistency that holds together when pressed. 🥜
Skipping the Chill Time
This is the #1 reason bars fall apart when sliced. The 2-hour fridge chill isn’t optional—it’s the secret to clean cuts and a firm texture. If you’re in a rush, pop the pan in the freezer for 30 minutes instead.
The bars need time for the flaxseed to fully bind and the peanut butter to set. I’ve learned this the hard way: cutting too soon = crumbly, sad bars. Trust the process, and your bars will hold their shape beautifully. ❄️
Using Underripe Bananas
Underripe bananas are your enemy here—they’re too firm and won’t mash smoothly, leaving lumps in your bars. Always use ripe bananas with brown spots (but not mushy!). If you’re stuck with firm bananas, let them sit at room temperature for 1-2 hours to soften.
Pro tip: Place them in a paper bag with an apple overnight—the apple’s ethylene gas speeds up ripening. No one wants a bar with banana chunks—smooth texture is key! 🍌
Melting the Peanut Butter Core Too Long
Microwaving the peanut butter and coconut oil for too long turns it grainy or even seizes up. Heat in 20-second bursts, stirring between each, until just melted—about 45-60 seconds total. If it starts to separate or look streaky, you’ve gone too far.
Let it cool slightly before mixing to avoid melting the chocolate chips. I’ve ruined batches this way, and trust me, you don’t want to start over. Patience here pays off with a creamy, smooth core. 🔥
Not Pressing Firmly Enough
If you press the mixture into the pan with half-hearted effort, your bars will crumble when sliced. Press firmly and evenly using your hands or a spatula—think of it like packing snow into a snowball. The surface should be smooth and slightly resistant to the touch.
If it feels too soft, chill for an extra 15 minutes before cutting. Uneven pressing = messy bars. Take the extra 30 seconds to do it right! 💪
Ignoring the Chocolate Chip Clumps
Fold those chocolate chips in gently at the end—don’t just dump them in and stir once. Use a spatula to distribute them evenly and break up any clumps. If you skip this, you’ll end up with a few bars packed with chocolate while others are sadly chip-free.
Think of it like scattering confetti—even distribution = happy taste buds. A quick 30-second extra stir ensures every bite has that rich chocolate surprise. 🍫
Nutrition facts
Frequently asked questions
Can I make these bars without peanut butter?
Swap the peanut butter for 1 cup almond butter or sunflower seed butter—just add 1 extra tablespoon of maple syrup to balance the flavor. For a seed-based option, try tahini (sesame paste) mixed with 1 tablespoon coconut oil for the core. The texture stays the same, but the flavor shifts to nutty or sesame-forward profiles.
How do I get the bars to hold together better?
If your bars crumble when cutting, the issue is usually underbinding. First, ensure your bananas are fully ripe (no lumps!). Then, add 1 extra tablespoon of ground flaxseed or 1 tablespoon chia seeds to the base mixture. For extra insurance, chill the bars for 3-4 hours instead of 2—this lets the flaxseed fully gel and bind the ingredients.
Can I add other mix-ins besides chocolate chips?
Yes! Try 1/4 cup crushed nuts (walnuts, pecans, or almonds), 1/4 cup dried fruit (raisins, cranberries, or chopped dates), or 1/2 cup shredded coconut for texture. For extra protein, stir in 2 tablespoons hemp seeds or 1/4 cup pumpkin seeds. Just fold them in gently at the end to avoid breaking up the peanut butter core.
Why do my bars taste bitter? Bitter flavor usually comes from overcooked cocoa powder or using unsweetened chocolate instead of chips.
How do I store these bars for maximum freshness?
Wrap individual bars in parchment paper or store them in an airtight container with parchment between layers. In the fridge, they’ll stay fresh for up to 1 week. For longer storage, freeze for 3 months—thaw at room temperature for 10-15 minutes before eating. Avoid storing in humid environments (like near the fridge’s water dispenser), as moisture can make them soft.