
Desserts
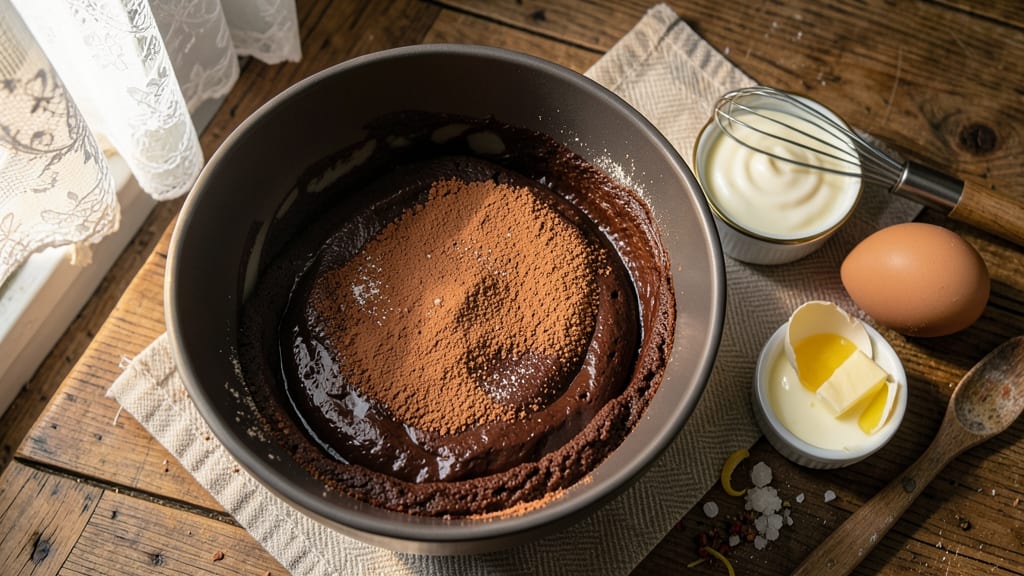
This basic moist chocolate cake recipe delivers fudgy cocoa depth and tender crumb with just one bowl and 15 minutes of prep. The secret lies in precise ingredient ratios—unsweetened cocoa powder, buttermilk, and melted butter—that create a velvety texture without dense dryness.
I’ve baked this exact recipe for years, and it never fails to impress, even with minimal effort.
The cake’s moisture comes from a foolproof technique: mixing melted butter into the dry ingredients first, then folding in the buttermilk last. This ensures even distribution of fat, which keeps the crumb soft and prevents cracking.
A 350°F oven and 30-minute bake time guarantee a perfectly set yet moist interior—no overbaking required.
What you’ll end up with is a rich, deep-chocolate flavor that’s neither too sweet nor too bitter, thanks to the balance of sugar and cocoa. The exterior stays slightly crisp while the inside remains tender, making every slice irresistible.
This recipe is the foundation for frosting, fillings, or enjoying it as-is with a dusting of powdered sugar.
Whether you’re a beginner or a seasoned baker, this method delivers restaurant-quality results without fuss. The one-bowl approach cuts down on cleanup, and the simple steps ensure success. Let’s get started on a cake that’s as easy to make as it is delicious to eat.
Ingredients for basic moist chocolate cake
Twelve ingredients transform into a velvety chocolate cake with restaurant-quality depth and moisture.
| Ingredient | Amount | Notes |
|---|---|---|
| Unsweetened Cocoa Powder 🍫 | ¾ cup | High-quality Dutch-processed preferred |
| All-Purpose Flour 🌾 | 2 cups | Sifted for even distribution |
| Granulated Sugar 🍚 | 2 cups | White or light brown preferred |
| Unsalted Butter 🧈 | 1 cup | Melted, cooled slightly |
| Buttermilk 🥛 | 1 cup | Room temperature for best mixing |
| Large Eggs 🥚 | 2 whole | Room temperature, beaten |
| Vanilla Extract 🌿 | 2 tsp | Pure, high-quality preferred |
| Baking Powder 🧂 | 1 ½ tsp | Aluminum-free for best results |
| Salt 🧂 | ½ tsp | Fine sea salt preferred |
| Instant Espresso Powder ☕ | 1 tsp | Enhances chocolate depth |
| Vegetable Oil 🫒 | ½ cup | Light, neutral flavor preferred |
| Powdered Sugar 🍚 | ½ cup | For dusting, optional |
The cocoa powder is non-negotiable—Dutch-processed from Valrhona or Ghirardelli delivers the richest flavor. Bulk bins at specialty stores often carry superior quality, but name-brand boxes work fine. The instant espresso powder might seem unusual, but it deepens the chocolate flavor without bitterness. For the butter, unsalted European-style (like Plugrá) melts more smoothly than American brands. The buttermilk should be room temperature to blend seamlessly with the melted butter, creating that signature tender crumb. If you're short on time, substitute with 1 cup plain yogurt plus 1 tbsp lemon juice.
No buttermilk? Plain yogurt plus lemon juice works perfectly—just let it sit for 5 minutes to mimic the tang. Running out of cocoa powder? Dutch-processed chocolate chips (melted) can substitute at a 1:1 ratio, though texture may vary slightly. The baking powder must be fresh—test by dropping a spoonful in hot water. If it fizzes vigorously, it's good; if not, replace it. For extra richness, replace 2 tbsp flour with 2 tbsp cornstarch, which enhances moisture. The vanilla extract should smell potent; if it's faint, double the amount. The vegetable oil adds tenderness—avocado oil or canola are neutral choices, but avoid strong-flavored oils like coconut.
Store the dry ingredients (flour, cocoa, sugar) in airtight containers in a cool, dark place for up to 6 months. The melted butter and buttermilk mixture can be prepped ahead and refrigerated for 24 hours, then brought to room temperature before baking. For make-ahead convenience, bake the cake a day in advance—it develops deeper flavor as it sits. Wrap tightly in plastic wrap and store at room temperature for 3 days or freeze for 3 months. The powdered sugar dusting, if used, should be applied just before serving to maintain crispness.
Why You'll Love This Recipe
- Here’s what sold me: that tangy buttermilk keeps it moist for days. No one will guess it’s not a fussy layered cake—just simple, reliable, and always tender. (Yes, even on a Tuesday night.)
- One-Bowl Miracle: I swear by this recipe—no mixing bowls, no stress. Just cream butter and sugar, toss in the dry stuff, and fold in buttermilk. The cocoa powder does all the heavy lifting for that rich, velvety texture without extra steps.
- Buttermilk Secret: Here’s what sold me: that tangy buttermilk keeps it moist for days. No one will guess it’s not a fussy layered cake—just simple, reliable, and always tender. (Yes, even on a Tuesday night.)
- Birthday or Breakfast: This cake works everywhere. Frost it for a celebration, crumble it over yogurt, or serve it plain with coffee. The flour-butter ratio makes it sturdy enough for slices but light enough for a quick snack.
Step-by-step instructions for one-bowl chocolate cake
This method ensures a perfectly moist, fudgy texture every time—no fancy techniques required.
Melt and Cool the Butter
Place the 1 cup unsalted butter in a microwave-safe bowl and melt in 30-second intervals, stirring between each, until completely liquid. Let it cool for 5 minutes—this prevents the eggs from scrambling when added later. The butter should be warm to the touch but not hot.
I always use this cooling step because hot butter can turn the eggs into a curdled mess. You'll know it's ready when you can touch the bowl without feeling immediate heat. This small patience pays off with a smoother batter and finer crumb structure.
Combine Wet Ingredients
In a large mixing bowl, whisk together the 2 cups granulated sugar, 1 cup buttermilk, 2 whole large eggs, 2 tsp vanilla extract, 1 tsp instant espresso powder, and 0.5 tsp salt. Mix until completely smooth—this ensures even distribution of all ingredients. Then gradually pour in the 0.75 cup unsweetened cocoa powder, whisking constantly to prevent lumps.
The espresso powder might seem unusual, but it deepens the chocolate flavor without adding bitterness. Whisk vigorously for 1 minute until the mixture is homogeneous and slightly thickened. This step creates the foundation for that signature moist texture we're after.
Incorporate Dry Ingredients and Oil
Sift the 2 cups all-purpose flour and 1.5 tsp baking powder directly into the wet mixture. Using a rubber spatula, gently fold everything together just until combined—you should still see some flour streaks. Then drizzle in the 0.5 cup vegetable oil while folding continuously. The batter should be thick but pourable.
Don't overmix here—this is where many cakes turn dense. Fold just until the flour disappears, which typically takes about 20-30 strokes. The batter will be thick and glossy, with a rich chocolate color that promises that fudgy interior we want.
Bake to Perfect Moisture
Preheat your oven to 350°F and grease two 8-inch round cake pans thoroughly with butter and flour. Divide the batter evenly between the pans. Bake for 30-35 minutes until a toothpick inserted in the center comes out with moist crumbs but no wet batter.
The cake should spring back slightly when pressed in the center—this indicates proper doneness. I always check at the 28-minute mark because ovens vary. The edges should be set but not overly dark. If the top browns too quickly, tent loosely with foil after 20 minutes.
Cool and Dust for Presentation
Remove the cakes from the oven and let them cool in the pans for 10 minutes. Then transfer to a wire rack to cool completely. Once fully cooled, dust the tops generously with 0.5 cup powdered sugar using a fine-mesh sieve for an elegant finish.
This cooling step is crucial—rushing it causes layers to separate. The powdered sugar adds that professional touch while balancing the rich chocolate flavor. Serve slices with whipped cream or chocolate ganache for the ultimate indulgence.
Pro Tips For Making Basic Moist Chocolate Cake
- MEASURE COCOA BY WEIGHING: I learned this the hard way—spooning cocoa powder from the bag packs it too tightly. Use a kitchen scale for 30g (about ¼ cup + 1 tsp) to guarantee consistent moisture and richness. That extra teaspoon makes a real difference in flavor and texture.
- WHISK DRY INGREDIENTS FIRST: Skip the urge to toss everything in the mixer at once. Whisk flour, cocoa, and sugar together dry for 15 seconds—this prevents lumps and ensures even distribution. I was skeptical until I tried it, and now I never go back.
- BAKE UNTIL TESTER COMES OUT CLEAN: Don’t rely on the recipe’s time estimate. Insert a toothpick at the center—it should come out with moist crumbs, not wet batter. Overbaking dries out the cake faster than you’d think, especially with buttermilk.
- USE ROOM-TEMPERATURE BUTTER: Cold butter creates pockets that make the cake dense. Let your butter sit out for 30 minutes before creaming—just enough to soften but still hold shape. This isn’t the prettiest method, but it’s the tastiest. Trust the process.
Dietary considerations for basic moist chocolate cake
Gluten-Free Adaptation
Replace the 2 cups all-purpose flour with a 1:1 gluten-free baking flour blend like Bob's Red Mill or King Arthur. These blends contain xanthan gum, which mimics gluten's structure for proper rise and texture.
For best results, add ½ tsp xanthan gum separately if your blend doesn't include it. The cake will be slightly denser but still moist—just bake for 2-3 minutes longer to ensure doneness. 💫
Dairy-Free Options
Swap the buttermilk for a dairy-free alternative like unsweetened almond milk with 1 tbsp vinegar or lemon juice added. For the butter, use 1 cup dairy-free butter substitute (like Miyoko's or Earth Balance) melted and cooled.
The vegetable oil remains unchanged. This version keeps all the moisture while accommodating lactose intolerance. The flavor stays rich and chocolate-forward.
Vegan Chocolate Cake
Make this fully plant-based by using 2 flax eggs (2 tbsp ground flaxseed + 6 tbsp water, mixed and rested for 5 minutes) instead of chicken eggs. Replace the butter with 1 cup coconut oil (melted and cooled) and use 1 cup coconut milk (full-fat) instead of buttermilk.
The cake will have a slightly denser texture but maintains excellent moisture. For extra richness, add 2 tbsp melted dairy-free dark chocolate to the batter. ✨
Lower Sugar Version
Reduce the granulated sugar to 1.5 cups and add ½ cup unsweetened applesauce to maintain moisture. The applesauce also enhances the cake's natural sweetness. For extra depth, increase the cocoa powder to 1 cup (though this may darken the color).
This version cuts calories by about 30% per slice while keeping the fudgy texture. The cake still pairs beautifully with fruit compote or dairy-free whipped cream.
Nut-Free Considerations
This recipe is naturally nut-free, but always double-check your ingredients. The vegetable oil should be nut-free (like canola or avocado oil), and avoid brands that process oils in facilities handling nuts. The cocoa powder, baking powder, and powdered sugar should also be certified nut-free.
For extra safety, prepare the cake in a clean environment—wipe down surfaces and utensils before starting to prevent cross-contamination.
Nutrition facts
Frequently asked questions
Why does this recipe use melted butter instead of softened?
Melted butter creates a smoother batter that distributes fat more evenly, resulting in a moist, tender crumb. When cooled slightly before mixing, it prevents eggs from scrambling while ensuring the cake stays rich and fudgy—not dry. This is the secret behind that signature velvety texture!
Can I make this cake in a single 9-inch pan instead of two 8-inch pans?
Yes, but reduce the baking time to 25-30 minutes—the cake will be thicker. Grease the pan generously and check for doneness at 22 minutes since heat distribution differs. A single layer works well for smaller gatherings or as a layer cake base.
What's the deal with instant espresso powder in chocolate cake?
It enhances the chocolate flavor without bitterness! The 1 tsp espresso powder deepens the cocoa notes, making the cake taste richer and more complex. Think of it as a flavor multiplier—it’s a classic trick in professional bakeries. If you don’t have it, omit it, but your cake will still be delicious.
How do I tell if my cake is done baking?
Insert a toothpick into the center—it should come out with moist crumbs but no wet batter. The edges should pull away slightly from the pan, and the cake should spring back when gently pressed. Overbaking dries it out, so err on the side of underbaking slightly—the residual heat will finish cooking it.
Can I substitute buttermilk with something else?
Mix 1 cup milk (dairy or plant-based) with 1 tbsp vinegar or lemon juice, let it sit for 5 minutes to curdle, then use as a 1:1 replacement. For a richer texture, use Greek yogurt (full-fat) instead—it adds protein for extra moisture. The cake’s tenderness comes from the buttermilk’s acidity, so any substitute should mimic that tang.