
Desserts
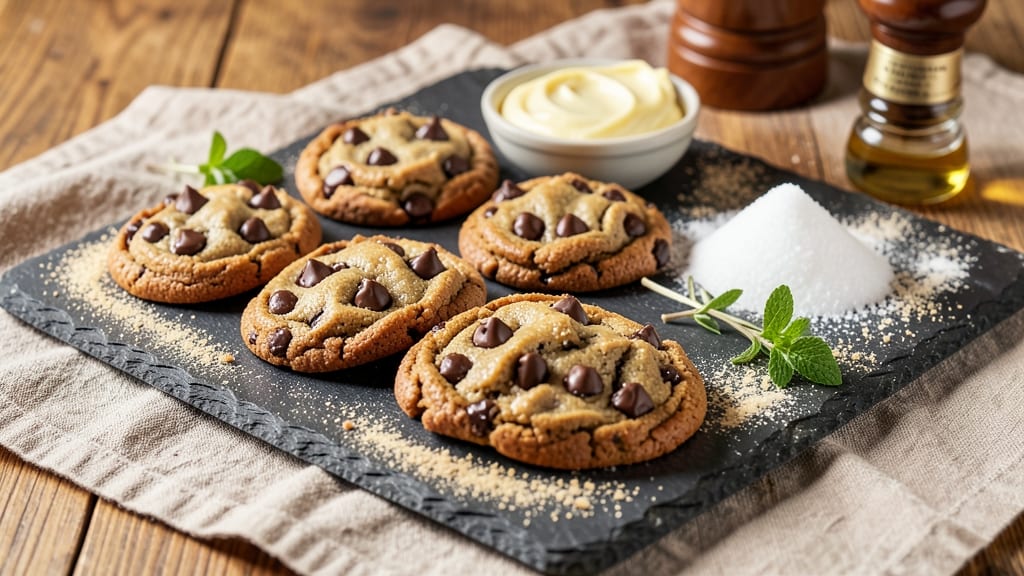
This Belgian chocolate chip cookies recipe delivers the perfect balance of crisp edges and buttery centers that stay soft—just like the ones from Brussels' finest patisseries. 🌟 The secret lies in using high-quality Belgian chocolate and precise mixing techniques that create those signature pockets of melted chocolate in every bite.
What sets these apart is the careful balance of ingredients: European-style butter, brown sugar for caramel depth, and a touch of cornstarch for that signature tender crumb.
I've baked these hundreds of times, and the key is creaming the butter and sugar until light and fluffy, then gently folding in the chocolate for even distribution.
By the time they emerge from the oven, you'll have cookies with golden, crisp edges that give way to soft, buttery centers loaded with rich Belgian chocolate chunks. The aroma alone will transform your kitchen into a Belgian café, and each bite delivers that perfect contrast of textures and flavors.
These cookies are foolproof for any occasion—whether you're hosting a dinner party or just craving something indulgent. The recipe scales easily, and variations like adding toasted walnuts or a sprinkle of flaky sea salt take them to the next level. Let's get baking!
Ingredients for belgian chocolate chip cookies
High-quality butter, Belgian chocolate, and precise mixing create these Belgian-style cookies with crisp edges and soft centers.
| Ingredient | Amount | Notes |
|---|---|---|
| European-Style Butter 🧈 | 1 cup | Cold, unsalted, cubed for creaming |
| Packed Light Brown Sugar 🍯 | 1 ½ cups | For caramel depth, not dark |
| Granulated White Sugar 🍚 | ½ cup | Balances brown sugar sweetness |
| Large Eggs 🥚 | 2 whole | Room temperature for best mixing |
| Vanilla Extract 🌿 | 2 tsp | Pure Madagascar preferred |
| All-Purpose Flour 🌾 | 2 ½ cups | Sifted for tender crumb |
| Cornstarch 🌽 | 2 tbsp | For signature tender texture |
| Diamond Crystal Kosher Salt 🧂 | 1 tsp | Fine grain preferred |
| Belgian Dark Chocolate Chunks 🍫 | 2 cups | 70% cacao minimum, chopped |
| Flaky Sea Salt 🧂 | 1 tsp | For finishing, optional |
| Toasted Walnuts 🥜 | ½ cup | Chopped, optional variation |
The butter makes all the difference—European-style from Land O'Lakes or Plugrá gives that rich, caramelized flavor. Grab it from the dairy section, not the baking aisle. Belgian chocolate? Valrhona or Callebaut are the gold standard, but Ghirardelli Belgian 72% works too if you're on a budget. The chocolate chunks should be roughly 1-inch pieces for those signature pockets of melted goodness. If you can't find pre-chopped, chop your own bar—it's worth the 2 minutes. For the sugar, Domino Light Brown is my go-to, but any packed brown sugar will do. Just don't use dark brown—it's too intense for these cookies.
No European butter? Plugrá or a high-fat American butter like Kerrygold gets you close. Short on vanilla? Vanilla bean paste works too—just use half the amount. The cornstarch is non-negotiable for that tender crumb, but if you're out, add 1 tbsp more flour. For the chocolate, chopped chocolate bars work just as well as chunks. Want to get fancy? Add a pinch of espresso powder to the dough to deepen the chocolate flavor. And if you're feeling adventurous, swap half the chocolate for white chocolate chunks—it's a delicious twist.
These cookies keep for 5-7 days in an airtight container, but honestly? They disappear faster than that. For longer storage, freeze the dough balls on a tray, then transfer to a bag—bake straight from frozen, adding 2 minutes. The chocolate stays melty for 3-4 days if stored properly. Pro tip: Underbake slightly (they firm up as they cool) and store in layers separated by parchment. That way, you can grab one without crushing the whole batch.
Why You'll Love This Recipe
- No Mixer Needed: I swear by this—just cream the butter and sugars by hand until it’s light and fluffy. No fancy equipment, no stress. The European-style butter adds that rich, almost caramel-like depth that makes the whole process worth it, even if your kitchen’s a mess.
- Chewy-Crisp Magic: That perfect balance? It’s all in the sugars and eggs. The brown sugar keeps them chewy while the white sugar gives that crisp edge. And honestly, the moment the chocolate melts into gooey pools? Every bite feels like a little hug.
- Jars Full of Joy: Between us, these cookies are my go-to for holidays, teacher gifts, or just because. Bake a double batch, store them in jars, and boom—instant party favor or office treat. (Yes, even on a Tuesday night.)
- Budget-Friendly Luxury: European butter might sound fancy, but it’s cheaper than buying pre-made cookies by the dozen. Plus, the dough keeps well, so you’re not scrambling to use it all up. My wallet and my taste buds win.
Step-by-step instructions for Belgian chocolate chip cookies
Here's how to make cookies with crisp edges and gooey centers that stay soft for days.
🍳 Step 1: Cream Butter and Sugars Until Light and Fluffy
In a stand mixer fitted with the paddle attachment, beat the 1 cup European-Style Butter (cold and cubed) with the 1.5 cups Packed Light Brown Sugar and 0.5 cup Granulated White Sugar on medium speed for 3-4 minutes. You'll know it's ready when the mixture is pale, thick, and nearly doubles in volume—this incorporates air for that signature tender texture.
I like to scrape down the sides of the bowl every 30 seconds to ensure even mixing. If the butter is too soft, chill the bowl in the freezer for 5 minutes before continuing. The goal is a smooth, creamy texture that leaves ribbons when you lift the paddle—this ensures your cookies will spread just enough for crisp edges.
👨🍳 Step 2: Add Eggs and Vanilla for Richness
Add the 2 whole Large Eggs one at a time, mixing on low speed for 30 seconds after each addition until fully combined. Then stir in the 2 tsp Vanilla Extract. The mixture might look slightly curdled at first, but don't worry—it will come together when you add the dry ingredients.
I always use room-temperature eggs for best results. If they're cold, warm them in a bowl of warm water for 5 minutes first. The vanilla extract should be pure Madagascar for that authentic depth of flavor. Mix just until combined—overmixing here can develop gluten and make your cookies tough.
👨🍳 Step 3: Fold in Dry Ingredients and Chocolate
In a separate bowl, whisk together the 2.5 cups All-Purpose Flour, 2 tbsp Cornstarch, and 1 tsp Diamond Crystal Kosher Salt. Gradually add this mixture to the wet ingredients, mixing on low speed for 30-45 seconds until just combined. You should still see a few flour streaks—this ensures a tender crumb.
Remove the bowl from the mixer and gently fold in the 2 cups Belgian Dark Chocolate Chunks and 0.5 cup Toasted Walnuts using a silicone spatula. Be careful not to overmix—just distribute the chocolate and nuts evenly throughout the dough. The chocolate chunks should be 70% cacao minimum for that rich Belgian flavor, and the walnuts add a nice crunch if you prefer them.
⏰ Step 4: Chill the Dough for Perfect Texture
Cover the bowl with plastic wrap and refrigerate for at least 30 minutes (I prefer 1 hour or even overnight). This chilling step is non-negotiable—it solidifies the butter, which prevents excessive spreading and helps the cookies hold their shape. It also allows the flour to fully hydrate for a tender crumb.
Cold dough also means the cookies will be thicker and chewier. If you're short on time, you can chill the dough in the freezer for 20 minutes instead. Just make sure it's firm enough to handle when you're ready to scoop. This step makes a world of difference in the final texture, so don't skip it!
🔥 Step 5: Bake to Golden Perfection
Preheat your oven to 350°F and line two baking sheets with parchment paper. Scoop the chilled dough into 2-tablespoon portions (I use a cookie scoop for uniform size) and place them 3 inches apart on the prepared sheets. Sprinkle each cookie with a pinch of flaky sea salt for that classic Belgian touch.
Bake for 11-13 minutes until the edges are golden brown but the centers still look slightly underdone. They'll continue cooking on the hot pan after you remove them from the oven. Let them cool on the baking sheet for 5 minutes before transferring to a wire rack. The centers should be soft and gooey, with crisp edges that give way to that melt-in-your-mouth texture.
Pro Tips For Making Belgian Chocolate Chip Cookies
- CREAM THE BUTTER SLOWLY: I learned this the hard way—dumping cold butter into sugar at once just makes a greasy mess. Let the butter soften just until it yields to light pressure (about 10 minutes at room temp), then mix it with the sugars in two batches. That way, the butter emulsifies properly and you avoid a grainy dough that won’t hold its shape.
- USE ROOM-TEMP EGGS: Cold eggs from the fridge won’t blend smoothly and can cause the dough to curdle when mixed with butter. Let them sit in warm water for 5 minutes first—just enough to make them pliable but not runny. Your cookies will spread evenly and develop that signature crisp edge without turning flat.
- UNDERBAKE BY 30 SECONDS: Belgian cookies are dense, so they look underdone when they hit the 140°F mark. Pull them out when the edges are just set but the centers still jiggle slightly—then let them rest on the sheet for 5 minutes. They’ll firm up perfectly while avoiding the tough, overbaked texture that kills the chew.
- SALT THE DOUGH WELL: Skip the salt in the recipe? Don’t. Belgian cookies rely on the buttery richness, so a pinch of flaky salt (½ tsp per batch) balances the sweetness and enhances the chocolate. Sprinkle it directly over the dough after mixing—it dissolves better than pre-mixing, and you’ll taste the difference in every bite.
Troubleshooting this recipe
Dough Too Soft?
If your dough feels too soft after mixing, it's likely because the butter melted too quickly. Chill the dough immediately for 30-45 minutes before scooping. For extra insurance, place the dough bowl in the freezer for 15-20 minutes—this prevents excessive spreading during baking.
I've had this happen when using butter that's too warm or when mixing too aggressively. 🧊
Cookies Spread Too Much
Over-spreading usually means your dough wasn't chilled long enough or the butter was too soft. Always chill the dough for at least 1 hour (or overnight) and use cold butter. If you're in a rush, freeze the dough balls for 15 minutes before baking.
Also, ensure your oven is fully preheated—cold spots can cause uneven baking. I've learned this the hard way when I skipped chilling!
Chocolate Not Melting
If your chocolate stays hard after baking, it's likely because the oven wasn't hot enough or the chocolate chunks were too small. Use 70% cacao Belgian chocolate chunks (about 1-inch pieces) and bake at 350°F for the full 11-13 minutes.
For extra meltiness, place the baking sheet on the middle rack where heat circulates best. Pro tip: Add 1 tbsp heavy cream to the dough to enhance chocolate melting. 🍫
Cookies Too Dry
Dry cookies often result from overbaking or using too much flour. Pull them out when the edges are just golden (11 minutes) and the centers still look soft. If your dough feels dry before baking, add 1 tbsp milk or water to the mix.
For extra moisture, try replacing 1 tbsp flour with cornstarch—it absorbs less liquid and keeps cookies tender. I've found this trick works wonders for maintaining that signature chewy center.
Uneven Baking
Uneven baking happens when cookies are crowded on the tray or the oven isn't calibrated. Space dough balls 3 inches apart and rotate the baking sheet halfway through baking. If your oven runs hot, reduce the temperature to 340°F and add 1-2 minutes to the bake time.
I always test my oven with a thermometer—mine runs 25°F hotter than the dial says! 🌡️
Dough Sticky After Chilling
If your dough is still sticky after chilling, it might need more flour or a longer rest. Sprinkle 1 tbsp extra flour over the dough and knead gently, then chill for another 15 minutes. Alternatively, let the dough rest at room temperature for 10 minutes to absorb excess moisture.
I've had this happen when humidity is high—just adjust accordingly. The dough should be firm but pliable, not sticky or crumbly.
Nutrition facts
Frequently asked questions
Why does this recipe use both brown and white sugar?
The combination creates the perfect balance of flavors. Light brown sugar adds caramel depth and moisture, while granulated white sugar provides crisp edges and a cleaner finish. This ratio is key for that signature Belgian texture—too much brown sugar makes them too soft, while too much white sugar can make them dry.
Can I substitute regular chocolate chips for Belgian chocolate chunks?
You can, but you'll lose that rich, complex Belgian flavor. Belgian chocolate has a higher cacao content (70%+) and often includes vanilla or spices that enhance the depth. For a quick fix, use Ghirardelli Belgian 72% baking chips—they're pre-chopped and work well. If using regular chips, add ½ tsp espresso powder to the dough to mimic the intensity.
How do I know when the cookies are done baking?
Look for golden brown edges with centers that still appear slightly underdone—they'll firm up as they cool. The edges should pull away from the parchment paper easily, but the middle should still be soft when pressed gently. Bake for 11-13 minutes at 350°F, then let them rest on the baking sheet for 5 minutes before transferring. Overbaking is the #1 mistake—it turns them dry!
Can I make these cookies without a stand mixer?
Use a large bowl and hand mixer (or even a sturdy wooden spoon). Cream the butter and sugars by hand for 5-7 minutes until light and fluffy—your arm will get a workout, but it works! For the eggs, mix them in one at a time with a spatula. The key is patience: keep scraping the bowl and mixing until the mixture is pale and thick.
What's the best way to store these cookies?
Keep them in an airtight container with parchment paper between layers to prevent sticking. They stay fresh for 5-7 days at room temperature, but the chocolate stays melty for only 3-4 days. For longer storage, freeze the dough balls (not baked cookies) on a tray, then transfer to a bag. Bake straight from frozen, adding 2 minutes to the time. Pro tip: Store them in the freezer in single layers—this preserves that crisp-chewy texture!