
Desserts
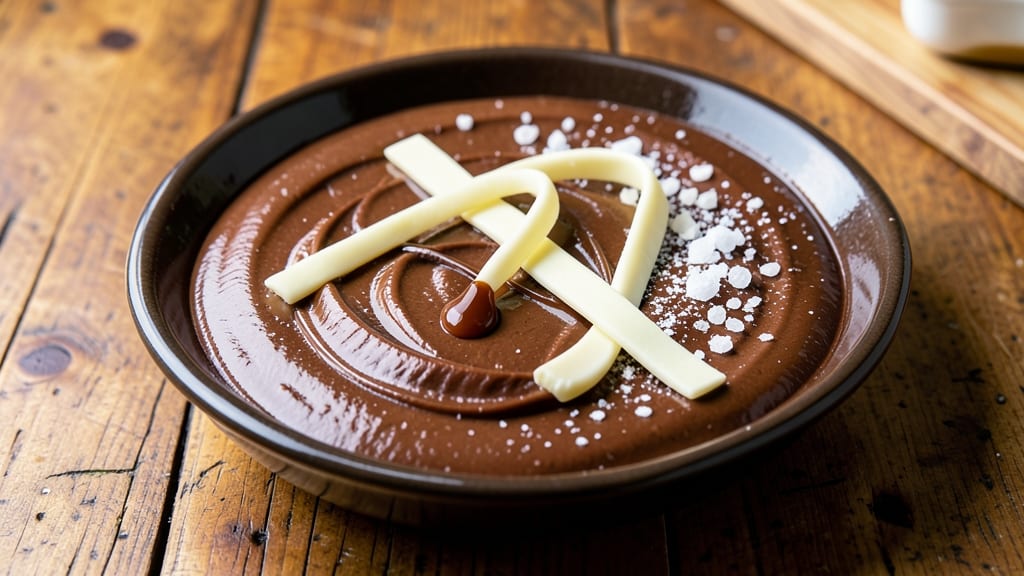
This bittersweet chocolate ganache recipe delivers the perfect balance of rich, velvety texture and deep cocoa flavor for every decadent dessert. The secret lies in precise temperature control—melted chocolate and warm cream combine to create a silky, glossy finish that's ideal for drizzling, filling, or coating.
I've perfected this method to eliminate graininess while maintaining the signature firm-yet-smooth consistency that makes ganache irresistible.
The foundation of great ganache is the ratio of chocolate to cream—equal parts by weight ensure a stable, spreadable texture without being too soft or brittle. Using high-quality bittersweet chocolate (at least 60% cocoa) guarantees a complex, sophisticated flavor profile that stands out in both sweet and savory applications.
This recipe also includes temperature guidelines to prevent seizing, a common issue that ruins the smooth finish.
What you'll achieve is a glossy, velvety ganache that's firm enough to pipe for decorative touches but still smooth enough to drizzle effortlessly. The texture should be thick yet pourable, with a shine that signals perfect execution.
This versatile sauce works as a cake filling, truffle coating, or elegant sauce for fruit and pastries—each application benefits from its balanced sweetness and rich cocoa depth.
For added customization, consider infusing the cream with vanilla, espresso, or citrus zest before combining with chocolate. Store properly in an airtight container at room temperature for up to a week, or refrigerate for longer shelf life.
The key to success lies in patience and precision—every step matters when creating this luxurious chocolate sauce.
Ingredients for bittersweet chocolate ganache
Two essential ingredients create this luxurious sauce: premium chocolate and rich cream, balanced with precision.
| Ingredient | Amount | Notes |
|---|---|---|
| High-Quality Bittersweet Chocolate (60% cocoa or higher) 🍫 | 8 oz | Chopped into even pieces |
| Heavy Cream 🥛 | ½ cup | Whole milk fat preferred |
| Unsalted Butter 🧈 | 2 tbsp | Cold, cubed for stability |
| Vanilla Extract 🌿 | ½ tsp | Pure, high-quality preferred |
| Kosher Salt 🧂 | ¼ tsp | Fine grain for balance |
| Granulated Sugar 🍚 | 1 tbsp | Optional for sweetness adjustment |
| Espresso Powder (optional) ☕ | ½ tsp | For depth of flavor |
| Orange Zest (optional) 🍊 | ½ tsp | Freshly grated for brightness |
The chocolate is non-negotiable—Valrhona or Callebaut brands deliver the best results, with their high cocoa content ensuring depth without bitterness. Ghirardelli 60% or 70% bars work well for home cooks, but avoid anything with added oils or emulsifiers. Look for bars with a vibrant, glossy appearance and minimal imperfections. Heavy cream should be cold from the fridge—room temperature cream can cause seizing. Hormel or Organic Valley brands consistently perform well, but any full-fat option will suffice. The butter acts as a stabilizer, so European-style unsalted butter like Plugrá or Land O'Lakes Cultured adds richness without overpowering.
No high-quality chocolate? Double the cocoa content with dark cocoa powder—use Hershey's Special Dark or Ghirardelli Premium for best results, but reduce cream by 1 oz to maintain balance. Substitute butter with coconut oil (solid at room temperature) for a dairy-free option, though texture will differ slightly. Vanilla extract can be replaced with vanilla bean paste or even a single scraped vanilla bean for intensity. The optional espresso powder or orange zest can be omitted entirely—this ganache shines even without them, but they add complexity when desired. For a sweeter version, increase sugar to 2 tbsp, but the natural sweetness of quality chocolate often eliminates the need.
Store the ganache in an airtight container at room temperature for up to 5-7 days, though it's best used within 3 days for optimal texture. For longer storage, refrigerate for up to 2 weeks—reheat gently in 10-second bursts in the microwave or at room temperature for 30-60 minutes. To prevent a skin from forming, press parchment paper directly onto the surface before sealing. This ganache freezes beautifully for up to 3 months—portion into ice cube trays for single-use servings. Once set, it regains its silky texture when rewarmed, making it ideal for batch prep.
Why You'll Love This Recipe
- I swear by this combo: just melt the chocolate with warm cream, then fold in butter at the end. No fancy gadgets, no stress—just a saucepan and a whisk. Honestly, the butter at the last second makes it buttery in the best way, like a hug for your taste buds.
- Two-Ingredient Core: I swear by this combo: just melt the chocolate with warm cream, then fold in butter at the end. No fancy gadgets, no stress—just a saucepan and a whisk. Honestly, the butter at the last second makes it buttery in the best way, like a hug for your taste buds.
- Rich Without Overpowering: Here’s what sold me—the bittersweet chocolate’s deep cocoa shine comes through, but the cream and vanilla soften it just enough. That pinch of salt? It’s the secret that makes the whole thing taste finished, not like you’re missing anything. (Yes, even on a Tuesday night.)
- Dresses Up Anything: Need dessert fast? Drizzle it over pound cake or ice cream. Craving a fancy touch? Fold it into whipped cream or stuff it in pastries. I’ve used it for truffles, glaze, and even a ridiculously good chocolate mousse. It’s my go-to flavor multiplier.
Step-by-step instructions for bittersweet chocolate ganache
Master this classic technique for a velvety ganache that's perfect for cakes, truffles, or elegant drizzles.
Chop and Measure the Bittersweet Chocolate
Begin by chopping the 8 oz high-quality bittersweet chocolate (60% cocoa or higher) into even ½-inch pieces. This size ensures consistent melting and prevents clumping. I use a sharp chef's knife for clean cuts, working quickly to avoid melting from body heat. Place the chopped chocolate in a medium heatproof bowl—glass or stainless steel works best for even heat distribution.
The reason for chopping is critical: smaller pieces melt more uniformly, creating a perfectly smooth ganache without any graininess. If you're using chocolate bars, break them into rough chunks first, then chop more finely. This step sets the foundation for your ganache's silky texture, so don't rush it. The chocolate should be completely dry with no condensation on the surface before proceeding.
Heat the Heavy Cream to Scalding
In a small saucepan, combine the ½ cup heavy cream with the 1 tablespoon granulated sugar (if using) and bring to a gentle simmer over medium heat. Once small bubbles form around the edges and the cream reaches 180°F (it should be steaming but not boiling vigorously), remove from heat. This scalded temperature is crucial—it's hot enough to melt the chocolate completely but not so hot that it causes the ganache to seize later.
I like to use whole milk fat cream here because it has a higher fat content that creates a richer, more stable ganache. If you're using optional ingredients, now's the time to add them: whisk in the ½ teaspoon espresso powder (for depth) and ½ teaspoon orange zest (for brightness) while the cream is still hot. Let the mixture sit for 1 minute to infuse the flavors before proceeding.
Pour Cream Over Chocolate and Let Rest
Immediately pour the hot cream over the chopped chocolate in the bowl. The chocolate will begin to melt instantly as the steam rises. Let the mixture sit undisturbed for 5 minutes—this resting period allows the chocolate to fully bloom and the cream to properly emulsify with the cocoa butter. I resist the urge to stir during this time; the natural heat transfer does all the work.
After 5 minutes, the mixture should look mostly melted with just a few small pockets of unmelted chocolate. If you see any unmelted pieces, gently press them under the surface with a spatula—the residual heat will finish melting them. This is where patience pays off: rushing this step can lead to a grainy texture or separated ganache.
Stir Until Silky Smooth
Using a silicone spatula, gently stir the mixture in wide, sweeping motions for 2-3 minutes. You'll notice it will thicken slightly as it cools, then suddenly become silky smooth as the cocoa butter fully crystallizes. The ganache should coat the back of your spoon completely, with no visible streaks of unmelted chocolate. If it's too thick, gently reheat in 10-second bursts in the microwave, stirring between each.
This is where the 2 tablespoons cold cubed butter comes in. Once the ganache reaches a smooth, pourable consistency (about 70°F), whisk in the butter until fully incorporated. The butter adds stability and prevents the ganache from becoming too runny as it cools. For extra flavor, add the ½ teaspoon vanilla extract and ¼ teaspoon kosher salt now, whisking until completely dissolved.
Adjust Consistency and Use Immediately
The ganache should now be at the perfect working temperature—70-75°F—where it's fluid enough to drizzle but thick enough to hold its shape. For a drizzling consistency, let it cool to 80°F before using. If it thickens too much, gently reheat in 5-second increments while stirring. For spreading consistency, use it immediately while still warm.
Here's a pro tip: if you're using this for cake filling, let it cool to 85°F before piping to prevent melting your frosting. For truffles or ganache cups, chill until firm but still pourable. The ganache will continue to thicken as it cools, so don't worry if it looks slightly too thin—it will come together beautifully. Use within 2 hours for best texture, or store covered at room temperature for up to 3 days.
Pro Tips For Making Bittersweet Chocolate Ganache
- CHOP THE CHOCOLATE SMALL: I learned this the hard way—big chunks of bittersweet chocolate sink to the bottom and refuse to melt evenly. Use a sharp knife or rock your chopping board to create rice-sized pieces. This isn’t about looks; it’s about every bit of chocolate working together in your ganache.
- HEAT CREAM TO 185°F: The cream needs to be scalding—185°F is the sweet spot—before it hits the chocolate. Too cool, and you’ll end up with a grainy mess. Too hot, and you’ll seize the chocolate. Use a thermometer or watch for steady bubbles around the edges of the pot.
- STIR CONSTANTLY FOR 2 MINUTES: Once the cream hits the chocolate, don’t walk away. Stir like your life depends on it for at least 2 minutes straight. This breaks up the fat molecules and creates that silky, glossy texture. I used to stop too soon, and the ganache always felt clumpy.
- WHISK IN THE BUTTER LAST: Add the butter and vanilla only after the chocolate and cream have fully emulsified. Cold butter can cool the mixture too fast, causing it to seize. Let the ganache sit for 30 seconds after whisking in the butter—it’ll thicken just enough to hold its shape.
Wine and beer pairings for this recipe
Red Wine Pairings
A bold Cabernet Sauvignon from Napa Valley or a rich Barolo from Piedmont complements bittersweet chocolate ganache beautifully. The tannins in these wines cut through the richness, cleansing your palate between bites.
I recommend a 2018 Caymus Vineyards Cabernet Sauvignon—its dark fruit notes and velvety texture mirror the ganache's depth. For a lighter option, try a Pinot Noir from Oregon, which offers red fruit brightness that contrasts the chocolate's intensity. 🍷
Port Wine Enhancement
Add a splash of Ruby Port (about 1 tablespoon) to the warm cream before combining with chocolate for a luxurious twist. The caramel and dried fruit notes in the port deepen the ganache's complexity, making it perfect for truffles or cake fillings.
I love using Graham's 10-Year-Old Tawny Port for its nutty undertones. This variation works especially well with 70% cocoa chocolate for a balanced sweetness.
Beer Pairings
A Belgian Dubbel like Westmalle Trappist pairs surprisingly well with chocolate ganache. The malt sweetness and caramel notes create a harmonious contrast. For a lighter option, try a German Pilsner—its crisp acidity refreshes the palate after each rich bite.
I've also enjoyed pairing ganache desserts with a stout like Guinness, though the roasted malt flavors can be polarizing. 🍺
Coffee-Infused Ganache
For a coffee lover's twist, steep 1 tablespoon finely ground espresso in the warm cream for 5 minutes before straining and combining with chocolate. The result is a ganache with mocha notes that pairs perfectly with a dark roast coffee like Blue Bottle Coffee.
This variation works exceptionally well with 72% cocoa chocolate for a balanced bitterness. The coffee infusion also enhances the ganache's pairing with Port wine or espresso martinis.
Sparkling Wine Finish
Serve ganache desserts with a chilled Prosecco or Cava to create a refreshing contrast. The effervescence cleanses the palate, allowing you to appreciate the ganache's rich flavors with each bite. I particularly enjoy pairing a La Marca Prosecco with a ganache-drizzled chocolate tart.
For a festive touch, add a splash of sparkling wine to the ganache itself (about 2 tablespoons) before chilling—this creates a light, airy texture perfect for topping fruit tarts. ✨
Nutrition facts
Frequently asked questions
Why does my ganache turn grainy?
The most common cause is uneven melting or stirring too early. Let the chocolate and cream rest for 5 minutes undisturbed after combining—this allows proper emulsification. If grainy, gently reheat in 10-second microwave bursts while stirring until silky smooth. Using high-quality chocolate (60%+ cocoa) also prevents graininess.
Can I make this ganache without butter?
Yes! Omit the butter for a lighter texture, but expect slightly faster cooling. For stability, substitute with 1 tablespoon coconut oil (solid at room temperature) or an extra 1 tablespoon heavy cream. The butter adds richness and helps prevent cracking when chilled for decorations.
How do I adjust the sweetness level?
Start with the 1 tablespoon sugar in the recipe—it balances bitterness without overpowering. For sweeter ganache, add up to 1 extra tablespoon of sugar to the cream. For less sweetness, reduce to ½ tablespoon or omit entirely. The chocolate's cocoa percentage also affects sweetness: 60% cocoa is ideal for balance.
What's the best way to store leftover ganache?
For short-term use (3 days), store in an airtight container at room temperature. For longer storage (2 weeks), refrigerate and reheat gently in 10-second microwave bursts while stirring. To prevent skin formation, press parchment paper directly onto the surface before sealing. Freeze for up to 3 months in portions.
Can I use dairy-free cream alternatives?
Yes! Replace heavy cream with full-fat coconut cream (chilled overnight) or oat cream (like Oatly). For best results, heat to 180°F just like dairy cream. Expect slightly different texture—dairy-free ganache may cool faster. Add 1 teaspoon arrowroot powder to stabilize if needed.