
Beverages
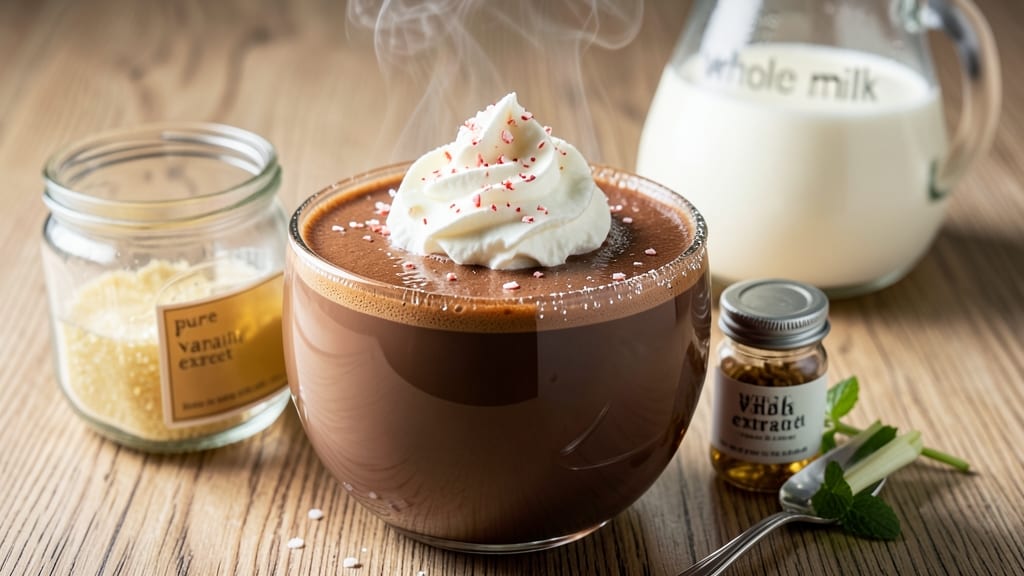
This black and white hot chocolate recipe transforms an ordinary mug into a visually stunning dessert that's just as delicious as it looks. The secret lies in balancing rich cocoa with velvety whipped cream and peppermint swirls, creating a contrast that's both striking and satisfying.
I've perfected this technique to ensure the hot chocolate stays creamy while the toppings maintain their texture, so every sip and bite delivers that perfect balance of flavors.
The foundation of this recipe is a smooth, thick hot chocolate base made with high-quality cocoa powder and milk, heated to a luxurious consistency.
What sets it apart is the attention to detail in the toppings—whipped cream piped into elegant swirls, a dusting of cocoa powder for the "black" contrast, and optional chocolate curls or crushed candy canes for added texture and flavor.
The result is a drink that's as impressive to serve as it is to enjoy.
By the time you're done, you'll have a mug that looks like it belongs in a dessert menu, complete with layers of dark cocoa and pristine white cream. The peppermint swirls add a refreshing twist that cuts through the richness, while the chocolate curls bring an extra touch of indulgence.
This isn't just hot chocolate—it's a dessert experience you can sip.
Perfect for holiday gatherings, date nights, or treating yourself after a long day, this recipe scales easily to serve a crowd or just one. The key to success is patience in heating the chocolate and letting the whipped cream reach its peak stiffness, ensuring every presentation is flawless.
Let's create this showstopper!
Ingredients for black and white hot chocolate
Rich cocoa, velvety cream, and festive peppermint—this is your hot chocolate upgrade.
| Ingredient | Amount | Notes |
|---|---|---|
| High-Quality Cocoa Powder 🍫 | ½ cup | Dutch-processed for smoothness |
| Heavy Whipping Cream 🥛 | 2 cups | Full-fat for best whipping |
| Whole Milk 🥛 | 2 cups | Warmed for silky texture |
| Granulated Sugar 🍚 | ½ cup | Adjust to taste |
| Peppermint Extract 🍃 | 1 tsp | Pure, strong flavor |
| Vanilla Extract 🌿 | 1 tsp | Pure vanilla preferred |
| Pinch Salt 🧂 | ¼ tsp | Enhances all flavors |
| Dark Chocolate Curls 🍫 | ¼ cup | Store-bought or homemade |
| Crushed Candy Canes 🎄 | ¼ cup | For festive crunch |
| Mint Leaves 🌿 | 4 whole | Garnish for freshness |
| Unsweetened Cocoa Powder 🍫 | 2 tbsp | For dusting contrast |
| Piping Bag 🎂 | 1 whole | Or ziplock bag with corner cut |
| Parchment Paper 📄 | 1 sheet | For clean presentation |
The cocoa powder is everything here. Ghirardelli or Hershey's Special Dark are my go-tos—they dissolve smoothly and have that deep, chocolatey punch. Skip the natural cocoa (the kind that makes your drink look weirdly gray). For the peppermint extract, McCormick or Frontier are reliable, but if you've got candy cane extract, that's even better. The whipped cream needs to be ice-cold when you start whipping—pop it in the freezer for 10 minutes if it's warm. And trust me, the candy canes? Crush them fresh—pre-packaged stuff loses its crunch.
No peppermint extract? Crushed candy canes steeped in warm milk works in a pinch (strain it after 10 minutes). Out of heavy cream? Whipped coconut cream gives a similar texture, though it won't be as rich. The vanilla extract can be swapped for vanilla bean paste if you're feeling fancy—just use half the amount. For the chocolate curls, if you can't find them, melt a chocolate bar, spread it thin on parchment, and freeze it, then break it into shards. Pro tip: dust your cocoa powder through a fine-mesh sieve for that restaurant-quality look.
This keeps best if you make the hot chocolate base ahead and reheat it gently—2-3 days in the fridge, covered. The whipped cream? Stabilize it with 1 tsp powdered sugar if you're prepping it early, but whip it just before serving. The candy canes and chocolate curls stay fresh for weeks in an airtight container. Serve in mugs with a saucer underneath to catch any drips—trust me, that's a game-changer for presentation. Leftovers? Freeze the base for up to 3 months, and just whisk in extra milk when reheating.
Why You'll Love This Recipe
- No-Fuss Layers: I swear by this method—just whisk the cocoa and sugar into warm milk, then swirl in the whipped cream and a dash of peppermint extract. The contrast of rich, velvety cocoa against the bright mint? It’s like a dessert in a mug, but zero effort.
- Velvet-Mint Magic: That first sip of deep cocoa, then the cool zing of peppermint cutting through—it’s the kind of balance that makes you reach for a second cup. Honestly, the whipped cream on top isn’t just for looks; it’s the secret to that dangerously smooth finish.
- Holiday Ready: Between us, this is my go-to for Christmas mornings, cozy movie nights, or even a fancy date dessert. The peppermint extract keeps it festive, but the whole milk and cocoa powder make it feel indulgent—no one ever guesses it’s this easy.
- Leftovers That Shine: Make a big batch, store it in jars, and reheat with a splash of milk. The whipped cream stays fluffy if you add it fresh, but the cocoa base? It’s just as rich the next day. My secret weapon for lazy Sundays or last-minute guests.
Step-by-step instructions for black and white hot chocolate
Here's how to create velvety layers of cocoa and peppermint swirls that'll wow everyone.
Warm the Milk and Whisk in Cocoa Base
In a medium saucepan, combine the 2 cups whole milk and 0.5 cup granulated sugar. Heat over medium heat until it just begins to simmer - you'll see small bubbles forming at the edges but not a full rolling boil. This takes about 5-7 minutes. Remove from heat and let it steep for 2 minutes to infuse flavors.
In a separate bowl, whisk together the 0.5 cup high-quality cocoa powder, 1 tsp vanilla extract, 1 tsp peppermint extract, and 0.25 tsp pinch salt until completely smooth. Slowly pour the warmed milk mixture into the cocoa while whisking continuously to prevent lumps. The mixture should be silky smooth with no graininess - this is your rich chocolate base.
Whip the Cream and Prepare Garnishes
In a chilled mixing bowl, whip the 2 cups heavy whipping cream with an electric mixer until soft peaks form. This takes about 2-3 minutes. In a small bowl, combine the 0.25 cup dark chocolate curls and 0.25 cup crushed candy canes. Set aside 2 tablespoons of this mixture for garnish.
Fill the piping bag with the remaining chocolate-candy cane mixture. Fold the top over and cut a small corner to create a fine tip. This will let you create elegant swirls in each serving. Keep the whipped cream cold while you prepare the hot chocolate base.
Assemble the Black and White Layers
Line four mugs with the parchment paper, cutting it to fit each mug's base. Pour equal portions of the hot chocolate mixture into each mug, filling them about 3/4 full. Let them sit for 1 minute to let the cocoa settle slightly.
Using the piping bag, create decorative swirls on top of each hot chocolate layer. Start from the center and work outward in gentle, overlapping circles. Sprinkle the reserved chocolate-candy cane mixture over the swirls. The contrast of dark cocoa against the lighter cream creates that classic black-and-white effect.
Add Final Touches and Serve Immediately
Gently press the 4 whole mint leaves into the whipped cream swirls on each mug. This adds fresh aroma and a pop of color. Dust each serving with 0.5 teaspoon of the unsweetened cocoa powder using a fine-mesh sieve for that professional finish.
Serve immediately while the hot chocolate is still steaming. The contrast of warm cocoa against the cool whipped cream creates an unforgettable experience. Each sip delivers rich chocolate flavor followed by refreshing peppermint notes from the candy cane swirls.
Pro Tips For Making Black And White Hot Chocolate
- Whisk the Cocoa First: I learned this the hard way—dumping cocoa powder into hot milk creates clumps that ruin the silky texture. Instead, whisk the cocoa into the sugar first, then slowly pour in the warm milk while stirring constantly. This ensures a smooth, lump-free base every time.
- Warm the Cream Separately: Heavy whipping cream scalds easily, and once it curdles, you’re out of luck. Heat the cream in a separate small saucepan just until it’s steaming (about 160°F/70°C)—not boiling—and then fold it into the chocolate mixture at the end. This keeps the cream light and fluffy for topping.
- Measure Peppermint Extract Precisely: A splash too much peppermint extract turns your drink into a minty punch, not a balanced dessert. Use a dropper or syringe for accuracy—start with ¼ teaspoon per cup of milk, taste, then adjust. (Yes, even if you’re impatient like me.)
- Chill the Mug First: Pouring hot chocolate into a cold mug makes the sides sweat and dilutes the flavors. Run your mug under warm water, then dry it thoroughly before serving. The drink stays richer longer, and the contrast of the cold mug makes the peppermint aroma pop.
Storing and reheating this black and white hot chocolate
Fridge Storage Tips
Store the hot chocolate base in an airtight container in the fridge for up to 2-3 days. The flavors actually deepen as it sits, so I always make extra! Let it cool completely before covering to prevent condensation.
For the whipped cream, whip it fresh when ready to serve—it loses volume and stiffness overnight. Keep the crushed candy canes and chocolate curls in separate small jars to maintain their crunch. 🥛
Freezing for Later
The hot chocolate base freezes beautifully for up to 3 months. Pour it into silicone molds or ice cube trays for single servings, or use a freezer-safe container for larger batches.
When reheating, thaw overnight in the fridge, then warm gently on the stovetop over low heat with a splash of milk to restore creaminess. Never microwave—it creates hot spots and ruins the texture. 🧊
Reheating Perfection
For the best results, reheat the hot chocolate base in a small saucepan over low heat until steaming, stirring constantly. Add 1-2 tablespoons of warm milk to help it blend smoothly.
The whipped cream should be whipped fresh, but if you're in a rush, stabilize it with 1 teaspoon powdered sugar and chill for 15 minutes before whipping again. The candy canes and chocolate curls stay fresh indefinitely in the freezer if stored properly. ✨
Make-Ahead Garnishes
Prep the whipped cream and garnishes ahead of time for a stress-free serving. Whip the cream, then store it in the fridge with a parchment-lined container to prevent sticking. Sieve the cocoa powder into a small jar for easy dusting later.
Crush candy canes and chocolate curls in advance, but store them separately to avoid moisture transfer. Assemble everything just before serving to keep the toppings looking fresh. 🎄
Serving Like a Pro
Use pre-warmed mugs to keep the hot chocolate hot longer. Line the bottoms with parchment circles for easy cleanup and a polished look. Serve with a small spoon for stirring and scooping the whipped cream swirls.
For a restaurant-style finish, add a sprinkle of flaky sea salt on top—it enhances the peppermint flavor beautifully. 🍫
Nutrition facts
Frequently asked questions
Can I make this without peppermint extract?
Swap the peppermint extract for 1 tablespoon of crushed candy canes steeped in 2 tablespoons warm milk (strain after 10 minutes). For a stronger flavor, add ½ teaspoon peppermint candy pieces to the hot chocolate base while heating. The candy canes will also contribute to your "black and white" garnish!
How do I get the whipped cream to hold its shape?
Chill all your tools (bowl, beaters, piping bag) in the freezer for 15 minutes before whipping. Use ice-cold heavy cream straight from the fridge, and whip until stiff peaks form. For extra stability, add 1 teaspoon powdered sugar or ½ teaspoon vanilla bean paste while whipping. Work quickly after whipping to keep it firm!
What's the best mug for this presentation?
Use wide, shallow mugs (like dessert cups) to showcase the layers. Pre-warm them by rinsing with hot water, then dry thoroughly. Line the base with parchment circles for easy removal and a clean look. For extra flair, choose mugs with contrasting colors—dark mugs make the white cream pop, while light mugs highlight the cocoa contrast!
Can I make this dairy-free?
Yes! Replace the milk with coconut milk (full-fat) or oat milk (barista blend) for richness. Use coconut whipped cream (chilled overnight) or dairy-free whipped topping. For the cocoa base, ensure your cocoa powder is dairy-free. The peppermint flavor will still shine through—just expect a slightly lighter texture.
Why did my hot chocolate turn grainy?
This usually happens when cocoa powder clumps or isn't fully dissolved. Whisk the cocoa powder with sugar first to create a smooth paste before adding milk. Heat the milk to 160°F** (just below boiling) to help emulsify the cocoa. If it's already made, strain it through a fine-mesh sieve to remove any lumps. Always whisk continuously while combining ingredients!