
Desserts
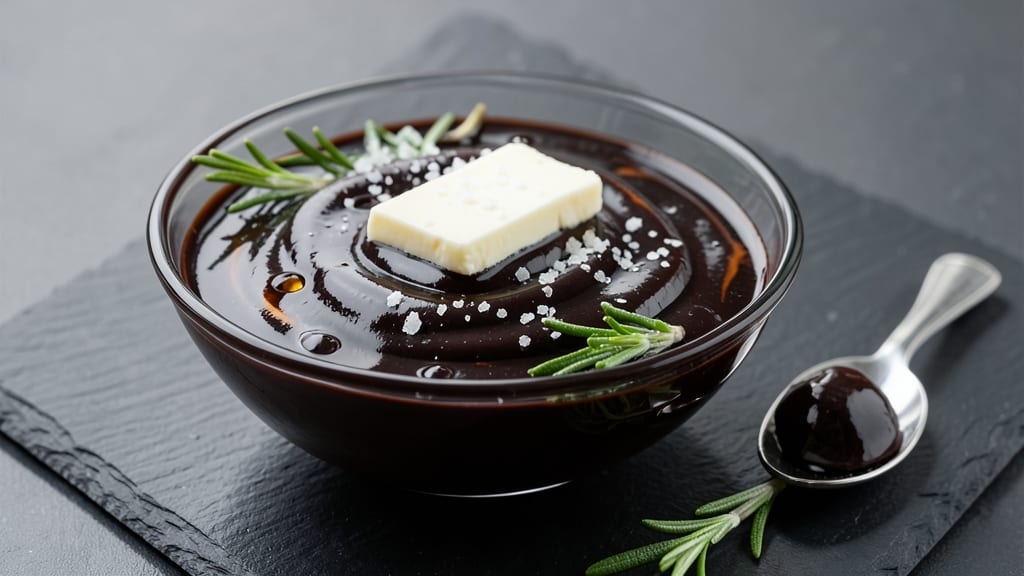
This black chocolate ganache recipe delivers a velvety, ultra-smooth pour that transforms any dessert into a showstopper. ✨ The secret lies in precise temperature control and high-quality ingredients—70%+ cocoa chocolate and heavy cream—creating a silky texture that's effortlessly elegant yet simple to master.
I've perfected this technique for professional results at home, ensuring every drizzle and layer stays perfectly glossy.
The magic happens when you temper the chocolate and cream together, creating a balance between rich cocoa depth and creamy smoothness. This ganache isn't just for fancy cakes—it's versatile enough for ice cream toppings, cake fillings, or even a luxurious chocolate sauce.
The key is patience: letting it cool slightly before using guarantees that signature pour without any lumps or graininess.
What you'll end up with is a decadent, restaurant-quality ganache that's rich, glossy, and irresistibly smooth. The deep chocolate flavor shines through without being overpowering, making it perfect for pairing with fruits, nuts, or even a sprinkle of sea salt. Once you try this, store-bought chocolate sauces will never compare.
Best of all, this ganache keeps beautifully in the fridge for up to two weeks, ready to elevate desserts whenever inspiration strikes. Whether you're filling a cake, drizzling over tiramisu, or serving as a dip for strawberries, this recipe delivers professional results with minimal effort.
Let's get started on creating your perfect pour.
Ingredients for black chocolate ganache
Seven ingredients. One decadent pour. Restaurant-quality ganache starts with these essentials.
| Ingredient | Amount | Notes |
|---|---|---|
| High-Quality Dark Chocolate (70%+ Cocoa) 🍫 | 8 oz | Chopped into even pieces |
| Heavy Whipping Cream 🥛 | 1 cup | Full-fat for best texture |
| Unsalted Butter 🧈 | 2 tbsp | Cold for smooth incorporation |
| Vanilla Extract 🌿 | ½ tsp | Pure, high-quality preferred |
| Kosher Salt 🧂 | ¼ tsp | Fine grain for balance |
| Flaky Sea Salt 🧂 | 1 tsp | For finishing garnish |
| Extra-Virgin Olive Oil 🫒 | 1 tsp | Optional for shine |
The chocolate makes or breaks this—70%+ cocoa is non-negotiable for that deep, velvety flavor. Valrhona or Callebaut are my go-tos, but any high-quality brand with at least 70% cocoa works. Chop it into even pieces (about 1/2-inch chunks) for consistent melting. Heavy cream needs to be cold and full-fat—none of that light stuff. The butter adds richness and helps create that signature glossy finish. Pro tip: buy your chocolate from specialty stores or the baking aisle at Whole Foods—the difference in quality is noticeable. And don't skip the vanilla—it rounds out the bitterness beautifully.
No heavy cream? Full-fat coconut milk works in a pinch (though texture will differ slightly). Short on butter? Extra olive oil (another 2 tbsp) can substitute, but the ganache will be slightly less stable. The sea salt is optional but adds a sophisticated contrast—Maldon is my favorite, but any flaky salt works. For a nutty twist, fold in 1 tbsp of toasted hazelnuts or walnuts at the end. And if you're feeling fancy, a splash of espresso powder (1/4 tsp) enhances the chocolate flavor without overpowering it. Just remember: patience is key—let the mixture cool slightly before using for that perfect pour.
This ganache keeps beautifully in the fridge for up to two weeks, sealed between layers of parchment paper. For longer storage, freeze in 1/4-cup portions for up to 3 months. To reheat, microwave in 10-second bursts until smooth. The olive oil addition (if using) helps preserve that glossy finish. And here's a pro trick: if your ganache thickens in the fridge, simply warm it gently over a double boiler until silky again. It's amazing how such a simple combination delivers such luxurious results—every time.
Why You'll Love This Recipe
- I swear by this 1: 1 chocolate-to-cream method—no guesswork, no seizing, just smooth perfection every time. The butter and vanilla tie it all together without overpowering that deep, bittersweet cocoa.
- Foolproof Ratio: I swear by this 1:1 chocolate-to-cream method—no guesswork, no seizing, just smooth perfection every time. The butter and vanilla tie it all together without overpowering that deep, bittersweet cocoa.
- Decadent in Seconds: That first spoonful? Rich, velvety, with just enough salt to make your taste buds sing. Honestly, I’ve made ganache before, but this one actually tastes like it belongs in a fancy dessert—no fancy skills required.
- Endless Uses: Drizzle it over strawberries for a no-bake dessert, swirl it into cake batter, or spread it on toast with a sprinkle of flaky salt. Between us, I’ve even used it as a glaze for roasted nuts—yes, really.
Step-by-step instructions for ultra-smooth black chocolate ganache
Here's how to create a velvety, ultra-smooth ganache that pours like silk and melts in your mouth.
🔥 Step 1: Heat the Heavy Whipping Cream to Scalding
Pour the 1 cup Heavy Whipping Cream into a medium saucepan and heat over medium-high heat until it reaches a gentle boil—about 3-4 minutes. You'll see small bubbles forming around the edges and the surface will look frothy. This high heat is crucial because it creates steam that helps break down the chocolate's crystalline structure, ensuring that silky texture.
I like to use a candy thermometer for precision, but if you don't have one, watch for rolling bubbles that indicate it's scalding hot. Remove the pan from heat immediately once it reaches this point—overheating can cause the cream to curdle or lose its ability to properly emulsify with the chocolate.
👨🍳 Step 2: Pour Scalding Cream Over Chopped Chocolate
Transfer the 8 oz High-Quality Dark Chocolate (70%+ Cocoa), chopped into even pieces, to a large heatproof bowl. Immediately pour the scalding hot cream over the chocolate in a slow, steady stream. This temperature contrast is what creates the magic—it melts the chocolate evenly while preventing any seizing or graininess.
Let the mixture sit for 2 minutes without stirring. This brief rest allows the chocolate to soften and begin the emulsification process. Here's the thing—if you stir too early, you risk creating air pockets that can lead to a lumpy ganache. Patience at this stage ensures a perfectly smooth final product.
🍳 Step 3: Stir Until Silky Smooth
After the 2-minute rest, use a silicone spatula to gently stir the mixture in small, circular motions for 1-2 minutes. The chocolate should melt completely and the ganache should begin to thicken slightly. If you notice any lumps that refuse to dissolve, simply place the bowl over a double boiler (or a heatproof bowl set over simmering water) for 10-15 seconds to gently reheat, then stir again until smooth.
Here's where it gets fun—the ganache should now have a shiny, glossy appearance and coat the back of your spoon. If it's too thick, add 1 teaspoon of hot cream at a time until it reaches a pourable consistency (about 30-32 seconds on a candy thermometer). The goal is a ganache that flows like liquid velvet but still clings beautifully to desserts.
🥘 Step 4: Finish with Butter and Seasonings
Remove the ganache from heat and let it cool slightly for 1 minute. Then stir in the 2 tbsp Unsalted Butter, 0.5 tsp Vanilla Extract, and 0.25 tsp Kosher Salt. The butter adds richness and helps create that signature ganache sheen, while the vanilla and salt balance the deep chocolate flavor. I always add the butter last—it should be cold to prevent the ganache from seizing up.
For the final touch, drizzle in the 1 tsp Extra-Virgin Olive Oil (if using) and gently fold it in. This optional step adds a subtle fruity note and enhances the ganache's glossy finish. Let the mixture cool for another 2-3 minutes until it reaches 90°F—this temperature is perfect for pouring without it setting too quickly.
⏰ Step 5: Pour and Garnish for Professional Results
Working quickly, pour the ganache over your prepared desserts—whether it's cakes, pastries, or fruit platters. The ganache should flow smoothly and create an even, glossy layer. If you're using it for dipping, let it cool to 85°F for easier handling without losing its shine.
For that restaurant-quality finish, sprinkle with 1 tsp Flaky Sea Salt while the ganache is still warm. The salt crystals will cling to the surface, adding a delightful contrast to the rich chocolate. Let the ganache set for 10-15 minutes at room temperature before serving—this allows it to firm up just enough to hold its shape while maintaining that luxurious mouthfeel.
Pro Tips For Making Black Chocolate Ganache
- CHOP CHOCOLATE UNIFORMLY: I learned this the hard way—uneven chocolate chunks mean grainy ganache. Chop the dark chocolate into small, consistent pieces (about ½-inch cubes) so they melt evenly. No food processor? A sharp knife and a little elbow grease work, but don’t rush it—this isn’t the time to be lazy.
- SCALD CREAM, DON’T BOIL: Heavy cream can curdle if it boils, and nobody wants lumpy ganache. Heat the cream until it’s steaming hot but not rolling—tiny bubbles at the edges, about 170°F (77°C). Pour it over the chocolate in a thin stream while stirring; this temp melts the chocolate smoothly without shocking it.
- SALT THE BUTTER FIRST: Skip this, and your ganache tastes flat. Mix the kosher salt (about ¼ teaspoon) directly into the butter before adding it to the chocolate-cream mix. The salt dissolves better this way, and the flavor integrates evenly—no gritty surprises later.
- LET IT REST, THEN WHISK: Pouring the ganache into a bowl and diving in with a whisk? Bad idea. Let the mixture sit for 30 seconds after combining—this lets the heat distribute and the chocolate fully emulsify. Then whisk in the vanilla. Sounds weird, but it works: you’ll get a silky, glossy finish instead of streaky, broken ganache.
Regional styles of this black chocolate ganache
French Patisserie Style
In French patisseries, black chocolate ganache is often used as a filling for éclairs and macarons, where precision matters most. The French technique emphasizes temperature control—chopping chocolate into ¼-inch pieces and using 35% cream (by weight) for a lighter texture.
I’ve found that adding a pinch of espresso powder (⅛ tsp) enhances the chocolate’s depth, a trick I picked up from Parisian bakers. The ganache should be semi-thick for piping, allowing it to hold its shape while still being smooth. 🥖
Italian Tiramisu Twist
Italian desserts like tiramisu often call for a lighter, airier ganache that pairs beautifully with coffee-soaked ladyfingers. Replace 2 tbsp of the heavy cream with 2 tbsp strong brewed espresso, cooled, for a mocha-infused flavor.
The Italians also love a touch of orange zest (⅛ tsp) to brighten the richness. For an authentic touch, strain the ganache through a fine-mesh sieve before assembling to ensure silky perfection. This version keeps its glossy finish even after chilling. ☕
Mexican Mole-Inspired Fusion
For a bold twist, infuse the ganache with smoky chipotle and cinnamon—a nod to Mexican mole sauces. Add ½ tsp ground cinnamon and ¼ tsp smoked paprika to the melted chocolate before combining with cream.
A dash of chipotle powder (⅛ tsp) adds heat without overpowering. This ganache works beautifully as a drizzle for churros or a filling for spiced pastries. The contrast of sweet and smoky is pure magic. 🌶️
Japanese Mochi Ganache
In Japan, ganache is often used to fill mochi cakes or drizzle over matcha desserts. For a chewier texture, replace 1 tbsp of the butter with 1 tbsp red bean paste (anko).
The Japanese also prefer a slightly thicker consistency, almost like fudge, so reduce the cream by 1 tbsp. A hint of matcha powder (⅛ tsp) creates a stunning green-black swirl when drizzled. This version is perfect for waffle sandwiches or as a filling for mochi ice cream. 🍡
American Bakery Classic
American bakeries often use ganache for cake layers and cupcakes, where a rich, glossy finish is key. The classic approach sticks to the basics but adds a pinch of cayenne (⅛ tsp) for subtle heat. For a nutty crunch, fold in ½ cup toasted pecans before pouring.
This ganache is forgiving—it holds up well in warm climates and doesn’t melt too quickly, making it ideal for summer desserts. A sprinkle of crushed pretzels on top adds a salty contrast. 🍰
Scandinavian Cardamom Variant
Scandinavian desserts often feature cardamom-infused ganache, especially in principality cakes. Add ½ tsp ground cardamom to the melted chocolate for a warm, aromatic twist. The Scandinavians also prefer a lighter texture, so they use half-and-half instead of heavy cream (though it won’t be as glossy).
This ganache pairs perfectly with lingonberry compote or candied pear slices. The cardamom’s floral notes balance the chocolate’s bitterness beautifully. ❄️
Nutrition facts
Frequently asked questions
Can I use milk chocolate instead of dark chocolate for this ganache?
The recipe specifically calls for 70%+ cocoa dark chocolate because the higher cocoa content creates that deep, velvety flavor and rich color. Milk chocolate would make the ganache sweeter and lighter in color, losing the signature depth. If you must use milk chocolate, reduce the cocoa percentage by 10-15% to compensate for the extra sugar.
Why did my ganache turn grainy or seize up?
This usually happens when the chocolate and cream aren't at the right temperature. The cream must be scalding hot (just boiling) while the chocolate stays cool until contact. If you stir too early or let the mixture cool too quickly, it can seize. For a quick fix, place the bowl over a double boiler for 10-15 seconds to gently reheat, then stir until smooth.
How do I adjust the consistency for different uses?
For drizzling or pouring, keep it at 90°F—this creates that signature glossy finish. For piping (like éclairs), let it cool to 85°F for thicker texture. If too thick, add 1 tsp hot cream at a time. Too thin? Chill for 10 minutes to firm up slightly. The butter content also affects thickness—reduce by 1 tbsp for lighter applications.
Can I make this ganache ahead of time?
This ganache keeps beautifully in the fridge for up to 2 weeks when stored between layers of parchment paper. For longer storage, freeze in ¼-cup portions for up to 3 months. To reheat, microwave in 10-second bursts until smooth. The olive oil addition helps preserve that glossy finish even after chilling.
What are some creative ways to use this ganache beyond cakes?
Try it as a dip for fresh fruit (strawberries, raspberries), a glaze for donuts, or a filling for cream puffs. For a showstopper, drizzle over vanilla ice cream or use as a chocolate sauce for pancakes. The deep flavor pairs beautifully with citrus zest or a sprinkle of crushed nuts. Even as a truffle center rolled in cocoa powder makes an impressive appetizer!