
Desserts
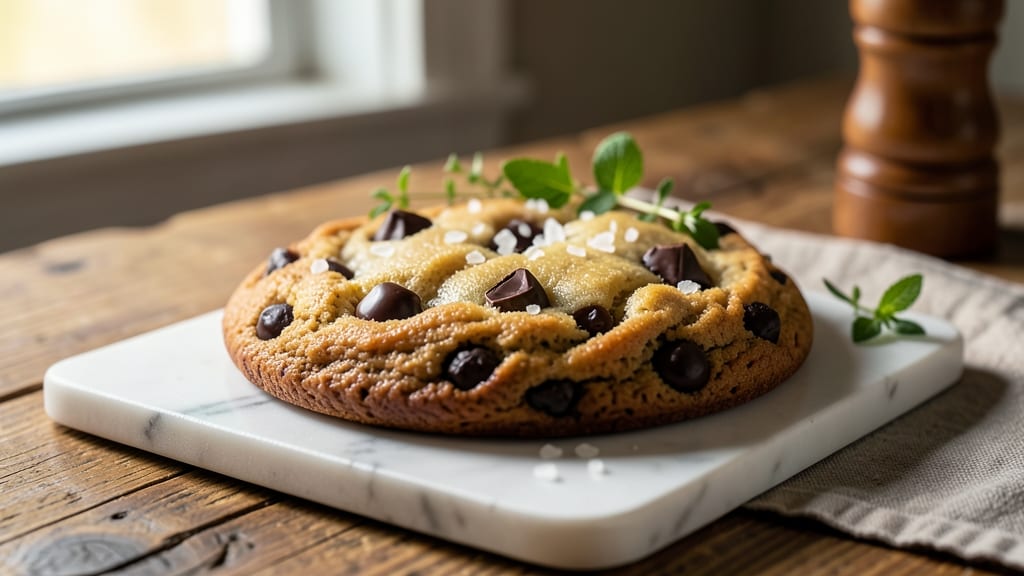
This bomb chocolate chip cookie recipe delivers the ultimate dessert experience—double-baked layers with a crunchy exterior and molten chocolate centers that explode with every bite. 🌟 The secret lies in a precise baking technique that creates pockets of gooey chocolate while keeping the edges perfectly crisp.
I’ve perfected this over years of trial and error, ensuring every cookie lives up to its name.
What sets these apart is the two-stage baking process: first, a quick bake to set the shape, then a second round to melt the chocolate chips into luscious rivers. The dough is rich but not greasy, with a perfect balance of brown and white sugar for caramelized depth.
No one will believe these are homemade—they’re restaurant-quality, but with a personal touch.
The result is a cookie that’s visually stunning—golden edges framing a crackly top with hidden pockets of chocolate—and irresistibly addictive. Each bite offers a symphony of textures: crispy, chewy, and gooey all at once. These cookies are perfect for holidays, potlucks, or simply satisfying that late-night craving.
For extra indulgence, try adding a sprinkle of flaky sea salt before the final bake, or swap half the chocolate chips for toffee bits. The variations are endless, but the core technique remains foolproof. Let’s get baking!
Ingredients for bomb chocolate chip cookie
Twelve ingredients, two bakes, and a symphony of textures—crispy, chewy, and molten all at once.
| Ingredient | Amount | Notes |
|---|---|---|
| Unsalted Butter 🧈 | 1 cup | Cold, cubed for even baking |
| Granulated White Sugar 🍚 | ¾ cup | Superfine preferred for smooth texture |
| Light Brown Sugar 🍚 | ¾ cup | Packed, for caramelized depth |
| Large Eggs 🥚 | 2 whole | Room temperature for even mixing |
| Vanilla Extract 🌿 | 2 tsp | Pure, high-quality extract |
| All-Purpose Flour 🌾 | 2 ½ cups | Sifted, for light texture |
| Baking Soda 🧂 | ½ tsp | Freshly measured |
| Diamond Crystal Kosher Salt 🧂 | ½ tsp | Fine grain preferred |
| Semisweet Chocolate Chips 🍫 | 2 cups | High-quality, like Ghirardelli |
| Flaky Sea Salt 🧂 | 1 tsp | For final garnish |
| Toffee Bits 🍫 | ½ cup | Optional, for extra indulgence |
The butter is non-negotiable—use European-style unsalted for higher fat content and richer flavor. Kirkland Signature or Plugrá are my go-tos, but any good brand works. Chill the cubes before mixing to prevent overmixing the dough. For the sugars, superfine white sugar dissolves faster, but regular granulated works if you pulse it in a food processor. The brown sugar? Pack it tightly—this is where that caramelized depth comes from. Fresh vanilla extract is a game-changer, but imitation works in a pinch if you're in a hurry.
No vanilla? Almond extract at half the amount adds a lovely twist. Swapping half the chocolate chips for toffee bits or chopped nuts is totally doable—just keep the total at 2 cups. For a salted caramel twist, fold in 1/4 cup caramelized sugar**> after the first bake. The flaky sea salt? Maldon is ideal, but any good flaky salt works. If your kitchen's humid, chill the dough for 30 minutes before baking to prevent spreading. And trust me, don’t skip the second bake**>—that’s when the magic happens.
Dough keeps 3 days in the fridge, wrapped tightly in plastic. For longer storage, freeze portions for up to 3 months**>. Thaw overnight in the fridge before baking. These cookies reheat beautifully—5 seconds in the microwave brings back that gooey center. Double the recipe? Use two cookie sheets and bake in batches. Leftovers? They vanish faster than you can say 'molten center.'
Why You'll Love This Recipe
- No-Fuss Mixing: I swear by the 30-second cream method—just toss the cold butter, sugars, and egg until it magically comes together. No food processor, no stress, just a bowl and a spatula. (Yes, even when I’m half-asleep at 10pm.)
- Chewy-Crisp Magic: That perfect bite? The combo of brown sugar’s deep caramel notes and white sugar’s crisp edges, all held together by the buttery vanilla richness. It’s the kind of cookie that disappears faster than my willpower.
- Party in a Jar: Double the dough, freeze half—now you’ve got a last-minute dessert for book clubs, potlucks, or just because. (Pro tip: the leftovers taste even better the next day, if that’s possible.)
- Pantry Goldmine: Five ingredients, zero weird substitutions. Butter, sugar, eggs, vanilla—stuff you already have lurking in your cupboards. And since they freeze like champs, you’ll never bake when you’re not supposed to.
Step-by-step instructions for bomb chocolate chip cookies
Here's how to create cookies with crispy exteriors and gooey, molten centers—every bite is a revelation.
👨🍳 Step 1: Cream Butter and Sugars to Peak Volume
In a stand mixer fitted with the paddle attachment, beat the 1 cup unsalted butter (cold, cubed) with the 0.75 cup granulated white sugar and 0.75 cup light brown sugar on medium speed for 3-4 minutes. You're aiming for a pale, fluffy texture that nearly doubles in volume—the mixture should look like whipped cream when ready. This step incorporates air, which creates those signature crackly tops and helps the cookies spread just enough for that perfect bomb effect.
I press the paddle against the bowl occasionally to scrape down the sides, ensuring even mixing. The butter should be completely incorporated but still hold its shape—if it looks like wet sand, it needs more time. This is where the magic begins, so don't rush it. The sugars should dissolve completely, leaving no grainy texture behind.
🍳 Step 2: Add Eggs and Vanilla for Richness
Add the 2 whole large eggs (room temperature) one at a time, mixing on low speed for 30 seconds after each addition. Then stir in the 2 teaspoons vanilla extract until fully combined. The mixture will look slightly curdled at first, but don't worry—this will smooth out when you add the dry ingredients. I always use pure vanilla extract here because imitation just doesn't cut it for these decadent cookies.
Here's the thing—if your eggs are cold, the dough will be tougher. That's why room temperature matters. The mixture should be thick but pourable, like a rich cake batter. If it's too stiff, let it sit at room temperature for 5 minutes before proceeding. This step ensures your cookies will have that perfect balance of chewy and crispy.
👨🍳 Step 3: Fold in Flour and Chocolate for Texture
In a separate bowl, whisk together the 2.5 cups all-purpose flour, 0.5 teaspoon baking soda, and 0.5 teaspoon diamond crystal kosher salt. Add this dry mixture to the wet ingredients in two batches, mixing on low speed just until combined—you should still see a few flour streaks. Overmixing develops gluten, which makes cookies tough instead of tender. Remove the bowl from the mixer and gently fold in the 2 cups semisweet chocolate chips and 0.5 cup toffee bits using a silicone spatula.
Here's where it gets fun—toss in the chocolate and toffee bits by hand to ensure even distribution. I like to press the chocolate chips into the dough slightly so they don't all rise to the top during baking. The dough should be thick, sticky, and hold its shape when scooped. If it's too dry, add 1 teaspoon milk (not in the ingredients list—this is a troubleshooting tip).
⏰ Step 4: Chill the Dough for Perfect Texture
Cover the dough bowl with plastic wrap and refrigerate for at least 1 hour (I prefer 2 hours or even overnight). Chilling is non-negotiable—it allows the flour to fully hydrate, prevents excessive spreading, and ensures those crispy edges we're after. The cold dough also makes handling easier, so you can scoop perfect portions without sticking.
Real talk: Skipping this step leads to flat, cakey cookies. The butter needs time to firm up, which creates steam during baking and that signature crackly top. I like to press the dough into a disk, wrap it tightly, and refrigerate it overnight. This extra time makes a world of difference in the final texture.
🔥 Step 5: Bake in Two Stages for Bomb Perfection
Preheat your oven to 375°F and line two baking sheets with parchment paper. Scoop the chilled dough into 2-tablespoon portions (I use a cookie scoop for uniformity) and place them 3 inches apart on the prepared sheets. Gently flatten each scoop to ¼-inch thickness—this ensures even baking and that crispy exterior.
Bake for 10-12 minutes until the edges are golden brown but the centers still look soft. Here's the secret: Remove the cookies from the oven when they look slightly underdone. They'll finish cooking on the hot pan. Let them cool on the baking sheet for 5 minutes, then transfer to a wire rack. While they're still warm, sprinkle each cookie with a pinch of flaky sea salt for that final touch of sophistication.
Pro Tips For Making Bomb Chocolate Chip Cookie
- Use Room-Temp Butter: Cold butter makes tough cookies—trust me, I’ve made this mistake. Let that unsalted butter sit out for 45-60 minutes until it’s soft but not melted (press your finger in; it should leave a slight indent). This guarantees a chewy center and crisp edges without overworking the dough.
- Mix Wet Ingredients First: Skip the dry pile and beat the butter, sugars, eggs, and vanilla until the mixture is light and fluffy—about 2-3 minutes. This incorporates air, which makes your cookies spread less and stay taller. I used to add the flour first, and my cookies always turned out flat and dense.
- Chill Dough for 24 Hours: Yes, even if you’re impatient like me. Wrap the dough in plastic and refrigerate overnight—this lets the flour hydrate fully and deepens the flavor. The next day, scoop and bake; your cookies will have that perfect balance of crispy edges and gooey centers.
- Bake One Sheet at a Time: Overcrowding the pan causes uneven baking and flat cookies. Use a cookie sheet that fits only 12-14 cookies (about 2 inches apart). If you’re short on time, bake two sheets at once but swap their positions halfway through—this guarantees even browning without burning.
Troubleshooting perfect results
Underbaked Centers
If your cookies emerge from the oven with soft centers that don't set properly, your oven temperature is likely too low or the bake time too short. I recommend using an oven thermometer to verify your 375°F setting—many ovens run 25°F hotter or colder than displayed.
For extra insurance, bake one sheet at a time to prevent heat loss from crowded pans. The secret is removing cookies when edges are golden but centers still jiggle slightly—they'll firm up as they cool. 🔥
Overly Spread Cookies
Excessive spreading usually means your dough was too warm or the butter wasn't chilled enough. Always use cold butter cubes straight from the fridge, and let the dough rest for the full 2 hours in the refrigerator. For extra control, flatten your scoops to ¼-inch thickness before baking.
I also recommend using a cookie scoop for uniform portions—this prevents uneven spreading. If your kitchen is humid, chill the dough an additional 30 minutes before baking.
Dry, Cakey Texture
Dry cookies often result from overmixing the dough or using too much flour. Mix the wet and dry ingredients just until combined—you should still see small flour streaks. For extra moisture, add 1 teaspoon milk if the dough looks too dry.
Another common issue is baking at too high a temperature—375°F is ideal for these cookies. If your oven runs hot, reduce to 350°F and monitor closely. The key is balance: crisp edges with a chewy center, not a dry, crumbly mess.
Chocolate Chips Stay Hard
For perfectly melted chocolate centers, ensure your chocolate chips are high-quality (I recommend Ghirardelli) and that you're baking at the correct temperature. The two-stage baking method is crucial—first bake until edges are golden, then let cookies rest on the sheet for 5 minutes before transferring.
If chips still aren't melting, try adding 1 tablespoon granulated sugar to the dough—it helps conduct heat more evenly. For extra indulgence, sprinkle a pinch of flaky sea salt on warm cookies to enhance the chocolate flavor.
Cookies Burn Before Centers Set
Burning edges with undercooked centers usually means your oven is too hot or the cookies are too close together. Always preheat for 15-20 minutes and use an oven thermometer to confirm 375°F.
Space cookies 3 inches apart on baking sheets, and rotate pans halfway through baking if your oven has hot spots. For even cooking, I use light-colored aluminum pans—they reflect heat better than dark pans. If your oven runs hot, reduce temperature to 350°F and bake for 14-16 minutes instead.
Nutrition facts
Frequently asked questions
Why do these cookies need two bakes?
The two-stage baking creates the signature "bomb" effect! The first bake sets the shape and crisps the edges, while the second round melts the chocolate chips into luscious rivers. This technique ensures you get that perfect balance of crunchy exterior with a gooey center—no more hard cookies or undercooked centers.
Can I make these cookies without a stand mixer?
Use a sturdy bowl and hand mixer (or even a wooden spoon) to cream the butter and sugars. Mix for 5-7 minutes until light and fluffy, scraping down the sides frequently. The key is patience—keep mixing until the mixture looks like whipped cream. For the dough, fold in ingredients gently by hand using a spatula.
How do I store leftover cookies?
Store cookies in an airtight container at room temperature for up to 5 days. For longer storage, freeze portions for 3 months. Thaw at room temperature for 1-2 hours or warm for 5 seconds in the microwave to restore that gooey center. Pro tip: Keep them on a wire rack in the container to prevent sogginess.
What if my dough is too sticky?
Sticky dough usually means the flour needs more moisture. Add 1 teaspoon milk at a time until it's workable but not wet. If it's still too sticky after adding 1 tablespoon total, chill for 30 extra minutes to firm up. Never add extra flour—this makes cookies tough. The dough should hold its shape when scooped but still be soft enough to press gently.
Can I add mix-ins like nuts or caramel?
Yes! Swap half the chocolate chips for walnuts, pecans, or caramel bits (about ½ cup total). For extra indulgence, fold in ¼ cup caramelized sugar after the first bake. Keep total mix-ins at 2 cups to maintain texture. Just press them into the dough so they don't all rise to the top during baking.