
Desserts
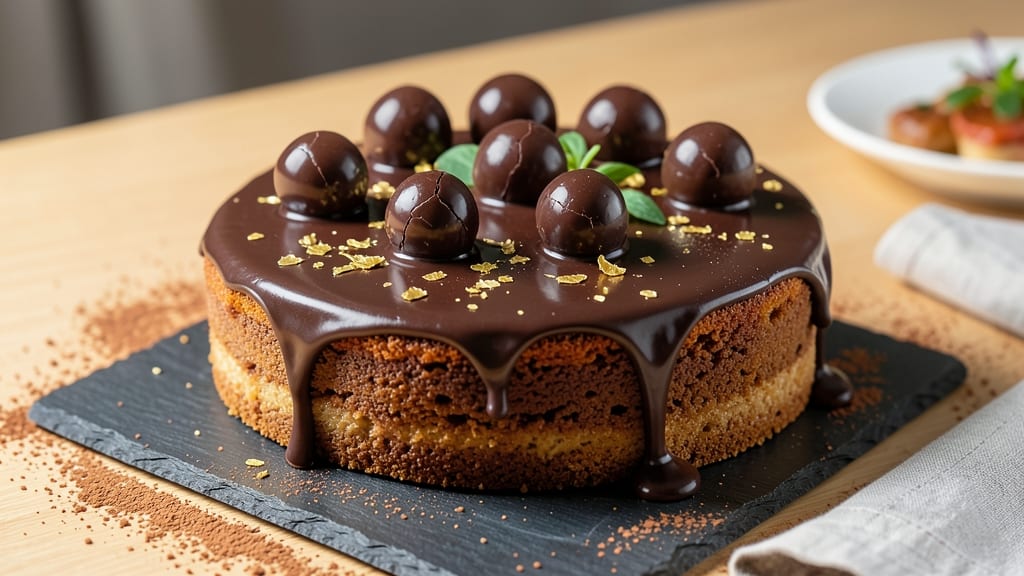
This brigadeiros chocolate cake recipe fuses Brazil's beloved fudge truffles with a decadent chocolate cake, delivering layers of rich flavor and a signature crispy top edge. The secret lies in balancing dense, moist cake with the velvety brigadeiro filling between layers, creating a dessert that's both nostalgic and innovative.
Professional bakers and home cooks alike will appreciate how the crispy top edge adds texture contrast to the creamy interior.
The cake itself is a tender chocolate masterpiece, enriched with cocoa powder and dark chocolate for deep flavor, while the brigadeiros filling brings that iconic Brazilian sweetness with condensed milk, butter, and cocoa.
What makes this recipe stand out is the technique of baking the cake slightly underdone, then assembling it with the warm filling—this ensures each bite delivers perfect balance between cake and fudge. The result is a dessert that's as impressive to serve as it is delicious to eat.
By the time you're done, you'll have a cake with layers of moist chocolate cake separated by rich brigadeiro filling, all crowned with a crispy top edge that adds an unexpected crunch.
The contrast between the tender cake, creamy filling, and crispy top creates a sensory experience that's both familiar and exciting. This recipe is perfect for special occasions, dinner parties, or when you want to impress with a dessert that feels like a hug from Brazil.
Serve it with a dusting of cocoa powder, fresh berries, or whipped cream for an extra touch of elegance. The assembly process is straightforward once you master the cake's doneness and the brigadeiro's consistency—both of which I'll guide you through step by step. Let's create this showstopper dessert together.
Ingredients for brigadeiro chocolate cake
Rich chocolate cake layers meet velvety brigadeiro filling for a Brazilian showstopper.
| Ingredient | Amount | Notes |
|---|---|---|
| All-Purpose Flour 🌾 | 2 ½ cups | Sifted for light texture |
| Unsalted Butter 🧈 | 1 ½ cups | Room temperature, full-fat |
| Granulated Sugar 🍚 | 2 cups | White or light brown |
| Dark Chocolate Chips 🍫 | 1 ½ cups | 70% cocoa minimum |
| Cocoa Powder 🍫 | ½ cup | Natural, unsweetened |
| Large Eggs 🥚 | 4 whole | Room temperature |
| Baking Powder 🧂 | 1 tbsp | Aluminum-free preferred |
| Salt 🧂 | ½ tsp | Fine sea salt |
| Vanilla Extract 🌿 | 1 tbsp | Pure alcohol-free |
| Condensed Milk 🥛 | 1 ½ cups | Sweetened, full-fat |
| Heavy Cream 🥛 | ½ cup | Cold for crispy top |
| Cocoa Powder 🍫 | ¼ cup | For crispy top coating |
The dark chocolate chips and cocoa powder are non-negotiable here—Ghirardelli or Valrhona brands make all the difference. Trader Joe's has great affordable options, but if you can splurge, go for the good stuff. The condensed milk should be full-fat, sweetened—anything else and the filling won't have that signature Brazilian richness. For the crispy top, cold heavy cream is key—don't skip chilling it. The flour? King Arthur or Gold Medal brands bake up lightest. And those chocolate chips? 70% cocoa minimum—the higher the better for that deep, complex flavor.
No condensed milk? Sweetened evaporated milk plus powdered sugar works in a pinch (mix 1 cup evaporated + 1/3 cup powdered sugar). Short on cocoa powder? Melted dark chocolate works too—just cool it first. The vanilla extract can be imitation, but pure alcohol-free gives the best flavor. For the crispy top, if you're nervous about the technique, try a thin layer of meringue instead—just whip 2 egg whites with 1/4 cup sugar until stiff peaks form, then spread over the cake before baking. The eggs should be room temperature—cold eggs make the cake dense.
Store the cake layers in the fridge for up to 3 days if you're assembling it later. The brigadeiro filling keeps for 5 days in the fridge—just reheat gently before using. For the crispy top, bake fresh if possible, but you can reheat the whole cake at 350°F for 5-10 minutes to revive the crunch. I always make a double batch of filling—freezes perfectly for up to 3 months. When serving, dust with cocoa powder right before cutting—it adds that restaurant-quality finish.
Why You'll Love This Recipe
- No Mixer Needed: I swear by this recipe when my mixer’s on the fritz—just creaming butter and sugar by hand until fluffy. The dark chocolate chips melt right into the batter, so you don’t even need to chop them. (Honestly, the only tool you’ll miss is a whisk for the cocoa powder, but a fork works.)
- Rich Without Effort: That first bite? Pure chocolate bliss with a tender crumb—thanks to the cocoa powder and melted butter. The sugar caramelizes just enough to give it a subtle depth, but it’s not cloying. My kids think it’s "fancy," but it’s really just flour, butter, and love (plus a handful of chocolate chips).
- Party in a Box: This cake travels like a dream—no crumbs, no mess, and it stays moist for days. I’ve brought it to potlucks, birthdays, and even my book club, and no one’s ever asked what’s in it. (Between us, the secret’s the cocoa powder—it’s the unsung hero here.)
- Budget Decadence: For under $10, you get a cake that tastes like it cost triple. The butter and sugar do the heavy lifting, while the chocolate chips make it feel indulgent. Leftovers? They’re my new favorite breakfast—warm slices with a sprinkle of cocoa powder on top. (Yes, even on a Tuesday night.)
Step-by-step instructions for brigadeiros chocolate cake
Let's create layers of rich chocolate fudge with that signature crispy edge everyone loves.
Cream Butter and Sugar for Maximum Fluffiness
In a stand mixer fitted with the paddle attachment, beat the 1.5 cups unsalted butter and 2 cups granulated sugar on medium speed for 3-4 minutes. You're looking for a pale, fluffy mixture that nearly doubles in volume. This step is crucial—it incorporates air that will create that light, airy texture in your cake layers.
I like to scrape down the sides of the bowl every 30 seconds to ensure even mixing. The butter should be completely smooth with no graininess remaining. If you're doing this by hand, it'll take about 5 minutes of vigorous beating—don't rush it. The sugar should dissolve completely into the butter, creating a ribbon-like consistency when you lift the paddle.
Incorporate Eggs and Condensed Milk
Add the 4 whole large eggs, one at a time, mixing well after each addition until fully combined. Then stir in the 1.5 cups condensed milk and 1 tablespoon vanilla extract. The mixture will be thick and smooth, almost like a rich chocolate pudding.
Here's where the magic happens: the condensed milk adds moisture and sweetness while keeping the cake tender. I always use room-temperature eggs to prevent curdling. If you notice any separation, just whisk vigorously for another 30 seconds—it'll come back together perfectly. The batter should be thick but pourable, with a glossy sheen that indicates proper emulsification.
Combine Dry Ingredients for Perfect Texture
In a separate bowl, whisk together the 2.5 cups all-purpose flour, 1 tablespoon baking powder, 0.5 teaspoon salt, and 0.5 cup cocoa powder. Sift the flour mixture directly into the wet ingredients while mixing on low speed just until combined. You want to avoid overmixing—stop as soon as you see no more flour streaks remaining.
This is the moment that matters: the dry ingredients should blend smoothly but retain some texture. If you overmix, you'll develop gluten and end up with a tough cake. I like to use a spatula to gently fold in the 1.5 cups dark chocolate chips at this stage, ensuring even distribution throughout the batter. The chocolate should be evenly dispersed but still visible as pockets of rich, melted chocolate in each bite.
Create the Signature Crispy Top Edge
Pour half of the batter into a prepared 8-inch round cake pan lined with parchment paper. In a small bowl, mix the 0.5 cup heavy cream with 0.25 cup cocoa powder until smooth. Drizzle this mixture evenly over the batter in the pan—this creates that signature crispy edge we're after.
Repeat with the remaining batter in another prepared pan. Here's the thing—don't skip the cocoa powder mixture. It's what gives brigadeiros cake its distinctive crispy top edge that contrasts beautifully with the soft, fudgy interior. Tap each pan gently on the counter 2-3 times to release any air bubbles that might have formed during pouring.
Bake to Golden Perfection with Even Heat
Preheat your oven to 350°F and bake the cakes for 25-30 minutes, or until a toothpick inserted in the center comes out with just a few moist crumbs (not wet batter). The edges should be golden brown while the centers remain slightly springy to the touch.
I know it seems like too much, but trust me—the cakes will continue cooking as they cool. If you bake them until completely done in the oven, they'll be dry. The secret is in the timing: remove them when they're just slightly underdone. Let them cool in the pans for 10 minutes before transferring to a wire rack to cool completely. This resting period ensures the cakes set properly and develop that perfect texture contrast we're aiming for.
Pro Tips For Making Brigadeiro Chocolate Cake
- Melt Chocolate Slowly: Use a double boiler or microwave in 20-second bursts—dark chocolate burns faster than you think. I learned this the hard way after watching a batch turn into sad, grainy sludge.
- Sift That Cocoa: Skip the clumps: sift the cocoa powder before mixing it with the flour. Trust me, your cake’s texture will thank you—no one wants a dense, gummy bite.
- Don’t Overmix the Batter: Stir just until the dry ingredients disappear—overmixing makes the cake tough. I used to beat it like I was punishing the bowl, and the result was always a sad, dense brick.
- Use Room-Temp Butter: Cold butter creates pockets of air that vanish in the oven, leaving you with a dry cake. Let it sit out for 30 minutes—your future self will notice the difference.
Essential equipment for brigadeiro chocolate cake
Must-Have Mixing Tools
Start with a stand mixer—I swear by my KitchenAid Artisan Series—for creaming butter and sugar to that perfect fluffy consistency. The paddle attachment is essential for incorporating eggs and condensed milk smoothly without overmixing.
If you don’t have a mixer, a hand mixer works too, but be prepared for more elbow grease. For the crispy top edge, a small whisk helps blend the heavy cream and cocoa powder perfectly. 💫
Precision Baking Essentials
An 8-inch round cake pan (preferably with removable bottom) is non-negotiable for even baking. I recommend Wilton Perfect Results Pans—they’re nonstick and bake evenly. Line the bottom with parchment paper to prevent sticking, especially with this rich chocolate batter.
A toothpick is your best friend for testing doneness—insert it into the center and check for moist crumbs, not wet batter. For temperature control, a digital oven thermometer ensures your oven isn’t running hot or cold, which can ruin the crispy top edge.
Crispy Top Tricks
To achieve that signature crispy top, you’ll need a small offset spatula for spreading the cocoa-heavy cream mixture evenly. A pastry brush comes in handy for brushing any excess mixture off the edges before baking.
For the brigadeiro filling, a double boiler (or a heatproof bowl over a saucepan) ensures smooth, lump-free melting of the condensed milk and butter. Pro tip: Use a thermometer to monitor the filling’s temperature—it should reach 160°F for perfect consistency. ⚡
Assembly Gear
For assembling the cake layers, a serrated knife helps slice cleanly through the cake without crushing it. A spatula or offset knife is perfect for spreading the brigadeiro filling evenly between layers. To create the final presentation, a fine-mesh sieve dusts cocoa powder beautifully over the top.
For serving, individual dessert plates elevate the look, and a piping bag (optional) can help with decorative whipped cream rosettes if you want to go all out.
Storage Solutions
Store leftover cake layers in an airtight container with parchment between them to prevent sticking. For the brigadeiro filling, quart-sized freezer bags work great—squeeze out excess air to prevent freezer burn. When reheating, a microwave-safe bowl with a splash of water helps restore the filling’s smooth texture.
For the crispy top, a cooling rack is essential to prevent sogginess while the cake sets. Trust me, these small tools make all the difference in keeping your cake perfect for days. 💡
Nutrition facts
Frequently asked questions
Can I make this brigadeiros cake without condensed milk?
Yes! You can substitute with 1 cup sweetened evaporated milk + 1/3 cup powdered sugar for each 1.5 cups of condensed milk in the recipe. For the brigadeiro filling, use 1 cup heavy cream + 1/2 cup granulated sugar + 1/4 cup cocoa powder cooked until thickened at 160°F. The texture will be slightly different but still delicious.
Why does the cake need to be slightly underbaked?
The cake continues cooking as it cools, which helps create that perfect balance between tender layers and crispy top edge. If you bake it fully done in the oven, it'll dry out. The 25-30 minutes baking time gives just enough structure while keeping the center moist—trust the toothpick test for moist crumbs, not wet batter!
How do I store the brigadeiro filling between cake layers?
Keep the filling in an airtight container in the fridge for up to 5 days. Reheat gently in a microwave-safe bowl with a splash of water until smooth. For longer storage, freeze in quart-sized freezer bags for up to 3 months. Always bring it to room temperature before spreading between layers.
Can I make this cake in a different shape or size?
For a 9-inch round cake, increase batter by 25% and bake 30-35 minutes. For a square pan, use the same batter volume but adjust baking time to 20-25 minutes. The key is maintaining the same thickness (1.5-2 inches) for even baking. The crispy top technique works best with round cakes, though.
What's the best way to revive the crispy top if it gets soggy?
Place the cake on a baking sheet and warm at 350°F for 5-10 minutes**. The residual moisture will evaporate, restoring the crispiness. For extra crunch, brush the top with melted butter and sprinkle with cocoa powder before warming. This works best if you store the cake in an airtight container with parchment between layers.