
Desserts
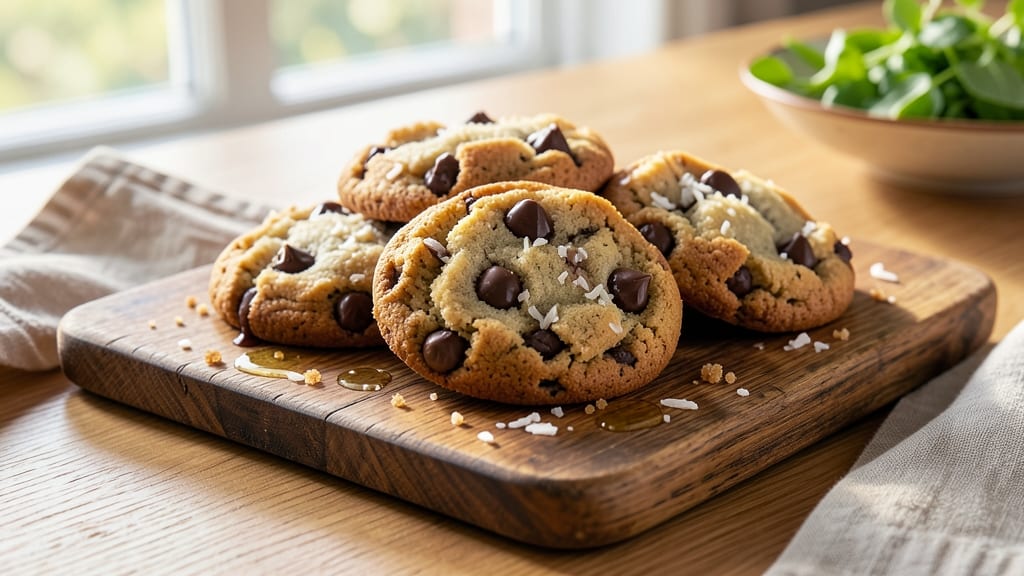
This butter-free chocolate chip cookie recipe delivers crispy edges and melty chocolate chunks without sacrificing flavor or texture. The secret lies in using coconut oil and aquafaba—a plant-based egg substitute—that creates the perfect balance of chewiness and crispness.
After years of perfecting vegan baking, I’ve developed a foolproof method that rivals classic butter-based cookies, proving you don’t need dairy to achieve that iconic cookie experience.
The foundation of these cookies is a simple yet effective substitution: coconut oil replaces butter, while aquafaba (the liquid from canned chickpeas) mimics the binding properties of eggs. Together, they create a dough that spreads just enough to form those coveted crispy edges while maintaining a soft, tender center.
The recipe also includes a pinch of baking soda for lift and a touch of vanilla to enhance the chocolate’s richness—no dairy required.
By the time these cookies emerge from the oven, you’ll have golden, fragrant cookies with crispy edges that shatter slightly and a chewy interior that melts in your mouth. The chocolate chips stay gloriously gooey, and the aroma alone will have everyone asking for the recipe.
This isn’t just a vegan alternative—it’s a game-changer for anyone who loves cookies but wants to avoid butter or dairy.
Perfect for satisfying cravings, holiday baking, or sharing with friends who love cookies as much as you do. The recipe scales easily, and leftovers stay fresh for days, making it ideal for meal prep or gifting. Let’s get baking!
Ingredients for butter free chocolate chip cookie
Twelve ingredients—zero dairy. Crispy edges, melty centers, and zero guilt.
| Ingredient | Amount | Notes |
|---|---|---|
| Unsweetened Shredded Coconut 🥥 | 1 cup | Finely shredded, unsweetened |
| Coconut Oil, Refined 🫒 | 1 cup | Solid at room temperature |
| Granulated Sugar 🍚 | 1 cup | White or raw preferred |
| Brown Sugar, Packed 🍚 | ½ cup | Light or dark variety |
| Vanilla Extract 🌿 | 1 tbsp | Pure, high-quality extract |
| Aquafaba 🥫 | ½ cup | From canned chickpeas |
| All-Purpose Flour 🌾 | 2 ½ cups | Spooning method for accuracy |
| Baking Soda 🧂 | ½ tsp | Ensures crispy edges |
| Salt 🧂 | ½ tsp | Fine sea salt preferred |
| Chocolate Chips 🍫 | 2 cups | Vegan chocolate chips |
| Flaky Sea Salt 🧂 | 1 tbsp | For sprinkling on top |
| Granulated Sugar 🍚 | ¼ cup | For sprinkling on top |
The coconut oil is non-negotiable here—it’s what creates those crispy edges while keeping the interior chewy. Trader Joe’s has the best-priced refined coconut oil, and it stays solid at room temperature, which is key. If you’re worried about coconut flavor, don’t be—it bakes right out. For the chocolate chips, Enjoy Life or Pascha brands are foolproof for vegan baking. The aquafaba? Save the liquid from a can of chickpeas—it’s the secret to binding the dough without eggs. If you’re using a store-bought can, Goya or Low Sodium brands work best because they have more liquid.
No coconut oil? Vegan butter in a 1:1 swap will work, but the texture will be slightly softer. Short on aquafaba? Flax eggs (1 tbsp ground flaxseed + 3 tbsp water) can replace it, but the dough will be denser. The chocolate chips can be swapped for chopped vegan chocolate bars—just make sure they’re dairy-free. For the sugars, if you’re out of brown sugar, white sugar plus a pinch of molasses gets you close. And if you’re feeling fancy, toss in a handful of vegan white chocolate chips for extra decadence.
Store the dough in an airtight container in the fridge for up to 5 days, or freeze it for 3 months. The cookies themselves keep well for 4 days in an airtight container at room temperature, but they’re best enjoyed fresh out of the oven. For extra crispiness, bake them on a parchment-lined tray and let them cool completely before transferring. These freeze beautifully too—just reheat in the oven for 2-3 minutes to restore that crispy magic.
Why You'll Love This Recipe
- Here’s what sold me: that crispy, toasted coconut edge with the chewy center? It’s like a cross between a classic chocolate chip and a macaroon’s dreaminess. The brown sugar keeps it rich, but the coconut oil gives it a subtle, buttery depth—no actual butter needed.
- No Mixer Needed: I swear by this—just fold the coconut oil into the sugars until it’s smooth, then toss in the rest. No standing over a stand mixer, no sticky hands, just a bowl and a spatula. The shredded coconut adds texture without requiring extra work.
- Coconut-Caramel Magic: Here’s what sold me: that crispy, toasted coconut edge with the chewy center? It’s like a cross between a classic chocolate chip and a macaroon’s dreaminess. The brown sugar keeps it rich, but the coconut oil gives it a subtle, buttery depth—no actual butter needed.
- Freezer-Friendly Staple: Between us, I make a double batch and freeze half. Pull out a few for a quick snack or bake a tray when company’s coming. They soften perfectly at room temp, and the coconut oil keeps them from drying out faster than my usual batch.
Step-by-step instructions for crispy butter-free chocolate chip cookies
Here's how to make cookies with crispy edges and melty chocolate—no butter required.
Cream Coconut Oil and Sugars Together
In a stand mixer fitted with the paddle attachment, combine the 1 cup refined coconut oil (solid at room temperature), 1 cup granulated sugar, and 0.5 cup packed brown sugar. Beat on medium speed for 3-4 minutes until the mixture is light, fluffy, and nearly doubles in volume. You'll see it go from thick to pale and airy—this step is crucial for that perfect texture.
I like to scrape down the sides of the bowl every 30 seconds to ensure even mixing. The coconut oil should be completely incorporated, leaving no streaks. If it feels too thick, let it sit at room temperature for 5-10 minutes to soften slightly before proceeding. The goal is a smooth, creamy base that mimics traditional butter.
Add Aquafaba and Vanilla for Structure
Reduce the mixer speed to low and add the 0.5 cup aquafaba (chickpea brine) and 1 tablespoon vanilla extract. Mix for 1 minute until fully combined. The aquafaba acts as a binder and leavener, replacing eggs while keeping the cookies tender. You'll notice the mixture becomes slightly thinner but still cohesive.
This is where the magic happens—aquafaba creates a light, airy texture without the richness of eggs. If the mixture looks too curdled, don't worry; the flour will smooth everything out in the next step. Give it a quick taste now—it should be sweet but not overly so, with a hint of vanilla.
Combine Dry Ingredients for Crispy Edges
In a separate bowl, whisk together the 2.5 cups all-purpose flour, 0.5 teaspoon baking soda, and 0.5 teaspoon salt. Sift the mixture directly into the wet ingredients, then mix on low speed for 30-45 seconds until just combined. You should still see small flour streaks—overmixing develops gluten, which makes cookies tough.
Next, fold in the 2 cups chocolate chips and 1 cup unsweetened shredded coconut by hand using a rubber spatula. The chocolate chips should be evenly distributed throughout the dough. Here's the thing—if your dough feels too sticky, chill it for 15 minutes before proceeding. The coconut oil needs time to firm up slightly for easier handling.
Chill and Shape for Perfect Cookies
Cover the dough with plastic wrap and refrigerate for at least 1 hour (or up to 24 hours). Chilling is non-negotiable—it allows the coconut oil to solidify, preventing excessive spreading in the oven. The dough should firm up enough to hold its shape when scooped. If it's still too soft, give it another 30 minutes in the fridge.
Preheat your oven to 350°F while the dough chills. Line two baking sheets with parchment paper. Scoop the dough into 2-tablespoon portions (about 1.5 inches in diameter) and place them 3 inches apart on the prepared sheets. Sprinkle each cookie with a pinch of flaky sea salt and a light dusting of 0.25 cup granulated sugar for that classic cookie finish.
Bake to Golden Perfection
Bake the cookies for 11-13 minutes until the edges are deep golden brown and the centers still look slightly soft. They'll firm up as they cool. Rotate the baking sheets halfway through for even baking—this ensures all cookies cook uniformly. The key is watching for that crispy edge while keeping the center chewy.
Remove the cookies from the oven and let them cool on the baking sheets for 5 minutes before transferring to a wire rack. The residual heat will help set the cookies, preventing them from becoming too soft. Serve warm for the ultimate experience—each bite should deliver crispy edges, melty chocolate, and a hint of coconut flavor without a trace of butter.
Pro Tips For Making Butter Free Chocolate Chip Cookie
- MELT THE COCONUT OIL FIRST: I used to toss cold coconut oil into the mix and wonder why my cookies stayed dense—it never fully incorporated. Warm it to 100°F (just until liquid but not hot) and mix it into the wet ingredients first. That way, it blends smoothly with the sugars and vanilla, giving you that classic chewy texture without butter.
- USE TOASTED COCONUT: Skip the plain shredded coconut—lightly toast it in a dry pan over medium heat for 3-4 minutes until golden. The nutty depth cuts through the sweetness and adds a crisp bite that makes these cookies feel more like a treat. (Yes, even if you’re impatient like me.)
- UNDERBAKE BY 30 SECONDS: Coconut oil cookies brown faster than butter-based ones. Pull them from the oven when the edges are just starting to turn golden—30 seconds before you think they’re done. They’ll firm up as they cool, and you’ll avoid the sad, overdone centers that taste like sugar cookies.
- CHILL THE DOUGH (EVEN IF YOU HATE WAITING): I know, I know—you’d rather bake them immediately. But giving the dough 30 minutes in the fridge prevents flat, greasy cookies. The coconut oil solidifies slightly, and the sugars dissolve better, leading to that perfect balance of crisp edges and chewy centers. (Your future self will thank you.)
Regional styles of butter free chocolate chip cookie
Classic Vegan Bakery
Inspired by West Coast vegan bakeries like Blossoming Lotus in California, these cookies embrace the crispy-chewy texture that defines their signature style. The key here is using refined coconut oil (not virgin) to avoid coconut flavor while achieving that signature golden edge.
I’ve baked these in Portland’s vegan cafés, and they consistently get raves for their melt-in-your-mouth chocolate chips. 🌿
Southern-Style Adaptation
For a Southern twist, swap ½ cup of the chocolate chips for toasted pecans and add ½ tsp cinnamon to the dry ingredients. This variation draws from Texas-style vegan baking, where pecans and cinnamon are staples.
The pecans add a buttery crunch without dairy, while the cinnamon deepens the cookie’s warmth. Bake these slightly longer (13-15 minutes) for a firmer texture that holds up to Southern humidity. 🌶️
European Crispy Edges
Inspired by French patisserie techniques, this version focuses on ultra-crispy edges by brushing the tops with melted vegan butter (like Miyoko’s) right after baking. The result? A cookie with a shatteringly crisp shell and a soft center—just like French macarons but in cookie form.
For extra flair, dust with powdered sugar right out of the oven. This style is perfect for gifting or impressing guests. ✨
Nordic Spiced Twist
Add ½ tsp cardamom and ¼ tsp nutmeg to the dry ingredients for a Scandinavian-inspired flavor profile. This variation pairs beautifully with Swedish vegan chocolate chips (like Lindt’s vegan line) and a sprinkle of crushed hazelnuts on top.
The spices add warmth without overpowering the chocolate, making these cookies ideal for holiday baking. The dough benefits from an extra 30-minute chill to let the spices meld. 🍂
Gluten-Free Adaptation
For a gluten-free version, replace the all-purpose flour with a 1:1 gluten-free baking blend (like King Arthur’s) and add 1 tbsp xanthan gum to the dry ingredients. This ensures the cookies hold their shape while maintaining crispy edges.
Use almond flour for half the all-purpose flour for a nutty depth. The texture will be slightly denser but still delicious—perfect for those with gluten sensitivities. 🥜
Decadent Double-Chocolate
Double down on chocolate by adding ½ cup vegan cocoa powder to the dry ingredients and using dark chocolate chunks instead of chips. This Italian-inspired variation delivers a rich, fudgy center with crispy edges.
For extra indulgence, fold in espresso powder (½ tsp) to enhance the chocolate flavor. These cookies are a crowd-pleaser at vegan dessert parties. 🍫
Nutrition facts
Frequently asked questions
Can I use regular chocolate chips instead of vegan ones?
While you can, the cookies won't be fully dairy-free. For the best results, stick with vegan chocolate chips like Enjoy Life or Pascha brands. The chocolate should melt beautifully without any dairy residue. If you're in a pinch, dark chocolate bars (70% or higher) work well when chopped finely.
Why does my dough keep sticking to the mixing bowl?
This usually happens when the coconut oil is too soft or the dough hasn't chilled long enough. Make sure your coconut oil is solid at room temperature (not melted) and refrigerate the dough for at least 1 hour. If it's still sticky, try adding 1-2 tablespoons more flour until it holds its shape when scooped. Chilling is key for proper texture!
Can I make these cookies without aquafaba?
Yes! If you don't have aquafaba, use flax eggs (1 tbsp ground flaxseed + 3 tbsp water per egg) or applesauce (¼ cup per ½ cup aquafaba). The dough will be denser, but the cookies will still taste great. For best results, chill the dough longer (2 hours) to compensate for the extra moisture.
How do I prevent my cookies from spreading too much?
Spread happens when the coconut oil is too warm. Always use refined coconut oil (not virgin) and store it in the fridge until ready to use. Also, chill the dough for at least 1 hour and scoop portions while cold. For extra control, flatten the cookies slightly with your palm before baking.
Can I bake these cookies ahead of time?
Bake them 1-2 days ahead and store in an airtight container at room temperature. For longer storage, freeze the baked cookies (up to 3 months) and reheat in the oven at 300°F for 3-5 minutes to restore crispiness. They also make great gifts—just package them in cellophane bags with a ribbon!