
Beverages
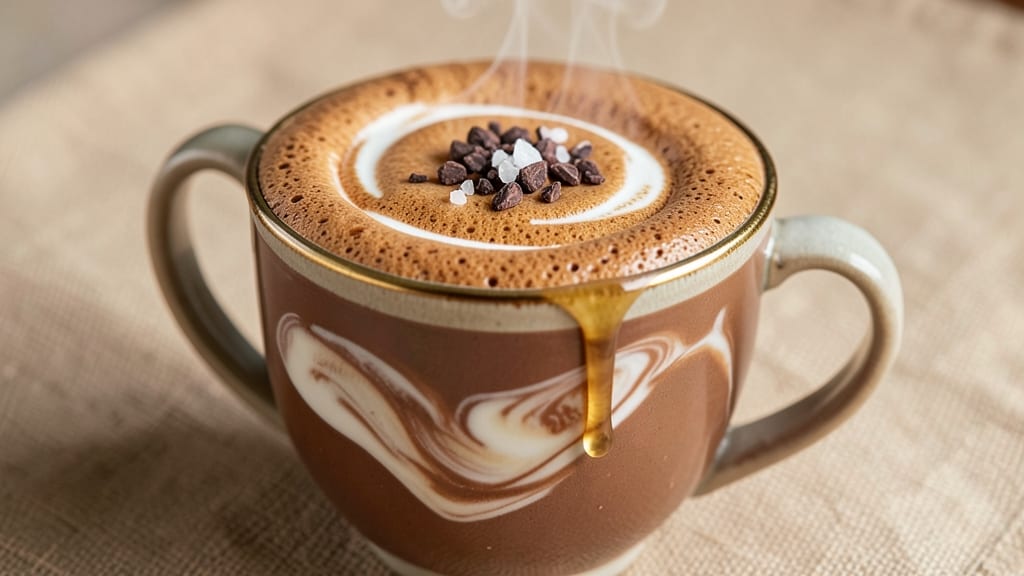
This cacao bliss hot chocolate transforms simple ingredients into a velvety, dreamy drink that rivals gourmet café versions. 💛 The secret lies in the perfect balance of rich cacao powder, velvety plant-based milk, and a touch of sweetness that creates a smooth, comforting texture without any dairy.
I developed this recipe after years of experimenting with vegan hot chocolate—finally achieving that luxurious mouthfeel and deep chocolate flavor everyone craves.
The magic happens when you whisk the hot milk into melted cacao butter and powder, creating those signature swirls that make every sip feel indulgent.
This version skips heavy cream while still delivering a rich, creamy finish by using coconut cream for topping and a hint of vanilla to enhance the chocolate's natural depth. The result? A hot chocolate so satisfying, it becomes your new daily ritual.
What sets this apart is how easily it comes together—just 5 minutes of active prep, then simmering while you enjoy the aroma. The optional whipped coconut cream adds a cloud-like texture, while a sprinkle of cinnamon or sea salt takes it to restaurant-quality levels.
Perfect for cozy nights, holiday gatherings, or whenever you need a moment of pure comfort.
Serve with vegan marshmallows, chocolate shavings, or a dusting of cacao powder for extra flair. The best part? This recipe scales perfectly—make a single serving or a pitcher for sharing. Let's create your new favorite hot chocolate experience.
Ingredients for cacao bliss hot chocolate
Velvety cacao, coconut cream, and a whisper of vanilla create this dreamy hot chocolate experience—rich without dairy!
| Ingredient | Amount | Notes |
|---|---|---|
| Unsweetened Cacao Powder 🍫 | ½ cup | High-quality Dutch-processed preferred |
| Cacao Butter 🍫 | ¼ cup | Melted for velvety texture |
| Full-Fat Coconut Milk 🥥 | 2 cups | Canned, for creamy base |
| Vanilla Extract 🌿 | 1 tsp | Pure Madagascar preferred |
| Maple Syrup 🍁 | ¼ cup | Grade B for rich flavor |
| Pinch Sea Salt 🧂 | ⅛ tsp | Fine grain for balance |
| Cinnamon Sticks 🌿 | 2 whole | For simmering aroma |
| Coconut Cream 🥥 | ½ cup | Chilled for whipping |
| Vegan Marshmallows 🍫 | ¼ cup | Optional for topping |
| Cacao Nibs 🍫 | 1 tbsp | For crunchy garnish |
| Coconut Oil 🫒 | 1 tbsp | For melting cacao butter |
The cacao powder and cacao butter are non-negotiable for that luxurious café quality. Navitas Organics or Valrhona cacao powder delivers the deepest flavor, while Now Foods cacao butter melts beautifully. Grab the full-fat canned coconut milk—Thai Kitchen or Goya are my go-tos. The maple syrup should be Grade B for that molasses-like richness, and Wholesome Sweeteners is my preferred brand. Cinnamon sticks infuse aroma better than ground, and if you can't find them, a dash of ground cinnamon works in a pinch.
No cacao butter? Substitute with extra coconut oil—just reduce the coconut milk slightly to maintain balance. Swap maple syrup for agave nectar or date syrup, though maple's caramel notes are ideal. For a lighter version, use light coconut milk but add an extra tablespoon of coconut cream to compensate. The vegan marshmallows? Dandies or House Foods brands melt perfectly, but any dairy-free option works. Pro tip: Toast the cacao nibs in a dry pan for 30 seconds before adding—they develop a nutty aroma that elevates everything.
Store leftover coconut milk in its can in the pantry, and keep the coconut cream in the fridge until ready to whip. The cacao butter solidifies at room temperature, so store it in a cool, dark place for up to 1 year. Once whipped, the coconut cream keeps for 3 days in the fridge—give it a quick blast with a hand mixer before serving. For a single serving, halve everything and use a 6-ounce mug for that perfect café ratio. This recipe doubles easily for gatherings, so make a pitcher and let everyone customize their own.
Why You'll Love This Recipe
- No-Fuss Magic: I swear by this recipe—just melt cacao butter in coconut milk, whisk in cacao powder, and sweeten with maple. No tempering, no fuss, just pure chocolatey satisfaction in under 10 minutes.
- Rich Without Guilt: The full-fat coconut milk makes it velvety, while the cacao butter adds depth (and a hint of nuttiness). Honestly, it’s the kind of drink that makes you forget it’s healthy—until you realize you’re using real cacao, not sugar bombs.
- Double-Duty Drink: Make a big batch and store it in the fridge—perfect for quick reheats or even as a base for smoothies. I’ve handed it to my coffee-loving husband (yes, really) and my picky 10-year-old, and both begged for seconds.
- Budget Luxury: Cacao butter might sound fancy, but a little goes a long way—this recipe costs me pennies per serving compared to store-bought. Plus, the maple syrup keeps it naturally sweet without artificial junk. (Between us, my grocery bill thanks me.)
Step-by-Step instructions for cacao bliss hot chocolate
Transform simple ingredients into luxurious hot chocolate with velvety swirls and whipped cream magic!
🍳 Step 1: Melt the Cacao Base for Silky Texture
In a medium saucepan, combine the 0.5 cup unsweetened cacao powder, 0.25 cup cacao butter, and 1 tbsp coconut oil. Place over medium-low heat and stir constantly with a silicone spatula until the cacao butter and coconut oil melt completely—this should take about 3-4 minutes. You'll see the mixture transform from grainy to smooth and glossy.
Here's the thing—cacao butter needs gentle heat to melt properly. If you rush it, you'll get lumps that ruin the velvety texture. Once fully melted, remove the pan from heat and let it cool slightly for 2 minutes—this prevents the coconut milk from curdling when you add it later.
🥘 Step 2: Infuse the Coconut Milk with Warm Spices
In a separate saucepan, pour the 2 cups full-fat coconut milk and add the 2 whole cinnamon sticks. Bring to a gentle simmer over medium heat—you'll see tiny bubbles form around the edges. Let it simmer for 5-6 minutes until the milk is hot but not boiling, and you can smell that gorgeous cinnamon aroma.
Don't walk away—simmering too hard can break the coconut milk's delicate fat emulsion. The cinnamon sticks will infuse the milk with warmth, creating the perfect aromatic foundation. Once infused, remove the cinnamon sticks and discard them.
🍳 Step 3: Combine and Sweeten the Chocolate Mixture
Return the melted cacao base to medium-low heat and slowly pour in the warm coconut milk while whisking continuously. This gradual addition prevents lumps and ensures a silky emulsion. Stir for 2-3 minutes until the mixture thickens slightly and becomes luxuriously smooth.
Now add the 0.25 cup maple syrup, 1 tsp vanilla extract, and 0.125 tsp sea salt, whisking until fully incorporated. Taste and adjust sweetness if needed—Grade B maple syrup adds depth, but personal preference matters. The mixture should coat the back of a spoon with a glossy, velvety texture.
🥄 Step 4: Create Whipped Cream Swirls for Dramatic Flair
While the hot chocolate cools slightly (to about 160°F), whip the 0.5 cup chilled coconut cream in a separate bowl using an electric mixer until soft peaks form. This should take about 1-2 minutes—don't overwhip or it'll turn buttery.
Here's where the magic happens: Spoon about 2 tablespoons of the whipped coconut cream into each mug. Then carefully pour the hot chocolate over the whipped cream, letting it naturally swirl and create marbled patterns. The contrast of hot and cold creates an incredible texture experience!
🍽️ Step 5: Garnish and Serve with Crunchy Toppings
Top each serving immediately with 1 tablespoon cacao nibs and 1 tablespoon vegan marshmallows (if using). The cacao nibs add a delightful crunch that contrasts perfectly with the creamy texture, while the marshmallows melt slightly from the heat for a nostalgic touch.
Serve while warm—this hot chocolate is best enjoyed immediately when the whipped cream is still holding its shape and the marshmallows are just beginning to soften. Each sip delivers layers of rich cacao, velvety coconut cream, and subtle sweetness with every luxurious swirl!
Pro Tips For Making Cacao Bliss Hot Chocolate
- Melt the Cacao Butter Slowly: I learned this the hard way—dumping cacao butter straight into hot milk makes it seize up like scrambled eggs. Instead, warm the coconut milk to just under a simmer (around 160°F/70°C), then whisk in the cacao butter a spoonful at a time. The butter will melt smoothly and create that velvety texture without clumping.
- Whip the Coconut Milk First: Full-fat coconut milk has a tendency to split when heated, especially with cacao. Before adding anything else, give the can a good shake, then whip the milk vigorously with a fork or whisk for 30 seconds. This breaks up the natural separation and guarantees a creamier final drink every time.
- Skip the Boil: I used to let this mixture boil like regular hot chocolate, but that turns the cacao bitter and makes the coconut milk curdle. Keep the heat at a gentle simmer—just enough to hear tiny bubbles forming at the edges—and remove from heat once the cacao butter is fully melted. The heat’s job is to warm, not to cook.
- Toast the Cacao Powder: This isn’t the prettiest method, but it works: Lightly toast the unsweetened cacao powder in a dry pan over medium heat for 30 seconds, stirring constantly. The aroma deepens instantly, and the flavor becomes richer without any bitterness. Just don’t walk away—it burns faster than you’d think.
Pro cooking tips for this dish
Temperature Control Secrets
Heat is your best friend here, but too much ruins everything. When melting the cacao butter and coconut oil, keep the heat at medium-low—any higher and you'll risk burning the delicate fats.
I use a thermometer to monitor temps: aim for 110-120°F during melting to avoid overheating. For the coconut milk infusion, maintain a gentle simmer—tiny bubbles at the edges mean you're golden. 🌡️
Emulsion Mastery
The magic happens when you combine the melted cacao base with warm coconut milk. Pour the milk slowly while whisking vigorously—this creates a silky emulsion instead of lumps. If you see curdling, immediately reduce heat and whisk like your life depends on it.
The key is patience: let the mixture thicken naturally over 2-3 minutes on low heat.
Whipped Cream Perfection
Chilled coconut cream is non-negotiable for proper whipping. Scoop it directly from the fridge and whip until you see soft peaks—overwhipping turns it buttery and grainy. Pro tip: Use a stand mixer for consistent results, but a hand mixer works in a pinch.
The cream should hold its shape when you lift the whisk, but still be light enough to swirl beautifully. ✨
Swirl Technique
This is where presentation meets science. Spoon 2 tablespoons of whipped cream into each mug first, then pour the hot chocolate slowly at an angle. The heat from the chocolate will partially melt the cream, creating those dreamy marbled patterns.
Work quickly—once poured, the cream starts melting immediately, so keep everything ready before you begin.
Timing Your Toppings
Cacao nibs and marshmallows need perfect timing. Add them just before serving—the nibs should stay crunchy while the marshmallows soften slightly from the heat. For extra drama, toast the nibs for 30 seconds before adding—they develop a nutty aroma that elevates the whole drink.
Keep a small bowl of toppings ready so you can garnish immediately after pouring.
Equipment Upgrades
Invest in a high-quality silicone spatula—it won't scratch your pans and helps create those velvety swirls. A small saucepan (8-10 inches) gives you better control over heat distribution.
For the whipped cream, a chilled metal bowl helps stabilize the fat for better peaks. These small upgrades make a world of difference in texture and presentation. 💡
Nutrition facts
Frequently asked questions
Can I make this recipe without cacao butter?
Yes! Substitute 1 extra tablespoon of coconut oil for the cacao butter, but reduce the coconut milk slightly to 1.75 cups to maintain balance. The texture will be slightly lighter but still rich and creamy. For best results, use high-quality cacao powder to compensate for the missing fat content.
How do I adjust the sweetness for kids?
For younger palates, increase the maple syrup to 0.35 cup and add an extra ½ teaspoon vanilla extract. You can also stir in 1 tablespoon of coconut sugar while the mixture is warm for a caramel-like sweetness. Always taste first—kids' preferences vary widely!
Will this recipe work with almond milk instead of coconut milk?
Not ideally—almond milk lacks the fat needed for proper emulsification and whipped cream. For a dairy-free alternative, use full-fat oat milk or cashew milk (like Silk brand) as a substitute. The texture will be lighter but still delicious. If you must use almond milk, add 1 extra tablespoon of coconut cream to improve richness.
Why did my whipped coconut cream turn grainy?
This happens when the cream isn't chilled enough or is overwhipped. Always use cold coconut cream straight from the fridge and whip just until soft peaks form (1-2 minutes max). For extra insurance, chill your mixing bowl in the freezer for 10 minutes before whipping. If it's already grainy, gently fold in 1 teaspoon of melted coconut oil to restore smoothness.
Can I make this ahead of time?
Yes, but with adjustments! Prepare the hot chocolate base up to Step 3 and store it in an airtight container for 3 days in the fridge. Reheat gently on the stove, stirring constantly until warm. For the whipped cream, make it fresh before serving—it won't hold its texture when reheated. Assemble just before drinking for the best experience.