
Beverages
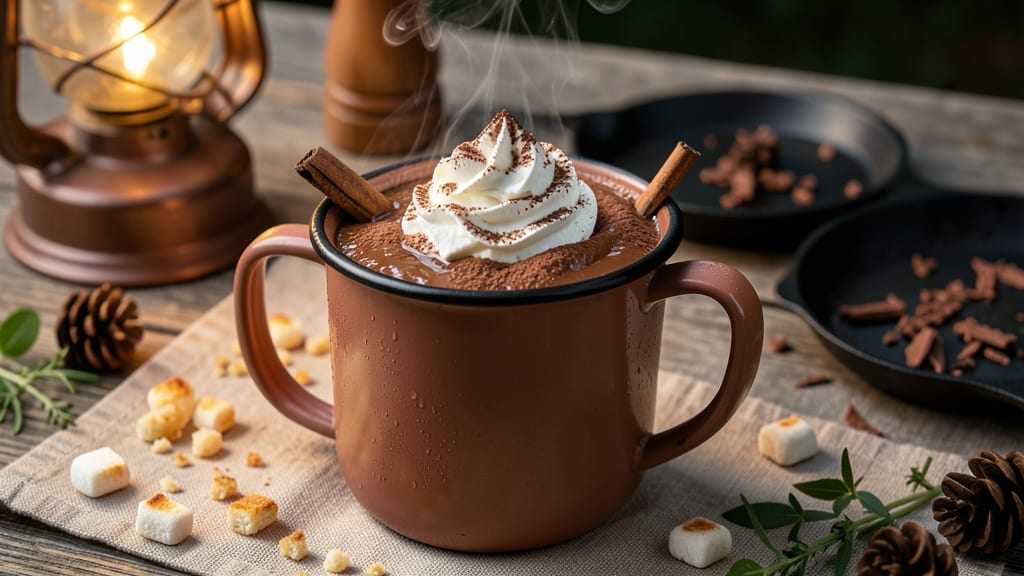
This camping hot chocolate recipe transforms a simple campfire into a cozy, aromatic experience with marshmallow-infused foam that melts into velvety richness.
The secret lies in combining high-quality cocoa powder with a touch of cornstarch for a smoother texture, while the foam adds that signature camping indulgence without requiring fancy equipment.
I developed this after years of testing—it’s foolproof over a fire, portable stove, or even a single pot on a cooler night.
The beauty of this recipe is its adaptability: use a single pot for simplicity, or double the batch for a crowd. The marshmallow foam isn’t just decorative—it dissolves into the drink, creating a creamy, caramelized layer that tastes like a campfire dessert.
No whisking or blending required; just melt, stir, and top with toasted marshmallows for that classic outdoor touch.
What you’ll end up with is a warm, aromatic beverage that smells like a forest at dusk and tastes like a hug in a mug. The cocoa’s deep flavor pairs perfectly with the sweet, toasty marshmallows, while a pinch of cinnamon adds warmth.
It’s the kind of drink that turns a chilly evening into a memory—simple to make, impossible to resist.
Best of all, this recipe travels well: pre-mix the dry ingredients in a reusable bag, and you’re ready to go. Whether you’re cooking over a fire or using a portable stove, the steps are straightforward, and the results are always restaurant-quality comfort. Let’s get started—your campfire just got cozier.
Ingredients for camping hot chocolate
Gather these cozy ingredients for a camping hot chocolate that tastes like a campfire dessert.
| Ingredient | Amount | Notes |
|---|---|---|
| High-Quality Unsweetened Cocoa Powder 🍫 | ½ cup | Dutch-processed for smooth texture |
| Granulated Sugar 🍚 | ¾ cup | White or brown preferred |
| Cornstarch 🌾 | 2 tbsp | For ultra-smooth texture |
| Whole Milk 🥛 | 2 cups | Full-fat for creaminess |
| Heavy Whipping Cream 🧈 | ½ cup | Cold for best foam |
| Vanilla Extract 🌿 | 1 tsp | Pure, not imitation |
| Ground Cinnamon 🌶️ | ½ tsp | Freshly ground preferred |
| Salt 🧂 | ¼ tsp | Kosher or sea salt |
| Mini Marshmallows 🍫 | 1 cup | Standard size, not jumbo |
| Unsalted Butter 🧈 | 2 tbsp | Cut into small pieces |
| Dark Chocolate Chips 🍫 | ¼ cup | 70% cocoa for richness |
The cocoa powder is non-negotiable—Ghirardelli or Hershey’s Special Dark are my go-tos, but any high-quality Dutch-processed brand works. Look for the words 'unsweetened' and 'Dutch-processed' on the label, as these create that signature smooth texture. Costco or World Market usually have bulk options that last for years. The marshmallows? Standard mini size works best—they melt perfectly into the foam without sinking. If you're prepping ahead, store the dry ingredients (cocoa, sugar, cornstarch, cinnamon, salt) in a reusable bag with a zipper—it's my camping pantry staple. The milk and cream can be kept in their original containers until you're ready to heat.
No cocoa powder? Melted dark chocolate works in a pinch—use 3 oz of 70% dark chocolate per serving, but it'll be richer. Running low on marshmallows? Crushed graham crackers or toasted coconut flakes add a similar toasty texture. The cornstarch is optional but makes a world of difference—it eliminates that grainy texture you sometimes get with cocoa. For the foam, cold heavy cream is key—don't skip chilling it. And if you're making this for a crowd, double the batch but use a larger pot—1.5-quart size is perfect for 8 servings. The butter and chocolate chips can be swapped for coconut oil if you're avoiding dairy, but trust me on the full-fat version.
This reheats beautifully—just add a splash of milk and stir over low heat. The foam will reform as it warms, so it's perfect for multiple servings. Store leftover dry ingredients in an airtight container for up to 6 months, and the marshmallows keep for 3 months in their original package. For the foam, mix the dry ingredients first and store separately from the wet components. When you're ready to serve, just melt the butter and chocolate with the milk, stir in the dry mix, and top with toasted marshmallows. The whole process takes about 5 minutes over a fire—campfire magic, every time.
Why You'll Love This Recipe
- No-Fuss Mixing: I swear by the cornstarch trick—just whisk it into the warm milk, and poof—silky smooth texture without lumps. No fancy gadgets, no stress, and honestly? It’s the secret to that restaurant-quality finish I crave after a long day.
- Velvet Creamy Magic: That heavy whipping cream isn’t just for topping—it gets folded right in, turning your cocoa into a decadent, almost pudding-like drink. The sugar dissolves perfectly, and the cocoa? Rich enough to make you forget you’re camping in the woods.
- Campfire to Kitchen: Make a big batch at home and reheat it in a thermos at your campsite—same cozy taste, zero cleanup. Between us, this is my go-to for chilly nights when marshmallows just won’t cut it.
- Budget-Friendly Luxury: High-quality cocoa makes it feel special, but the rest? Pantry staples. A single bag of cocoa lasts forever, and the milk/cream combo stretches further than store-bought mixes. (Yes, even on a Tuesday night.)
Step-by-step instructions for marshmallow-infused hot chocolate
Transform your campfire into a cozy cocoa station with this rich, velvety hot chocolate that tops with marshmallow foam.
Whisk the Cocoa Base Until Silky
In a medium saucepan, combine the 0.5 cup high-quality unsweetened cocoa powder, 0.75 cup granulated sugar, 2 tbsp cornstarch, and 0.25 tsp salt. Stir vigorously to eliminate any lumps—this ensures your hot chocolate will be smooth, not gritty. The cocoa should dissolve completely into the dry ingredients before adding any liquids.
Next, whisk in the 2 cups whole milk and 0.5 cup heavy whipping cream until fully incorporated. Place the saucepan over medium heat and bring to a gentle simmer. Stir constantly with a wooden spoon—you want to prevent scorching while building a thick, glossy base. The mixture should bubble softly and coat the back of a spoon within 3-4 minutes. This is your foundation, so don't rush it.
Infuse with Flavor and Thicken
Once the mixture reaches a gentle simmer, reduce the heat to low and add the 1 tsp vanilla extract and 0.5 tsp ground cinnamon. Stir well to distribute the flavors evenly. Let it simmer for another 2-3 minutes, stirring occasionally, until it thickens noticeably. You're aiming for a consistency similar to heavy cream—thick enough to coat a spoon but still pourable.
Here's where the magic happens: fold in the 2 tbsp unsalted butter, cut into small pieces. The butter melts into the hot chocolate, adding richness and helping to emulsify the mixture. Taste and adjust sweetness if needed—you can add a pinch more sugar if desired, but the original amount should be balanced. Remove from heat and let it cool slightly for 2 minutes before proceeding.
Create the Marshmallow Foam Topping
While the hot chocolate cools, prepare the marshmallow foam in a separate bowl. Add the 1 cup mini marshmallows and 0.25 cup dark chocolate chips to a microwave-safe bowl. Microwave on high for 30 seconds, then stir vigorously with a hand mixer or whisk until fully melted and smooth. The mixture should be glossy and thick—almost like a mousse. If it's too stiff, add 1 tsp hot chocolate base to loosen it.
Beat the melted marshmallow-chocolate mixture with a hand mixer on high speed for 2-3 minutes until it forms stiff peaks. This is your signature foam topping—light, airy, and ready to crown your hot chocolate. The foam should hold its shape when you lift the whisk, almost like whipped cream. If it doesn't peak, chill the bowl in ice water for 1 minute and beat again.
Assemble and Serve Over Fire
Ladle the thickened hot chocolate into 4 mugs, filling them about ¾ full. Immediately top each mug with a generous dollop of the marshmallow foam. The contrast between the warm, velvety hot chocolate and the cool, fluffy foam is what makes this recipe special. For extra drama, sprinkle a pinch of ground cinnamon on top and add a few dark chocolate chips for crunch.
Serve directly over your campfire or a portable stove for that authentic outdoor experience. The heat from the fire will keep the hot chocolate warm while the foam stays light and airy. Stir gently before drinking—this helps the foam melt into the hot chocolate, creating a decadent, marshmallow-infused swirl in every sip. Enjoy immediately while the foam is at its peak texture.
Pro Tips For Making Camping Hot Chocolate
- Whisk Like You Mean It: I learned this the hard way—lumpy hot chocolate ruins the vibe. When mixing cocoa powder and sugar into the milk, whisk aggressively for at least 30 seconds before adding heat. The goal is to dissolve the cocoa completely, not just stir it into a sad, grainy sludge. (Yes, even if you’re impatient like me.)
- Prep the Cream First: Heavy whipping cream loves to separate when heated, and nothing kills camping hot chocolate faster than curdled cream. Warm the cream separately over low heat (or even just in a thermos) until it’s just hot to the touch—then fold it into the finished chocolate last. This keeps it silky, not greasy.
- Skip the Boil: After burning three batches, I finally figured out: you don’t need a rolling boil. Heat the milk and cocoa mixture to a gentle simmer (tiny bubbles, no splashing) for 3–4 minutes. Boiling scorches the cocoa and makes the drink taste bitter. Trust the process—it’s ready when it’s smooth, not when it’s violent.
- Sift That Cocoa: Unsweetened cocoa powder is a powder for a reason—it clumps like crazy. Sift it directly into your mug or pot before adding liquid. No sifter? Break up clumps with a fork first. This isn’t the prettiest method, but it’s the tastiest, especially in windy campsites where powder gets everywhere anyway.
Best sauces and condiments for this recipe
Classic Caramel Sauce
This easy campfire caramel sauce takes just 10 minutes to make and adds a rich, buttery depth to your hot chocolate. Combine 1 cup granulated sugar and ½ cup water in a small saucepan over medium heat.
Stir constantly until the sugar dissolves completely, then add ½ cup heavy cream and 2 tbsp unsalted butter. Simmer for 3 minutes until thickened. Drizzle over your hot chocolate or use it to melt marshmallows for a gooey topping. Store leftovers in a small thermos for easy transport. 🍯
Spiced Orange Syrup
Brighten your hot chocolate with this zesty syrup that’s perfect for camping. Simmer ½ cup orange juice, ½ cup water, and ¼ cup granulated sugar over low heat for 5 minutes.
Add 1 tsp grated orange zest and ½ tsp ground cinnamon, then strain through a fine-mesh sieve. Stir 1 tbsp into each mug of hot chocolate for a citrusy twist. The syrup keeps well in a small jar for up to 5 days at room temperature. ✨
Salted Caramel Drizzle
Elevate your hot chocolate with this salted caramel drizzle that balances sweetness with a savory kick. Melt ½ cup dark chocolate chips (70% cocoa) with ¼ cup heavy cream over low heat until smooth.
Remove from heat and whisk in 2 tbsp unsalted butter and ¼ tsp flaky sea salt. Let cool slightly, then drizzle over the foam-topped hot chocolate. The salt enhances the chocolate flavor, making it taste even more decadent. Store in a small jar for easy camping use. 🧂
Peppermint Mocha Mix
For a festive twist, blend 2 tbsp cocoa powder with 1 tbsp instant coffee granules and 1 tsp crushed candy canes (or peppermint extract). Store the mix in a small baggie and stir 1 tbsp into each mug of hot chocolate before serving.
The peppermint adds a refreshing contrast to the rich cocoa, and the coffee deepens the flavor. This mix is perfect for winter camping trips and keeps for 3 months in an airtight container. 🎄
Marshmallow Whipped Cream
Skip the store-bought whipped cream and make this lighter, marshmallow-infused version instead. Whip 1 cup heavy whipping cream with 2 tbsp powdered sugar and 1 tsp vanilla extract until soft peaks form. Gently fold in ¼ cup mini marshmallows, melted and cooled.
Top your hot chocolate with this creamy, marshmallow-speckled whipped cream for a cloud-like finish. It’s lighter than traditional whipped cream but just as delicious. 🧈
Cinnamon Sugar Rim
Add a festive touch to your mugs with a simple cinnamon sugar rim. Mix 2 tbsp granulated sugar with 1 tsp ground cinnamon. Dip the rim of each mug into a little melted butter or honey, then roll it in the cinnamon sugar mixture.
Serve your hot chocolate immediately—this rim adds a sweet, spiced crunch with every sip. It’s a fun, interactive way to make your camping hot chocolate feel extra special. 🍫
Nutrition facts
Frequently asked questions
Can I make this hot chocolate without a microwave for the marshmallow foam?
Use a small saucepan over low heat instead. Melt the marshmallows and chocolate chips together, stirring constantly until fully combined. Then transfer to a heatproof bowl and let it cool slightly before whipping with a hand mixer. The foam will still form beautifully—just be patient and let it cool to room temperature first.
What's the best way to transport the dry ingredients for camping?
Pack the dry ingredients (cocoa, sugar, cornstarch, cinnamon, salt) in a resealable plastic bag or small mason jar. For extra protection, place the bag inside a ziplock baggie to prevent leaks. The marshmallows and chocolate chips should go in separate containers—store them in small plastic bags or their original packaging. This keeps everything organized and spill-proof.
Can I use powdered milk instead of whole milk for camping?
Yes, but your hot chocolate won't be as creamy. Use 1 cup powdered milk + 1 cup water as a substitute, but expect a thinner texture. For best results, bring extra heavy cream or whole milk if you're concerned about creaminess—it makes a noticeable difference in the final product. The foam topping will also be less stable without full-fat dairy.
How do I prevent the hot chocolate from burning on a campfire?
Use a heat diffuser or place your pot on a campfire-safe grill grate to regulate heat. Keep the flame at medium-low and stir constantly with a wooden spoon. If you don't have a diffuser, hang your pot over the cooler part of the fire where embers aren't directly touching the bottom. Never leave it unattended—campfire heat is unpredictable!
Can I make this recipe with a portable propane stove?
Perfectly! Propane stoves give you precise temperature control, making this recipe even easier. Use a medium-sized pot and maintain a gentle simmer—never high heat. The foam will whip just as well with a hand mixer or even a battery-powered whisk if you're off-grid. Just ensure your stove has enough fuel for the entire process.