
Desserts
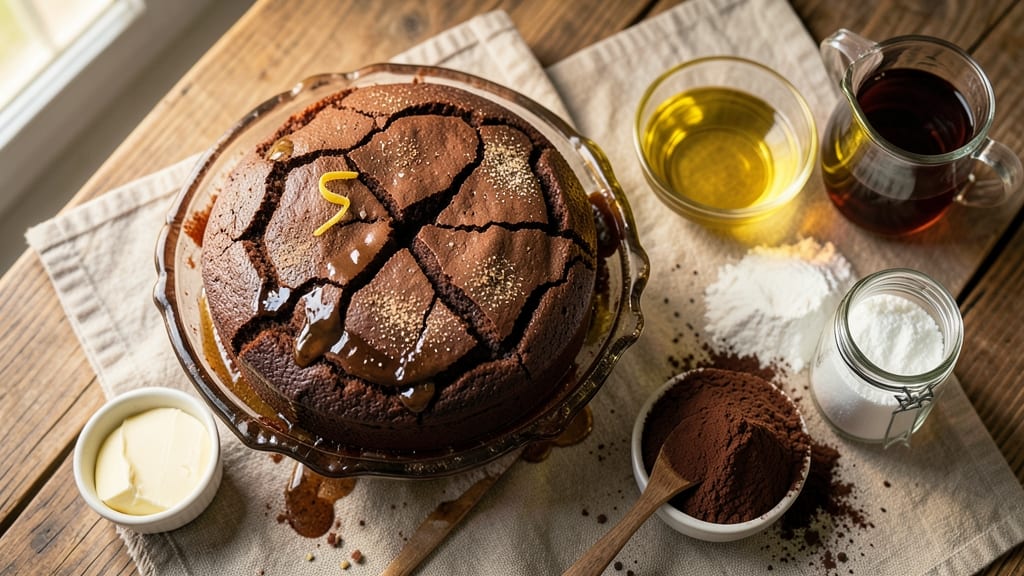
This Canadian chocolate cake recipe delivers decadent triple layers of fudgy richness with a signature coffee-infused depth that sets it apart from classic versions. The secret lies in a blend of dark cocoa powder and espresso powder, creating a complex flavor profile that's both indulgent and sophisticated. I've perfected this recipe over years of baking, ensuring each slice has that signature Canadian touch—just enough warmth from cinnamon and nutmeg to complement the chocolate's intensity.
The cake itself bakes up with a tender yet dense crumb, thanks to a precise balance of butter and vegetable oil in the batter. Between each layer, a velvety coffee buttercream ties everything together, its subtle bitterness enhancing the chocolate's depth.
What makes this recipe truly special is the optional maple glaze drizzle—just a touch of Canadian maple syrup transformed into a glossy, caramel-like finish that adds another layer of flavor and visual appeal.
By the time you're done, you'll have a cake that's rich enough to satisfy serious chocolate lovers but balanced enough to serve at gatherings without overwhelming. The coffee infusion gives it an adult sophistication that pairs beautifully with a glass of cold milk or a robust espresso.
This isn't just dessert—it's an experience that captures the essence of Canadian baking traditions with modern flair.
Whether you're celebrating a special occasion or simply craving a luxurious treat, this triple-layered chocolate cake delivers restaurant-quality results at home. The recipe scales perfectly for parties, and the leftovers reheat beautifully—though I can't promise they'll last that long. Let's get baking!
Ingredients for canadian chocolate cake
Four cups of flour, two of butter, and a secret coffee blend—this is your Canadian chocolate cake essentials list.
| Ingredient | Amount | Notes |
|---|---|---|
| All-Purpose Flour 🌾 | 4 ½ cups | Sifted for light texture |
| Unsalted Butter 🧈 | 2 cups | Softened to room temperature |
| Vegetable Oil 🫒 | ½ cup | For tender crumb |
| Granulated Sugar 🍚 | 2 ½ cups | White or light brown |
| Dark Cocoa Powder 🍫 | ¾ cup | Dutch-processed preferred |
| Espresso Powder ☕ | 2 tbsp | For coffee infusion |
| Instant Coffee Granules ☕ | 2 tbsp | Dissolved in warm water |
| Large Eggs 🥚 | 6 whole | Room temperature |
| Vanilla Extract 🌿 | 2 tbsp | Pure extract preferred |
| Ground Cinnamon 🌶️ | 1 tsp | For warmth |
| Ground Nutmeg 🌶️ | ½ tsp | Freshly grated preferred |
| Salt 🧂 | ½ tsp | Diamond Crystal preferred |
| Powdered Sugar 🍚 | 4 cups | For buttercream |
| Heavy Cream 🥛 | 2 cups | Cold for buttercream |
| Pure Maple Syrup 🍁 | ½ cup | Grade A for glaze |
| Milk 🥛 | ¼ cup | For glaze consistency |
The cocoa and espresso powders are non-negotiable here. Valrhona cocoa or Hershey's Special Dark for the former, and Starbucks Via Instant works great for the latter. I grab my espresso powder from Williams Sonoma—it's a game-changer for that deep, complex flavor without overpowering the chocolate. For the butter, Plugrá is my go-to, but any high-quality unsalted will do. The maple syrup? 100% pure Canadian from Sapori di Canada if you can find it—otherwise, any Grade A will work. The key is using freshly ground spices: Penzeys bulk section has the best cinnamon and nutmeg.
No espresso powder? Strong brewed coffee cooled and reduced by half works in a pinch. Substitute Dutch-processed cocoa with natural cocoa at a 1:1 ratio, but expect slightly more acidity. The buttercream can handle Greek yogurt instead of heavy cream for a lighter version, though it'll be less stable. For the glaze, agave nectar is a 1:1 swap for maple syrup if you're avoiding sugar. And if you're scaling up? Double the coffee elements—trust me, it's worth it. The cake layers can be baked ahead and stored at room temp for 2 days wrapped tightly.
This cake keeps beautifully—5 days at room temperature wrapped in plastic, or 2 weeks in the fridge once assembled. The buttercream? 3 days max in the fridge, but bring it to room temp before whipping again. For parties, I always bake the layers the day before and assemble morning-of. The glaze sets quickly, so make it fresh and have a toothpick ready to test doneness. Freeze unbaked layers for 3 months—just thaw overnight before baking.
Why You'll Love This Recipe
- No Mixer Needed: I swear by this recipe because it’s one-bowl, no-fuss—just creamed butter, sugar, and a splash of oil until it’s light and fluffy. No electric mixer here; my hands (and a sturdy wooden spoon) do all the work.
- Rich Without Bitterness: That dark cocoa powder? It’s the star—deep, velvety, but not overpowering. The butter and oil keep it moist, while the sugar balances the bitterness just enough to make every bite feel like a hug.
- Birthday or Boredom: Serve it warm with ice cream for a party, or slice a single piece for a 3 p.m. pick-me-up. It’s my go-to for celebrations, but honestly? I’ve eaten it straight from the pan more times than I’ll admit.
- Dollar Stretcher: Flour, sugar, butter—these are pantry staples that won’t break the bank. Plus, it keeps for days (if it lasts that long), so you’re getting double the dessert for half the guilt. Leftovers? I freeze slices and toast them later.
Step-by-step instructions for triple-layered Canadian chocolate cake
Here's how to build a decadent chocolate cake with coffee depth and perfect texture—layer by layer.
Prepare the Coffee-Infused Cake Batter
In a small bowl, dissolve the 2 tbsp instant coffee granules in ¼ cup warm water and set aside to steep for 5 minutes. This ensures the coffee flavor fully develops before mixing. In a large mixing bowl, cream together the 2 cups unsalted butter and 2.5 cups granulated sugar on medium speed until light and fluffy—this should take about 3-4 minutes. The mixture will nearly double in volume and turn pale.
Add the 6 whole large eggs, one at a time, mixing well after each addition. Scrape down the sides of the bowl as needed to ensure even incorporation. Stir in the 2 tbsp vanilla extract, 1 tsp ground cinnamon, ½ tsp ground nutmeg, and ½ tsp salt. Sift in the 4.5 cups all-purpose flour and ½ cup dark cocoa powder alternately, beginning and ending with the flour. Mix on low speed until just combined—overmixing develops gluten, which can make the cake dense.
Incorporate the Coffee Solution and Oil
Pour the dissolved coffee mixture into the batter and mix on low speed until evenly distributed. Add the ½ cup vegetable oil and mix again until fully incorporated. The batter should be smooth and thick, with a rich chocolate aroma. If the batter appears too thick, add 1-2 tablespoons of milk to loosen it slightly. This step ensures the cake remains moist and tender while infusing that signature coffee depth.
Divide the batter evenly among three 8-inch round cake pans lined with parchment paper. Tap the pans gently on the counter to remove any air bubbles and ensure the batter settles evenly. This distribution is critical for uniform layers.
Bake the Layers to Perfect Doneness
Preheat your oven to 350°F. Bake the cake layers for 25-30 minutes, or until a toothpick inserted into the center comes out clean with a few moist crumbs clinging to it. Rotate the pans halfway through baking for even browning. The edges should be set, but the tops should still look slightly soft—this indicates the cake is fully baked but still moist.
Remove the cakes from the oven and let them cool in the pans for 10 minutes. Then, transfer them to a wire rack to cool completely. This gradual cooling prevents cracking and ensures the layers hold their shape when assembling.
Make the Coffee Buttercream Filling
In a stand mixer fitted with the paddle attachment, beat the 2 cups heavy cream and 4 cups powdered sugar on medium speed until smooth and fluffy. Add the 2 tbsp espresso powder and mix until fully incorporated. The buttercream should be light, airy, and slightly coffee-infused. In a separate bowl, whip the 2 cups unsalted butter until creamy, then gradually fold it into the cream mixture until fully combined.
Spread a generous layer of the buttercream between each cake layer, pressing down gently to ensure even distribution. This step is where the cake’s triple-layered richness comes together—don’t rush it. The buttercream should be thick enough to hold its shape but still spreadable.
Assemble and Glaze the Cake
Place the first cake layer on a serving plate, then add the second layer on top, followed by the third. Crumb coat the entire cake with a thin layer of buttercream, then chill in the refrigerator for 15 minutes. This step prevents crumbs from mixing into the final glaze. After chilling, apply a final layer of buttercream, smoothing it evenly with a spatula for a polished finish.
For the glaze, heat the ½ cup pure maple syrup and ¼ cup milk in a small saucepan over low heat until warm but not boiling. Drizzle the glaze over the top and sides of the cake, allowing it to drip slightly down the sides for a glossy, elegant finish. Let the glaze set for 10 minutes before slicing to ensure it adheres perfectly.
Pro Tips For Making Canadian Chocolate Cake
- MELT THE COCOA FIRST: I learned this the hard way—dumping cocoa powder straight into the batter leads to lumps that ruin the texture. Whisk it with the hot liquid (water, coffee, or milk) until it’s completely dissolved before adding it to the mix. No lumps, no regrets.
- USE ROOM-TEMPERATURE BUTTER: Cold butter creates pockets of air in the batter, making the cake dense and uneven. Let that butter sit out for 30-60 minutes before creaming it with sugar—soft enough to press a fingerprint into it, but not melted. Your cake will rise smoother and taste richer.
- DON’T OVERMIX THE BATTER: Once you fold in the dry ingredients, stop mixing the second everything is just combined. Overmixing develops gluten, which turns your tender chocolate cake into a tough, chewy brick. Use a spatula and lift—if you see streaks of flour, you’re good.
- GREASE PANS WITH OIL, NOT BUTTER: Butter leaves a greasy residue that can make the cake stick, especially in a Canadian chocolate cake where moisture is key. Lightly brush the pans with vegetable oil instead, then dust with flour—it ensures clean release and a perfect crumb every time. (Yes, even if you’re impatient like me.)
Regional styles of this dish
Quebec-Inspired Maple Twist
In Quebec, chocolate cake often gets a maple syrup boost—both in the batter and as a glaze. For this variation, replace ¼ cup of the granulated sugar with 2 tbsp pure maple syrup in the batter. The syrup adds natural sweetness and complements the coffee notes beautifully.
Top it off with a richer glaze by doubling the maple syrup to 1 cup and reducing it with 2 tbsp milk until slightly thickened. This creates a stunning amber drizzle that tastes like a Canadian fall morning. 🍁
Atlantic Canada's Spiced Rum Buttercream
Newfoundland and Nova Scotia love their rum! Swap the coffee buttercream for a spiced rum version by adding 1 tbsp dark rum (like Captain Morgan) to the buttercream mixture. Warm the rum slightly to release its aroma, then mix it in with the espresso powder.
For extra warmth, add ¼ tsp ground cloves and ½ tsp vanilla bean paste instead of extract. This version pairs perfectly with a glass of spiced cider. 🍹
Prairie-Style Nutty Crunch
Alberta and Saskatchewan often incorporate nuts into their desserts. For a textured twist, fold 1 cup chopped pecans or walnuts into the buttercream before assembling the cake. Toast the nuts first in a dry pan over medium heat for 3-4 minutes until fragrant, then cool completely before mixing.
For an extra crunch, sprinkle toasted nuts between each cake layer or decorate the top after glazing. 🌰
Ontario's Classic Coffee Whisky Glaze
Ontario's whisky distilleries inspire this luxurious variation. Replace the maple glaze with a whisky reduction by simmering ½ cup Canadian whisky (like Crown Royal) with ¼ cup maple syrup until reduced by half. Strain and drizzle over the cake while warm.
The whisky adds a smoky depth that pairs wonderfully with the chocolate and coffee. Serve with a dollop of whipped cream for an Ontario-style café experience. 🥃
British Columbia's Dark Chocolate Espresso
For a richer, more intense flavor, boost the chocolate content by adding ¼ cup melted dark chocolate (70% cocoa) to the cake batter. Use Ghirardelli squares for the best results. Increase the espresso powder to 3 tbsp and add 1 tsp instant espresso powder directly to the buttercream.
This West Coast variation delivers a bold, almost mocha-like flavor that's perfect for coffee lovers. 🌿
Northern Tradition: Baked Apples
In colder regions like Manitoba and the Yukon, baked apples are a classic dessert. For a Canadian fusion, core 4 small apples (like McIntosh or Granny Smith), stuff with a mix of 2 tbsp brown sugar, 1 tsp cinnamon, and 1 tbsp chopped pecans.
Bake at 350°F for 25 minutes** until tender. Serve warm slices of this cake alongside the baked apples for a comforting, regionally inspired dessert. 🍎
Nutrition facts
Frequently asked questions
Can I make this cake without coffee?
Skip the 2 tbsp espresso powder and 2 tbsp instant coffee granules in the batter, and reduce the espresso powder in the buttercream to 1 tbsp. The cake will still be rich and delicious—just without that signature coffee depth. For a sweeter alternative, add 1 tsp vanilla bean paste instead to enhance the chocolate flavor.
How do I prevent my cake layers from cracking?
Cracking usually happens when the cake cools too quickly. Let the layers cool in their pans for 10 minutes before transferring to a wire rack, and avoid placing them in the fridge until fully assembled. Also, ensure your oven is fully preheated to 350°F and avoid opening the oven door during baking. A crumb coat before the final buttercream layer also helps seal any cracks.
Can I use this recipe for a single-layer cake?
Yes! For a single-layer cake, reduce the batter to fit one 9-inch round pan (about 1/3 of the total batter). Bake for 30-35 minutes at 350°F and frost with the same buttercream. The texture will be denser but still rich. This works well for smaller gatherings or personal servings.
What’s the best way to store leftovers?
Store the fully assembled cake in an airtight container at room temperature for up to 3 days, or refrigerate for 5 days. For longer storage, freeze the cake (unfrosted) for up to 3 months. Thaw overnight in the fridge before adding frosting. The buttercream may soften slightly when reheated, so bring it to room temperature before whipping again if needed.
Why does my cake taste bitter?
Bitterness usually comes from overmixing the batter or using too much cocoa or espresso. Stick to the recipe’s measurements and mix just until combined—overmixing develops gluten, making the cake dense and bitter. If using natural cocoa (not Dutch-processed), reduce it to ½ cup and add 1 tbsp extra flour to balance the flavor. Also, ensure your butter and eggs are at room temperature.