
Snacks
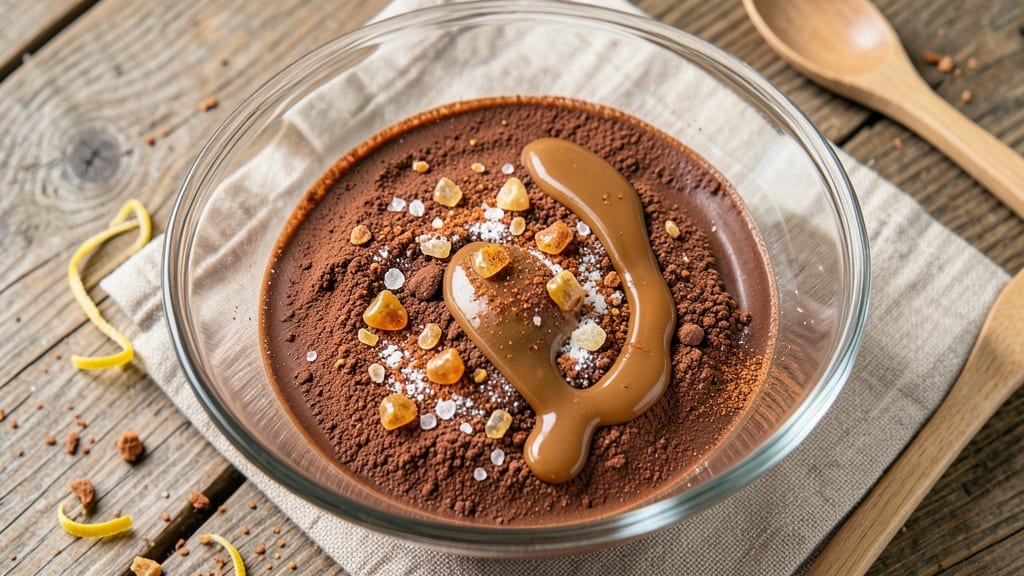
This caramel hot chocolate mix recipe transforms a simple powder into a luxurious drink with velvety swirls and buttery crunch in just minutes. The secret lies in the perfect balance of rich cocoa, smooth caramel, and a touch of salt that elevates every sip.
Whether you're craving a cozy nightcap or a comforting treat, this method delivers restaurant-quality results without the fuss.
What sets this recipe apart is how effortlessly it combines the deep, chocolatey base with creamy caramel pockets that melt into every spoonful. The process is straightforward: heat your milk to steaming, whisk in the mix until smooth, and let the caramel swirls create a marbled effect.
No special equipment is needed—just a saucepan, a whisk, and patience for the flavors to meld.
The result is a drink that’s rich yet balanced, with a velvety texture and a satisfying crunch from the caramel bits. Top it with whipped cream and a drizzle of extra caramel for an indulgent finish, or serve it warm for a comforting hug in a mug.
Perfect for chilly evenings or as a sweet reward after dinner, this hot chocolate is sure to become a favorite.
For added flair, try stirring in a pinch of cinnamon or a dash of vanilla extract before serving. The possibilities are endless, but the foundation—smooth, creamy, and perfectly caramelized—is what makes this recipe shine. Let’s get started on creating your dream hot chocolate.
Ingredients for caramel hot chocolate mix
Rich cocoa, smooth caramel, and a touch of salt—these are the stars of your dreamy hot chocolate mix.
| Ingredient | Amount | Notes |
|---|---|---|
| Unsweetened Cocoa Powder 🍫 | ½ cup | High-quality Dutch-processed preferred |
| Granulated Sugar 🍚 | 1 cup | White or light brown sugar |
| Powdered Sugar 🍚 | ¼ cup | For smooth texture |
| Store-Bought Caramel Sauce 🍯 | 1 cup | Smooth, no chunks (like Smucker's) |
| Heavy Whipping Cream 🥛 | ½ cup | Full-fat for best texture |
| Salted Caramel Bits 🍬 | ¼ cup | Store-bought or homemade |
| Vanilla Extract 🌿 | 1 tsp | Pure, not imitation |
| Ground Cinnamon 🌶️ | ½ tsp | Optional for warmth |
| Kosher Salt 🧂 | ¼ tsp | Fine grain preferred |
| Whole Milk 🥛 | 2 cups | For dissolving mix (not included in dry blend) |
| Heavy Cream 🥛 | 1 cup | For serving (optional) |
| Store-Bought Whipped Cream 🍦 | ½ cup | For topping (optional) |
The cocoa powder sets the foundation, so Dutch-processed is key—it dissolves smoothly without bitterness. Grab a high-quality brand like Ghirardelli or Valrhona if you can, but the store-brand stuff works fine too. For the caramel sauce, Smucker's or Trader Joe's are reliable—avoid the chunky kind. The heavy whipping cream is non-negotiable for that velvety texture, but if you're watching calories, half-and-half works in a pinch. The caramel bits add the signature crunch, so don't skip them unless you're making this for a crowd with dietary restrictions.
No Dutch-processed cocoa? Natural cocoa powder with extra sugar (add 1 tbsp) gets you close. Short on caramel sauce? Homemade caramel sauce (butter, sugar, cream) works, but it's a bit more work. The vanilla extract can be swapped for vanilla bean paste if you're feeling fancy—just reduce the amount to 0.5 tsp. For a spiced twist, add 0.25 tsp pumpkin pie spice instead of cinnamon. The mix keeps well in an airtight container for up to 2 weeks, but the caramel bits may harden over time—just crush them up before using.
Store the dry mix in an airtight container in a cool, dark place for up to 2 weeks. The caramel sauce and bits can be stored separately in the fridge for up to 3 months. To serve, whisk 2 tbsp of the mix into 1 cup of steaming milk—adjust to taste. For extra indulgence, top with whipped cream and a drizzle of warm caramel sauce. This reheats beautifully, so double the batch and freeze half for lazy nights.
Why You'll Love This Recipe
- Five-Ingredient Magic: I swear by this mix—just whisk cocoa, sugars, and caramel into cream, and boom, you’ve got a velvety drink with zero fuss. No measuring cups, no fancy tools, just dump-and-stir simplicity that even my sleepy 10-year-old can handle.
- Rich Without Guilt: That smooth caramel swirl cuts through the bitterness of cocoa, making every sip feel like a hug. Honestly, the powdered sugar gives it this silky finish that tastes indulgent but won’t wreck my diet—promise.
- Party or Pajamas: This mix is my go-to for everything: movie nights, sick-day cuddles, or when I need to impress guests without slaving in the kitchen. (Yes, even on a Tuesday night.) Just adjust the cream-to-milk ratio for thickness, and you’re golden.
- Zero Waste, Double Use: Make a big batch—it keeps for weeks in an airtight jar. Between us, I’ve used it for hot chocolate and as a secret ingredient in brownies. The caramel sauce stretches further than you’d think, too. Budget win.
Step-by-step instructions for caramel hot chocolate mix
Here's how to create a rich, velvety hot chocolate with decadent caramel swirls and buttery crunch.
Combine Dry Ingredients for Smooth Texture
In a medium bowl, whisk together the 0.5 cup unsweetened cocoa powder, 1 cup granulated sugar, 0.25 cup powdered sugar, 1 tsp vanilla extract, 0.5 tsp ground cinnamon, and 0.25 tsp kosher salt. I use a whisk for even distribution—this prevents clumping and ensures a silky finish. The powdered sugar helps dissolve the mix smoothly in milk, while the cinnamon adds subtle warmth that pairs perfectly with caramel.
Sift the mixture through a fine-mesh strainer into another bowl to remove any potential lumps. This step is crucial for achieving that velvety texture we're after. Store the dry blend in an airtight container until ready to use—it keeps for up to 2 weeks at room temperature, making this a perfect make-ahead option.
Prepare the Caramel Swirl Base
In a small saucepan, combine the 1 cup store-bought caramel sauce and 0.5 cup heavy whipping cream. Warm over medium-low heat for 3-4 minutes, stirring constantly until the mixture reaches 160°F and becomes smooth. You'll notice the caramel starts to thicken slightly—this is when it's ready to swirl.
Remove from heat and let cool for 2 minutes while you prepare the hot chocolate. The slightly thickened caramel will create those beautiful ribbons when swirled into the hot milk. For extra decadence, fold in the 0.25 cup salted caramel bits at this stage—they'll melt slightly and add bursts of buttery crunch throughout each sip.
Heat and Prepare the Milk Mixture
In a separate saucepan, heat the 2 cups whole milk over medium heat until it reaches 170°F—just below boiling. This temperature is perfect for dissolving the cocoa blend without scorching it. Remove from heat and immediately whisk in the dry cocoa mixture until completely dissolved. The mixture should be smooth with no visible powder.
Here's the thing—if you see any lumps after whisking, strain the mixture through a fine-mesh sieve into mugs. This ensures a silky texture in every sip. The warm milk should now have a rich, chocolatey aroma with hints of vanilla and cinnamon.
Create the Signature Caramel Swirls
Working quickly, divide the hot chocolate mixture evenly among 4 mugs (about 1 cup per mug). Using a spoon, drizzle 1-2 tablespoons of the warm caramel mixture down the side of each mug. Then, gently stir with a spoon in a circular motion to create those signature swirls. The heat from the chocolate will help the caramel melt slightly as it mixes.
For the ultimate presentation, top each mug with 2 tablespoons of the 1 cup heavy cream and a dollop of 0.5 cup store-bought whipped cream. The contrast between the warm chocolate and cool whipped cream creates a luxurious mouthfeel. Sprinkle with an extra pinch of ground cinnamon for garnish—this adds visual appeal and enhances the warm spice notes.
Serve Immediately for Perfect Texture
Serve the hot chocolate right away while the caramel swirls are still visible. The combination of velvety cocoa, rich caramel, and creamy toppings creates a luxurious drinking experience. Each sip should deliver layers of flavor—bitter cocoa balanced by sweet caramel, with a hint of saltiness from the caramel bits and warmth from the cinnamon.
If you prefer an even richer version, stir in an extra 1 tablespoon of heavy cream per mug before serving. The key to success is keeping everything warm until the final moment—this ensures the caramel stays smooth and the whipped cream holds its shape. Enjoy immediately for that perfect balance of textures and temperatures.
Pro Tips For Making Caramel Hot Chocolate Mix
- SIFT THE COCOA: I learned this the hard way—unsifted cocoa powder clumps like a stubborn snowbank. Use a fine-mesh sieve to break up those lumps before mixing, or you’ll end up with gritty hot chocolate that feels like you’re drinking cocoa-flavored sand.
- WHISK THE CREAM COLD: Heavy whipping cream straight from the fridge whips up faster and holds its volume better. Let it sit out for 10 minutes if it’s ice-cold, but don’t over-warm it—lukewarm cream turns into butter faster than you can say "disaster."
- MEASURE CARAMEL PRECISELY: Store-bought caramel sauce varies wildly in thickness. Use a kitchen scale for accuracy—aim for about ¼ cup (60g) per batch, then adjust to taste. Eye-balling it leads to either a sad, weak drizzle or a syrup-soaked mess.
- STORE IT RIGHT: This mix keeps for weeks in an airtight container, but moisture is the enemy. Add a silica packet or a slice of bread (yes, really) to absorb any dampness—condensation ruins the texture faster than you’d think.
Troubleshooting your caramel hot chocolate mix
Lumpy Mix Fix
If your hot chocolate turns out lumpy, it’s usually from clumping in the dry mix or improperly dissolved powder. To fix it, strain the mixture through a fine-mesh sieve directly into mugs—this catches any undissolved bits.
For future batches, whisk the dry ingredients more vigorously before adding milk, and ensure your milk reaches 170°F before mixing. A splash of hot water (about 1 tablespoon per cup of milk) can also help break up stubborn lumps. 💫
Weak Caramel Flavor
The caramel swirls might taste weak if the sauce wasn’t heated enough or if too much milk diluted it. Warm the caramel sauce to 160°F (not just simmered) to intensify its flavor.
For stronger swirls, reduce the milk slightly—try 1.5 cups instead of 2—and stir in an extra 1 tablespoon of caramel sauce per mug. If using store-bought caramel bits, ensure they’re salted and high-quality (like Trader Joe’s or Smucker’s).
Separated Layers
If the caramel and chocolate separate, it’s likely because the caramel cooled too much before swirling. Keep the caramel warm by placing the saucepan in a bowl of hot water while you prepare the mugs.
Work quickly when drizzling—add the caramel to the still-warm chocolate and stir immediately. For extra stability, whisk in 1 tablespoon of cold heavy cream per mug before adding the caramel to help bind the layers.
Grainy Texture
A grainy texture usually means the powdered sugar or caramel bits didn’t dissolve fully. For the mix, sift the dry ingredients twice to break up clumps, and whisk the milk vigorously after adding the cocoa blend.
If the caramel bits are too large, pulse them in a food processor for 5 seconds before mixing. For a smoother finish, strain the hot chocolate through a cheesecloth-lined sieve before serving.
Burnt or Bitter Taste
Overheating the milk or cocoa can turn your hot chocolate bitter. Keep the milk at 170°F—never boiling—and remove it from heat as soon as it reaches temperature. If the cocoa tastes bitter, use Dutch-processed cocoa powder (like Ghirardelli) and reduce the granulated sugar slightly.
A pinch of vanilla extract or marshmallow fluff can also help balance bitterness. 🍫
Caramel Too Thin
If your caramel swirls disappear or look too runny, the sauce wasn’t thickened enough. Simmer the caramel mixture for an extra 1-2 minutes until it reaches 165°F—this helps it hold its shape when swirled.
For a thicker consistency, stir in 1 teaspoon of cornstarch mixed with 1 tablespoon water while heating. Let it cool slightly before adding to the mugs to prevent melting too quickly.
Nutrition facts
Frequently asked questions
Can I make this caramel hot chocolate mix without powdered sugar?
Yes, but your texture will be slightly grainier. Replace the 0.25 cup powdered sugar with an extra 0.25 cup granulated sugar and whisk the dry mix vigorously to break up any clumps. The hot milk will help dissolve it, though you might need to strain the final mixture for silky smoothness. For best results, use Dutch-processed cocoa powder which dissolves more easily.
How do I store the dry mix for longer than 2 weeks?
For extended storage, divide the dry mix into airtight containers and refrigerate for up to 1 month. The caramel sauce and bits should be stored separately in the fridge too. For longer than that, freeze the dry mix in portions—it'll keep for up to 3 months. Thaw in the fridge overnight before using, and whisk vigorously to restore texture.
Can I use this mix with dairy-free milk?
For best results, use full-fat coconut milk or oat milk with 1 tablespoon cream per cup to mimic the richness. Heat the dairy-free milk to 170°F and whisk in the mix as usual. The caramel swirls will still form, though the texture may be slightly lighter. Avoid almond milk—it can create a thin, watery consistency that won't hold the swirls well.
Why does my caramel hot chocolate taste too sweet?
The sugar content is likely unbalanced. Reduce the granulated sugar by 2 tablespoons and add 0.25 tsp extra cocoa powder to deepen the chocolate flavor. For a more sophisticated balance, stir in 0.5 tsp instant espresso powder per mug—it enhances the cocoa's richness without adding sweetness. Let the mixture sit for 2 minutes before tasting to allow flavors to meld.
Can I make individual servings to take on-the-go?
Yes! Prepare the hot chocolate as directed, then pour into thermal travel mugs and seal tightly. For extra insulation, wrap the mugs in a thick towel before packing in a cooler bag. The drink will stay warm for 1-2 hours. For a portable version, pre-mix the dry ingredients in single-serving packets—just add hot milk when ready to drink.