
Desserts
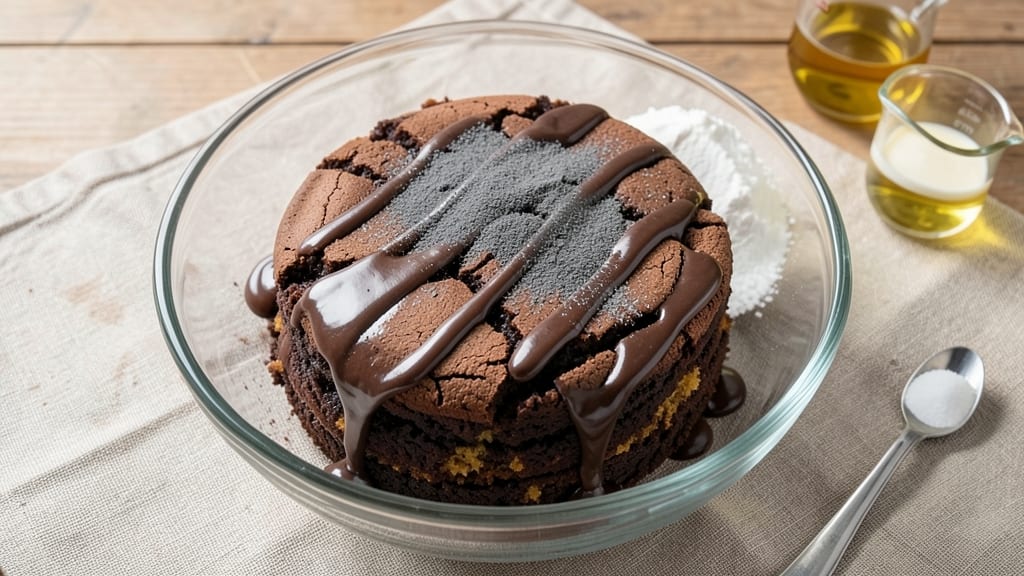
This cheap and easy chocolate cake recipe delivers restaurant-quality moist layers using just one bowl and pantry staples. I developed it after burning through three expensive box mixes and realizing there's a simpler way—no fancy equipment, no special ingredients, just foolproof technique.
The secret lies in a precise ratio of cocoa powder, baking soda, and buttermilk that creates tender crumb without needing expensive mix-ins.
What makes this recipe truly budget-friendly is using basic ingredients you likely already have: all-purpose flour, cocoa powder, baking soda, and buttermilk (or buttermilk substitute).
The single-bowl method eliminates extra dishes, and the cake bakes in just 30 minutes at 350°F, giving you a warm, moist dessert with minimal effort. No frosting required—just dust with powdered sugar or serve with a simple whipped cream topping.
The result is a rich, fudgy chocolate cake with perfectly moist layers that stay tender even after slicing. This recipe has converted skeptics who think "cheap" means "dry"—the buttermilk and baking soda combination creates that signature moist texture without needing expensive additives.
The flavor is deep and chocolatey, with just the right balance of sweetness that satisfies any chocolate craving.
Perfect for birthdays, potlucks, or satisfying a midnight sweet tooth, this cake comes together in under 15 minutes of prep time. The instructions are clear enough for beginners but flexible enough for experienced bakers to customize.
Let's get started on this game-changing dessert that proves homemade can be both easy and impressive.
Ingredients for cheap and easy chocolate cake
Pantry staples and precise ratios transform basic ingredients into restaurant-quality chocolate cake.
| Ingredient | Amount | Notes |
|---|---|---|
| All-Purpose Flour 🌾 | 2 cups | Sifted for even texture |
| Unsweetened Cocoa Powder 🍫 | ¾ cup | Natural or Dutch-processed |
| Granulated Sugar 🍚 | 1 ½ cups | White or light brown |
| Buttermilk 🥛 | 1 cup | Homemade or store-bought |
| Vegetable Oil 🫒 | ½ cup | Light or canola preferred |
| Baking Soda 🧂 | 1 tsp | Pure, not baking powder |
| Salt 🧂 | ½ tsp | Fine sea salt preferred |
| Vanilla Extract 🌸 | 1 tsp | Pure alcohol-free if preferred |
| Hot Water 💧 | ½ cup | Boiled and cooled |
| Powdered Sugar 🍚 | ¼ cup | For dusting or topping |
| Dark Chocolate Chips 🍫 | 1 cup | Semi-sweet, optional |
The cocoa powder is non-negotiable here—Hershey's Special Dark or Dutch-processed brands deliver the richest flavor without bitterness. Most grocery stores carry both natural and Dutch-processed varieties, but check the label: natural cocoa has a slightly tangy edge while Dutch-processed is smoother. Bulk bins at Whole Foods often have higher-quality options if you're willing to invest. For the buttermilk, homemade (1 tbsp vinegar or lemon juice + 1 cup milk) gives the best tang, but store-bought works fine in a pinch. The baking soda needs to be fresh—if it smells like vinegar, toss it and buy a fresh box.
No buttermilk? Plain yogurt thinned with milk works perfectly, or even 1 cup milk + 1 tbsp vinegar as a last-minute swap. Running low on vanilla extract? Vanilla bean paste gives more flavor for the same cost. The hot water activates the baking soda fully, so don't skip it—this is what creates that signature moist crumb. Chocolate chips are optional, but if you add them, Ghirardelli 60% or higher delivers the best melt-in-your-mouth texture. For a budget version, store-brand semi-sweet works just as well when melted first for even distribution.
This batter keeps for 2 days in the fridge if covered tightly—just bring it to room temperature before baking. The cake itself reheats beautifully in the microwave (30 seconds covered) or at 300°F for 10 minutes to restore moisture. For make-ahead prep, bake the cake, cool completely, then wrap tightly in plastic wrap. It stays fresh for 5 days at room temperature or 3 months frozen. The powdered sugar topping should be applied just before serving—it loses its crispness if stored too long.
Why You'll Love This Recipe
- Pantry Magic: I swear by this recipe because it uses stuff I already have—no special trips to the store. That buttermilk and vegetable oil combo keeps it rich without needing butter or expensive shortcuts.
- Fudgy Core: The cocoa powder and sugar melt into that perfect dense, moist center that’s not too sweet—just deep, chocolatey satisfaction. Honestly, it’s the kind of cake that makes you want to eat it straight from the pan.
- Weeknight Hero: This is my go-to for birthdays, potlucks, or when I just need dessert now. Bake it once, slice it twice—leftover pieces stay fresh for days, and it’s the kind of cake that disappears fast.
- Budget Win: For under $5, this feeds six people (or one very hungry person). Between us, it’s the most reliable chocolate cake I’ve ever made—no fancy ingredients, no wasted money, just pure chocolate joy.
Step-by-step instructions for a single-bowl chocolate cake
This method delivers consistently moist layers with minimal cleanup—ideal for budget-friendly baking.
Combine Dry Ingredients in One Bowl
In a large mixing bowl, sift together the 2 cups all-purpose flour and 0.75 cup unsweetened cocoa powder. This prevents lumps and ensures even distribution of cocoa throughout the batter. Use a whisk to break up any clumps in the cocoa powder before adding the flour.
Next, add the 1.5 cups granulated sugar, 1 tsp baking soda, and 0.5 tsp salt to the same bowl. Whisk these dry ingredients together for about 30 seconds until fully combined and no streaks of flour remain. The baking soda will react slightly with any acids in the cocoa, so don't skip this step—it's what creates that perfect lift in your cake.
Incorporate Wet Ingredients Gradually
Create a well in the center of your dry ingredients and pour in the 1 cup buttermilk, 0.5 cup vegetable oil, and 1 tsp vanilla extract. The buttermilk adds moisture while keeping the cake tender, and the oil ensures a rich, fudgy texture. Using a sturdy spatula or wooden spoon, gently fold these wet ingredients into the dry mixture just until combined.
Here's where precision matters: don't overmix. You're looking for a thick, slightly lumpy batter—this prevents a dense cake. The mixture should hold its shape when you lift the spatula, but still be pourable. If it looks too thick, add 1-2 tablespoons of hot water to loosen it slightly, but don't exceed the 0.5 cup hot water called for in the recipe.
Fold in Hot Water and Chocolate Chips
Pour the 0.5 cup hot water into the batter in a slow, steady stream while gently stirring with your spatula. The hot water activates the baking soda immediately, which is why we add it last—this ensures maximum rise. Fold it in just until incorporated, being careful not to deflate any air bubbles you've created.
Finally, stir in the 1 cup dark chocolate chips using a spatula. Distribute them evenly throughout the batter, but don't worry about perfect uniformity—they'll melt slightly during baking and create pockets of rich chocolate in every bite. The batter should now be thick, glossy, and ready for the oven.
Bake in Two Layers for Perfect Results
Preheat your oven to 350°F and grease two 6-inch round cake pans (or one 9-inch pan if you prefer a single layer). Divide the batter evenly between the pans—you'll need about 1½ cups per 6-inch pan. Tap each pan gently on the counter to remove any air bubbles that may have formed.
Bake for 25-30 minutes or until a toothpick inserted into the center comes out clean. The edges should be set, but the center should still have a slight bounce—this indicates a moist interior. Rotate the pans halfway through baking for even browning. If the tops brown too quickly, tent loosely with aluminum foil after 15 minutes to prevent over-browning while the center finishes baking.
Cool and Dust for Maximum Moisture
Remove the cakes from the oven and let them cool in their pans for 10 minutes. This allows the cakes to set slightly before handling. Then, carefully transfer them to a wire rack to cool completely. While they're still warm, dust the tops generously with 0.25 cup powdered sugar—this creates a beautiful finish and preserves moisture.
The secret to keeping this cake moist? Don't skip the powdered sugar step, and always store it in an airtight container between layers of parchment paper. This single-bowl method yields rich, fudgy layers that stay tender for days—perfect for your budget without sacrificing quality.
Pro Tips For Making Cheap And Easy Chocolate Cake
- Whisk the Cocoa First: Mix the cocoa powder with the vegetable oil and sugar before adding any liquid—this prevents clumps and gives you a smoother batter. I learned this the hard way after scraping dried cocoa chunks out of my mixer for the third time.
- Measure Buttermilk Right: Use 1 cup of buttermilk plus 1 tablespoon of vinegar or lemon juice—this guarantees tangy thickness without curdling. Store-bought buttermilk can be hit-or-miss, so this backup saves you from a gummy cake.
- Bake Until Slightly Under: Pull the cake out when the edges look set but the center still jiggles—overbaking turns it dry. Let it cool 10 minutes in the pan before transferring, or it’ll crack like a dried riverbed.
- Skip the Extra Egg: This recipe doesn’t need one—extra eggs make the texture dense and chewy. The buttermilk and oil already add moisture, so trust the formula unless you’re making a layered cake. (Yes, even if you’re skeptical.)
Storing and reheating your leftovers
Room Temperature Storage
Let your cake cool completely before storing at room temperature. I always wrap each layer tightly in plastic wrap, then place them between parchment paper to prevent drying. Store in an airtight container for up to 5 days—this keeps the moisture locked in.
The powdered sugar topping stays crisp when stored this way, but I recommend adding fresh powdered sugar before serving for the best texture. 💛
Fridge Preservation
For longer storage, refrigerate your cake in the same airtight container with parchment paper between layers. It stays fresh for 7-10 days this way, though the texture becomes slightly denser. To serve, let it sit at room temperature for 10-15 minutes before slicing—this prevents crumbs.
I find the cake actually tastes better after a day in the fridge as the flavors meld together. 🥶
Freezer Magic
This cake freezes beautifully for up to 3 months without losing moisture. Wrap each layer individually in plastic wrap, then place them in a freezer-safe bag with all air squeezed out. When ready to serve, thaw overnight in the fridge.
For quick serving, microwave individual slices for 20-30 seconds on 50% power—this restores moisture without drying out the edges. The texture remains perfectly tender when reheated this way. ❄️
Reheating Secrets
For the best results, I recommend the oven method—wrap the cake in foil and warm at 300°F for 10-15 minutes. This gently reheats the entire piece evenly.
Microwave reheating works in a pinch: cover with a damp paper towel and heat for 15-20 seconds at a time until warmed through. Never reheat uncovered, or the powdered sugar topping will lose its crispness. 🔥
Reviving Dry Cake
If your cake dries out during storage, don't toss it! Brush the slices with 1-2 teaspoons of simple syrup (equal parts sugar and water, heated until dissolved) or a thin layer of vegetable oil.
Let it sit for 5 minutes before serving—this restores moisture instantly. I've revived cakes this way even after 10 days of storage with perfect results. 💫
Nutrition facts
Frequently asked questions
Can I make this chocolate cake without buttermilk?
Use 1 cup plain yogurt thinned with 1 tablespoon milk or 1 cup milk + 1 tablespoon vinegar or lemon juice as a substitute. Let it sit for 5 minutes to thicken before using. The tangy reaction creates the same moist texture as buttermilk.
Why does my cake turn out dry even though I followed the recipe?
Overmixing the batter or baking too long are the most common causes. Stop mixing once the ingredients are just combined—lumpy batter prevents dryness. Also, check your oven temperature with an oven thermometer (many run 25°F hotter than set). If the cake browns too fast, tent with foil after 15 minutes.
How can I make this cake richer without adding more fat?
Replace 1 tablespoon of hot water with 1 tablespoon of coffee or espresso powder dissolved in it—this enhances chocolate flavor without extra calories. For a fudgier texture, add 2 tablespoons of melted butter to the batter along with the oil. The butter adds richness while keeping the cake moist.
Can I bake this in a different pan size?
Yes! For a 9-inch round pan, use the full batter. For 8-inch pans, divide the batter between two pans (about 1 cup per pan). Bake times may vary: 8-inch pans need 20-25 minutes, while 9-inch pans take 30-35 minutes. Always check with a toothpick.
What's the best way to serve this cake without frosting?
Dust with powdered sugar and top with whipped cream, raspberries, or a drizzle of melted chocolate**. For extra indulgence, warm 1 cup heavy cream with 2 tablespoons powdered sugar and ½ teaspoon vanilla until thickened, then pour over slices. The contrast of warm cake and cool topping is perfect!