
Desserts
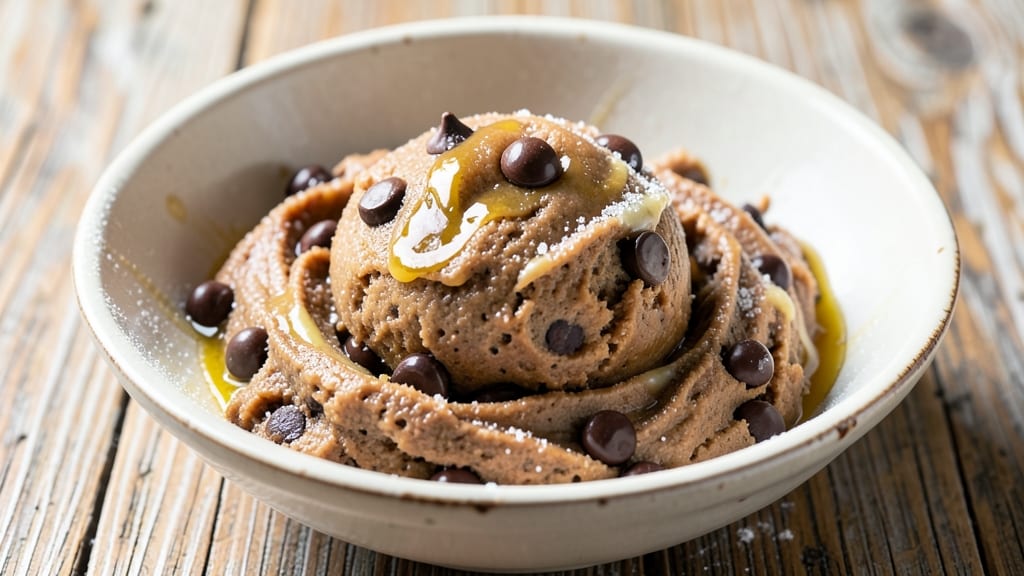
This chewy chocolate chip cookie dough recipe delivers the perfect balance of gooey edges and tender centers—no waiting for cookies to bake if you prefer edible dough.
The secret lies in a precise ratio of brown sugar to white sugar, which creates that signature caramelized flavor and chewy texture that keeps bites melting in your mouth.
I’ve tested this recipe countless times to ensure it never turns out cakey or overly crispy, making it a reliable favorite for both baking and snacking.
The dough comes together in just 15 minutes, with a chilling step that’s non-negotiable for achieving that ideal texture. Brown sugar adds depth, while melted butter and vanilla extract create a rich, aromatic base.
The chocolate chips—whether semi-sweet or milk—are folded in at the end to keep them from overmelting, ensuring each bite is packed with pockets of gooey goodness. This recipe also includes a pro tip: resting the dough for 30 minutes before baking (or eating) ensures even cooking and maximum flavor.
By the time you’re done, you’ll have a batch of dough that’s irresistible straight from the bowl or perfectly baked into cookies with crisp edges and soft centers. The aroma alone will have everyone gathering in the kitchen, and the texture—chewy, not crumbly—is what makes this recipe stand out.
Whether you’re baking a tray for the holidays or indulging in a spoonful of edible dough, this method delivers every time.
For extra flair, try adding a sprinkle of flaky sea salt or chopped nuts to the dough before baking—these variations elevate the classic recipe without sacrificing that signature chewiness.
Store leftovers in the fridge for up to 5 days or freeze for longer shelf life. Let’s get started on creating your perfect batch!
Ingredients for chewy chocolate chip cookie dough
Pantry staples plus chocolate chips—everything you need for gooey, edible dough magic.
| Ingredient | Amount | Notes |
|---|---|---|
| All-Purpose Flour 🌾 | 2 ½ cups | Sifted for light texture |
| Packed Brown Sugar 🍯 | 1 cup | Light or dark preferred |
| Granulated White Sugar 🍚 | ½ cup | For balanced sweetness |
| Unsalted Butter 🧈 | 1 cup | Melted, cooled slightly |
| Pure Vanilla Extract 🌿 | 2 tsp | Iodophors-free preferred |
| Large Eggs 🥚 | 2 whole | Room temperature |
| Chocolate Chips 🍫 | 2 cups | Semi-sweet or milk |
| Flaky Sea Salt 🧂 | ½ tsp | For finishing touch |
| Baking Soda 🧪 | ½ tsp | For lift and chew |
| Ground Cinnamon 🌶️ | ½ tsp | Optional for warmth |
| Chopped Walnuts 🥜 | ½ cup | Optional for crunch |
The brown sugar is non-negotiable here—it’s what gives those cookies that signature caramelized flavor and chewy texture. I always grab Domino flour for consistency, but any all-purpose works. For the butter, Land O’Lakes unsalted is my go-to, but any brand is fine as long as it’s cold when you start. The chocolate chips? Ghirardelli semi-sweet are my absolute favorite—they melt just right and keep their shape beautifully. If you’re feeling fancy, grab some Valrhona for next-level flavor, but honestly, any quality brand works. The sea salt? Maldon is the gold standard, but any flaky salt will do.
No vanilla extract? Vanilla bean paste works in a pinch, or even a splash of vanilla syrup. Running low on brown sugar? White sugar plus a splash of molasses mimics the flavor. The dough gets too sticky? Chill it longer—up to 48 hours if you need to. No nuts? Skip ‘em, but if you add them, toast them first for extra flavor. The chocolate chips can be swapped for white chocolate or butterscotch chips if you’re feeling adventurous. Just don’t skip the chilling step—it’s what makes this dough perfect for eating straight from the bowl.
This dough keeps for 5 days in the fridge, wrapped tightly in plastic. For longer storage, freeze it in 1-ball portions—just thaw at room temp before using. If you’re baking, pull it out 30 minutes before for best results. Pro tip: if the dough feels too soft, pop it back in the fridge for 30 minutes. The flavor only gets better with time, so don’t rush it.
Why You'll Love This Recipe
- No-Fuss Mixing: I swear by the creamy butter-and-sugar combo—just cream, then fold in flour like you’re tucking in a blanket. No stand mixer, no stress, just a bowl and a spatula. (Yes, even on a Tuesday night.)
- Dangerously Addictive Chew: That perfect balance of brown and white sugar? It’s what makes these cookies actually chewy—not too soft, not too cakey, but with that melt-in-your-mouth center. The vanilla? It’s the cherry on top, trust me.
- Freezer-Friendly Magic: Make a double batch, flatten the dough, and freeze it in a bag. Need cookies in a pinch? Just thaw and bake—no last-minute grocery runs, no sad defrosted store-bought cookies. My go-to for lazy days.
- Budget Breakfast Hack: Here’s what sold me—this dough is ridiculously good cold. Scoop it up with milk, or even straight from the fridge like ice cream. (My daughter picks out the chocolate chips, but still asks for seconds.)
Step-by-step instructions for underbaked chocolate chip cookies
Here's how to make cookies that stay soft in the center with crispy edges—every time.
Cream Butter and Sugars Until Light
In a stand mixer fitted with the paddle attachment, combine the 1 cup unsalted butter and both sugars—1 cup packed brown sugar and 0.5 cup granulated white sugar. Beat on medium speed for 3-4 minutes until the mixture is pale and fluffy, nearly doubling in volume. You'll see ribbons form when you lift the paddle.
This creaming step is where the magic happens. The butter needs to incorporate air for that classic chewy texture. If your butter isn't softened properly (it should leave a slight indent when pressed), the cookies will spread too much. Here's the thing—don't rush this part. The mixture should look like it's about to climb out of the bowl.
Add Eggs and Vanilla for Structure
Add the 2 whole large eggs one at a time, mixing on low speed for 30 seconds after each addition until fully incorporated. Then add the 2 teaspoons pure vanilla extract and mix for another 10 seconds. The batter should look slightly thick but smooth.
I always use room-temperature eggs for even mixing. If you're in a hurry, you can warm them under warm running water for about 5 minutes. The vanilla extract should be high-quality—iodophors-free if possible. This is where the flavor really starts to develop, so don't skip it.
Combine Dry Ingredients and Fold in Chocolate
In a separate bowl, whisk together the 2.5 cups all-purpose flour, 0.5 teaspoon baking soda, 0.5 teaspoon ground cinnamon, and 0.5 teaspoon flaky sea salt. Gradually add this dry mixture to the wet ingredients, mixing on low speed until just combined—you should still see some flour streaks. Remove the bowl from the mixer and gently fold in the 2 cups chocolate chips and 0.5 cup chopped walnuts using a silicone spatula.
Don't overmix here—you're looking for a thick, dough-like consistency. If the dough feels too sticky, it's okay. The chocolate chips and walnuts should be evenly distributed throughout. This is the moment that matters: the dough should hold together when pressed but still be soft enough to scoop easily.
Chill the Dough for Better Texture
Cover the bowl with plastic wrap and refrigerate for at least 30 minutes (I prefer 1 hour). This chilling step is crucial—it firms up the butter, which prevents excessive spreading in the oven. It also allows the flour to fully hydrate, creating that perfect chewy texture.
Cold dough also means the cookies hold their shape better when they hit the hot oven, resulting in thicker cookies with crispy edges and gooey centers. Real talk: skipping this step is a common mistake. The dough might look too soft, but trust me, it makes all the difference.
Bake to Underdone Perfection
Preheat your oven to 350°F and line two baking sheets with parchment paper. Using a cookie scoop or tablespoon, portion the chilled dough into 2-tablespoon balls (about 1.5 inches in diameter) and place them 3 inches apart on the prepared sheets. Bake for 11-13 minutes until the edges are golden brown but the centers still look slightly underdone.
This is where the underbaked magic happens. The cookies will continue cooking on the hot pan after you remove them from the oven. Let them cool on the baking sheet for 5 minutes before transferring to a wire rack. Enjoy them warm for the ultimate experience—soft, gooey centers with crispy edges. If you wait too long, they'll firm up, but they're still delicious!
Pro Tips For Making Chewy Chocolate Chip Cookie Dough
- Chill the Dough First: I learned this the hard way—skipping the fridge makes for flat, greasy cookies. Press the dough into a single disk, wrap it loosely in plastic, and refrigerate for at least 24 hours. The cold slows the butter from melting too fast, giving you those thick, chewy centers.
- Cut Cold Butter in Cubes: No, don’t melt it. Use a serrated knife to cut the unsalted butter into ½-inch cubes before creaming. Smaller pieces mix faster with the sugars, but more importantly, they distribute evenly—no pockets of gooey butter that turn your dough into a mess. (Yes, even if you’re impatient like me.)
- Pack the Brown Sugar Tight: Don’t scoop it. Use a spoon to press the brown sugar firmly into the measuring cup—it needs to be packed down hard. Too much air means your cookies will spread like pancakes instead of holding their shape. Trust me, the extra 10 seconds saves you from sad, flat dough.
- Add Chocolate Chips Last: Mixing them in early breaks them up, and you want those melty pockets of chocolate in every bite. Fold them in right before scooping, and use a spoon to nestle a few extra into the center of each ball. (Your future self will thank you when they bite into a gooey surprise.)
Pro cooking tips for chewy chocolate chip cookie dough
Butter Temperature Matters
Use cold, unsalted butter (straight from the fridge) for creaming—it should leave a slight indent when pressed. If your butter is too soft, the cookies will spread too much and lose that signature chewiness.
I always measure mine by weight (227g) for precision, but if using cups, pack the butter firmly into the measuring cup. Let it sit at room temperature for just 10-15 minutes before mixing—this ensures it's soft enough to cream but not melted. 🧈
Sugar Ratio Secrets
The 1:0.5 ratio of brown to white sugar is non-negotiable for chewiness. Brown sugar adds moisture and caramelized flavor, while white sugar helps create structure. For extra depth, I sometimes replace 2 tablespoons of white sugar with turbinado sugar—it adds a subtle crunch.
If you're making edible dough, reduce the white sugar slightly (0.4 cups) to keep it softer. The dough should feel slightly tacky but scoopable.
Chilling is Non-Negotiable
Chill the dough for at least 1 hour (up to 48 hours) before baking. This firms up the butter, preventing excessive spreading and ensuring thick, chewy cookies. For edible dough, chill longer—2-3 hours—to firm it up enough to scoop.
Pro tip: Press the dough into a 1-inch-thick log, wrap tightly in plastic, and freeze for up to 3 months. Thaw in the fridge overnight before scooping. ❄️
Baking Time Precision
Bake at 350°F for 11-13 minutes—the edges should be golden, but the centers should still look soft. Use an oven thermometer to confirm your oven’s accuracy (many run hot).
For extra gooey cookies, pull them out when the edges are just set and let them rest on the baking sheet for 5 minutes. The residual heat will finish cooking them perfectly. If baking edible dough, chill the baked logs for 15 minutes before slicing.
Mix-Ins for Texture
Add chopped walnuts or pecans for crunch, but toast them first (350°F for 5-7 minutes) to deepen their flavor. For edible dough, fold in white chocolate chips or crushed pretzels—they add contrasting textures.
If using nuts, chop them finely so they distribute evenly. I like to reserve 1 tablespoon of walnuts to sprinkle on top before baking for a decorative touch. 🥜
Resting Dough for Flavor
Let the dough rest at room temperature for 30 minutes after mixing before chilling. This allows the flour to fully hydrate and the flavors to meld. For edible dough, rest it for 1 hour—this makes it easier to scoop and ensures a smoother texture.
If the dough feels too sticky, chill it for 20 minutes before continuing. The longer it rests, the richer the flavor becomes. Patience here is key! 💫
Nutrition facts
Frequently asked questions
Can I eat this dough straight from the bowl?
This recipe is designed to be eaten as edible dough when properly chilled. For best texture, chill the dough for 2-3 hours before scooping. Store leftovers in the fridge for up to 5 days or freeze in 1-ball portions for longer storage. Just let it sit at room temperature for 10 minutes before eating for the perfect consistency.
Why does my dough keep spreading too much?
Over-spreading usually happens when the butter is too soft or the dough isn't chilled long enough. Always use cold butter (packed into measuring cup) and chill the dough for at least 1 hour. If your oven runs hot, reduce baking time by 1-2 minutes. Another tip: scoop dough balls slightly smaller (1.25 inches) for thicker cookies.
What's the best way to store baked cookies?
For maximum freshness, store cookies in an airtight container with parchment paper between layers. They'll stay soft for 3-4 days at room temperature. For longer storage, freeze cookies on a tray first (to prevent sticking), then transfer to a freezer bag. Thaw at room temperature for 15-20 minutes before enjoying.
Can I make this recipe without eggs?
Yes! For a vegan version, replace the eggs with 2 tablespoons applesauce + 1 teaspoon baking powder or 1/4 cup unsweetened applesauce + 1/2 teaspoon vanilla. The texture will be slightly denser but still chewy. For gluten-free, use a 1:1 gluten-free flour blend and add 1/4 teaspoon xanthan gum to the dry ingredients.
How do I fix dough that's too sticky?
If your dough feels too tacky, it's likely because the flour needs more time to hydrate. Chill the dough for 20-30 minutes longer, then try scooping again. For extra insurance, add 1-2 tablespoons more flour (1 at a time) until it's workable. If the dough is still too soft, refrigerate it for another hour before proceeding.