
Desserts
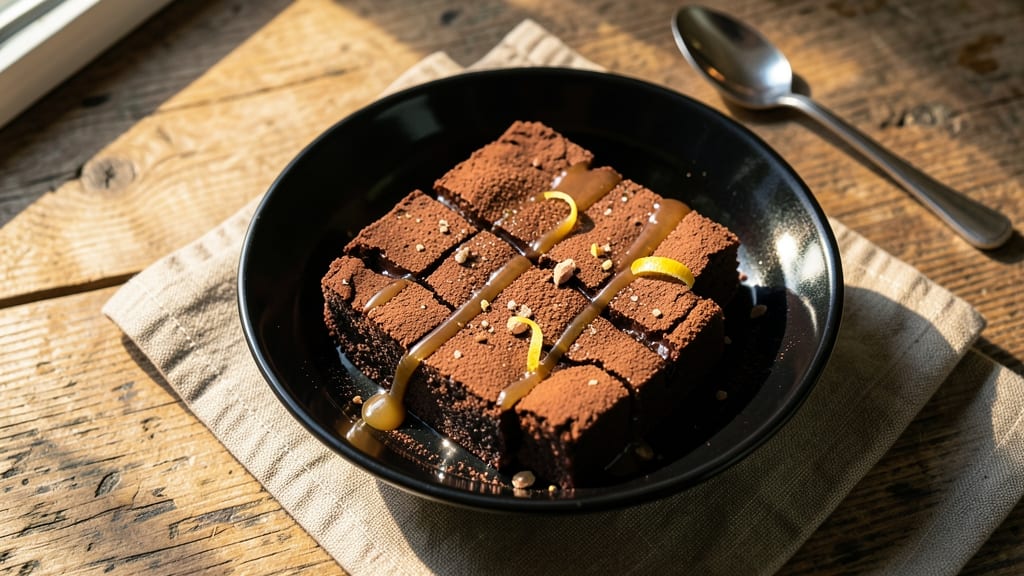
This chewy chocolate fudge brownie recipe delivers the perfect balance of dense, moist centers and crispy edges—double-layered with a nutty crunch that takes every bite to the next level.
The secret lies in a precise mix of cocoa powder, melted butter, and a touch of espresso powder for depth, all baked just until the edges set but the center remains fudgy.
I’ve perfected this recipe over years of testing, ensuring it never dries out or becomes too cakey, which is a common pitfall with brownie recipes.
The texture is where this recipe truly shines: chewy yet tender, with a rich chocolate flavor that lingers. A layer of toasted pecans or walnuts adds that nutty crunch, while a sprinkle of flaky sea salt on top elevates the sweetness.
The recipe uses simple ingredients—no fancy substitutions—but the technique ensures professional results every time. Whether you’re baking for a crowd or treating yourself, these brownies are guaranteed to disappear quickly.
Baking time is critical here: 30-35 minutes at 350°F ensures the edges are set while the center stays moist. The double-layered approach means you get twice the richness without the extra effort, and the nutty topping adds texture that keeps every bite interesting.
This isn’t just another brownie recipe—it’s a foolproof method for achieving restaurant-quality results at home.
Perfect for holidays, dessert nights, or as a gift, these brownies hold their texture for days when stored properly. Serve warm with a scoop of vanilla ice cream or dust with powdered sugar for an extra touch of elegance. Let’s get started on creating your next favorite treat.
Ingredients for chewy chocolate fudge brownie
Simple ingredients transformed into restaurant-quality chewy chocolate fudge brownies with nutty crunch.
| Ingredient | Amount | Notes |
|---|---|---|
| Unsalted Butter 🧈 | 1 cup | Melted, cooled slightly |
| Granulated Sugar 🍚 | 1 ½ cups | Light brown preferred |
| Unsweetened Cocoa Powder 🍫 | ¾ cup | Dutch-processed preferred |
| Espresso Powder ☕ | 1 tbsp | Enhances chocolate depth |
| All-Purpose Flour 🌾 | ½ cup | Sifted for even texture |
| Vanilla Extract 🍯 | 1 tsp | Pure, high-quality |
| Large Eggs 🥚 | 2 whole | Room temperature |
| Flaky Sea Salt 🧂 | ½ tsp | For garnish |
| Pecans or Walnuts 🌰 | 1 cup | Toasted, roughly chopped |
| Powdered Sugar 🍚 | ¼ cup | For dusting |
| Dark Chocolate Chips 🍫 | ½ cup | 70% cocoa, optional |
The cocoa powder makes all the difference here. Dutch-processed gives a smoother texture and richer flavor, but regular cocoa works too. For the best quality, grab a bag from Ghirardelli or Valrhona—they’re worth the splurge. Pecans or walnuts should be toasted until golden and fragrant; Trader Joe's sells pre-toasted bags if you're short on time. The espresso powder is non-negotiable for that deep chocolate flavor, but if you're out, a teaspoon of instant coffee works in a pinch. Butter should be melted but not hot—just warm enough to mix easily.
No Dutch-processed cocoa? Regular cocoa powder plus 1/4 tsp baking soda mimics the effect. Swap pecans for walnuts or almonds if you prefer, but toast them first. The dark chocolate chips are optional but add pockets of gooey goodness. For a vegan version, use flax eggs (1 tbsp ground flaxseed + 3 tbsp water per egg) and ensure your cocoa and chocolate chips are dairy-free. The flaky sea salt should be coarse—Maldon is my go-to, but any good-quality flaky salt works. If you can't find it, a pinch of regular salt sprinkled lightly will do.
Store these brownies in an airtight container at room temperature for up to 5 days, though they're best enjoyed fresh. For longer storage, wrap tightly in plastic wrap and keep in the fridge for 1 week. Freeze for up to 3 months by wrapping each brownie individually in plastic wrap. Reheat slices in the microwave for 10-15 seconds to restore that warm, gooey texture. These brownies reheat beautifully, so save leftovers for a quick dessert later in the week.
Why You'll Love This Recipe
- One-Bowl Wonder: I swear by this—just melt butter, mix everything in the same bowl, then bake. No fancy equipment, no stress, and honestly? That’s all I need when I’m craving something rich but don’t want to scrub three bowls afterward.
- Espresso Kick: The espresso powder isn’t just for show—it cuts through the sweetness and gives these brownies a deep, almost grown-up chocolate flavor. (Yes, even my coffee-hating husband sneaks bites.)
- Party-Ready Magic: Slice them into squares for a crowd, or leave them whole for dramatic dessert moments. They stay fudgy for days, so I always make a double batch—because someone will always “help” themselves.
- Budget Bliss: Butter, sugar, cocoa—these are pantry staples that won’t break the bank. Plus, the leftovers? They’re my secret weapon for lazy mornings or last-minute gifts. Wrap a piece in foil, and boom—you’ve got a thoughtful treat.
Step-by-step instructions for chewy chocolate fudge brownies
Here's the precise method for creating decadent, double-layered brownies with perfect texture and nutty contrast.
Melt and Mix the Base Ingredients
In a medium heatproof bowl set over a pot of barely simmering water, melt the 1 cup unsalted butter until completely liquid. Remove from heat and let cool for 5 minutes—this prevents scrambling the eggs later. While the butter cools, whisk together the 1.5 cups granulated sugar, 0.75 cup unsweetened cocoa powder, and 1 tbsp espresso powder in a separate large bowl until smooth and free of lumps.
Add the cooled butter to the dry mixture and whisk vigorously for 2 minutes until fully combined and the batter looks glossy. This step ensures even distribution of cocoa and sugar, which is crucial for that signature fudge texture. The batter should be thick but pourable—if it's too stiff, you may need to add 1 tablespoon of warm water to loosen it slightly.
Incorporate Eggs and Flavorings
In a small bowl, lightly beat the 2 whole large eggs until just combined (no need to overbeat). Add them one at a time to the chocolate mixture, whisking 30 seconds after each addition until fully incorporated. Stir in the 1 tsp vanilla extract and 0.5 cup all-purpose flour, mixing just until the flour disappears—overmixing develops gluten and makes brownies tough.
Real talk: This is where the magic happens. The eggs provide structure while keeping the brownies moist, and the flour acts as a binder. The batter should now have a thick, fudgy consistency—if it looks too thin, it will spread too much in the pan. Fold in the 0.5 cup dark chocolate chips by hand using a spatula, ensuring even distribution throughout the batter.
Prepare the Double-Layered Pan
Preheat your oven to 350°F. Lightly grease an 8x8-inch baking pan with butter or line it with parchment paper for easy removal. Pour half of the batter into the pan and spread it evenly using an offset spatula. Sprinkle half of the 1 cup toasted pecans or walnuts evenly over the first layer, pressing them down gently with the back of the spatula.
Pour the remaining batter over the nut layer and spread it evenly. Sprinkle the remaining nuts over the top layer, pressing them down lightly to create that signature crunch. Here's the thing—don't skip pressing the nuts. They'll sink slightly as the brownies bake, creating pockets of nutty flavor in every bite. Tap the pan gently on the counter to eliminate any air bubbles that might have formed.
Bake to Perfect Doneness
Bake for 25-30 minutes, or until a toothpick inserted in the center comes out with moist crumbs but no wet batter clinging to it. The edges should be set but the center should still look slightly underbaked—this ensures that chewy texture throughout. Don't overbake; the brownies will continue cooking slightly as they cool.
I press down gently on the center of the brownies during the last 5 minutes of baking to encourage even cooking and prevent a dome from forming. This also helps create that signature crackly top. When they're done, let them cool in the pan for 15 minutes before transferring to a wire rack to cool completely. This gradual cooling prevents cracking and maintains the fudgy texture.
Dust and Serve
Once completely cool, dust the top generously with 0.25 cup powdered sugar using a fine-mesh sieve. This adds that classic "snowy" finish while balancing the rich chocolate flavor. Sprinkle with the 0.5 tsp flaky sea salt for a sophisticated contrast of sweet and salty.
Slice into 16 equal squares (4 servings) using a warm, wet knife for clean cuts. Serve at room temperature for the best texture—these brownies develop their full chewy potential as they sit. The combination of rich chocolate fudge, toasted nuts, and that perfect dusting of powdered sugar makes each bite unforgettable. Store leftovers in an airtight container at room temperature for up to 5 days or freeze for up to 3 months.
Pro Tips For Making Chewy Chocolate Fudge Brownie
- Melt Butter Slowly: I learned this the hard way—dumping cold butter into hot sugar turns your mixture into a greasy mess. Warm the butter in the microwave for 30 seconds first, then melt it gently over low heat with the sugar. This keeps the butter from seizing up and ensures a smooth, glossy batter that won’t separate.
- Sift the Cocoa: Unsweetened cocoa powder is notoriously clumpy, and clumps in your batter mean uneven texture. Sift it directly into your measuring cup (or straight into the dry ingredients) to eliminate lumps. No sifter? Use a fine-mesh strainer and tap it firmly with a spoon—it’s a pain, but worth it for that fudgy consistency.
- Stop at the Toothpick Test: Overbaking is the enemy of chewy brownies. Pull them when a toothpick comes out with moist crumbs (not wet batter, not dry powder). If you’re nervous, check 2 minutes early—brownies finish cooking as they cool. Underbaked brownies are forgivable; dry ones are a crime.
- Use Room-Temp Butter: Cold butter creates pockets of air in your batter, leading to a cakey texture instead of the dense, fudgy result you want. Let your butter sit out for 30–60 minutes until it’s soft but not melted—press your finger into it, and it should leave a slight indent. No time? Microwave it in 10-second bursts until pliable.
Storing and reheating this dish
Room Temperature Storage
Store your chewy chocolate fudge brownies in an airtight container at room temperature for up to 5 days. I use glass containers with silicone seals from Rubbermaid—they keep the brownies fresh while preventing moisture loss.
The double-layered texture stays intact when stored properly, and the nuts maintain their crunch. Place a piece of parchment paper between layers if stacking to prevent sticking. 🧈
Refrigerator Refresh
For longer storage, refrigerate in the same airtight container for up to 1 week. The cold temperature actually enhances the fudge-like texture, making them even more decadent when served chilled.
Let brownies sit at room temperature for 10-15 minutes before serving to soften slightly—the contrast between cool and warm makes them irresistible. I often reheat slices in the microwave for 10-15 seconds to restore that warm, gooey center. 💫
Freezer Perfection
Freeze individual slices wrapped tightly in plastic wrap for up to 3 months. I like using quart-sized freezer bags with the air squeezed out to prevent freezer burn. Thaw at room temperature for 1-2 hours before serving—this gradual process preserves the chewy texture.
For a quick treat, microwave thawed slices for 15-20 seconds to revive the fudge consistency. The nuts stay crisp even after freezing, adding that satisfying crunch. ❄️
Reheating Secrets
Microwave reheating is my go-to for single servings: place a slice on a microwave-safe plate and heat for 8-10 seconds on medium power. For even warmth, cover with a damp paper towel to prevent drying.
Alternatively, warm in a 200°F oven for 5-7 minutes—this method keeps the edges crisp while melting the center. The powdered sugar topping stays intact, and the salt enhances the chocolate flavor when warm. 🔥
Texture Preservation
The key to maintaining that perfect chewy texture is never overbaking when reheating. Microwave in short bursts and check frequently to avoid drying out. For oven reheating, cover loosely with foil to prevent the top from becoming too crisp.
The double-layered structure holds up well when reheated properly, making these brownies perfect for quick desserts or meal prep. Store leftovers in the freezer for convenience—just thaw and enjoy! 💡
Nutrition facts
Frequently asked questions
Why do these brownies turn out chewy instead of cakey?
The secret lies in the precise ratio of cocoa powder to flour and the baking time. Using 0.5 cup flour for 0.75 cup cocoa powder creates that dense, fudgy texture, while baking just until a toothpick comes out with moist crumbs (not wet batter) ensures they stay chewy. Overbaking turns them cakey, so timing is everything!
Can I substitute dark chocolate for the cocoa powder?
Not directly—dark chocolate adds moisture and fat that would make your brownies too dense. Instead, melt 0.5 cup dark chocolate (70% cocoa) with the butter and reduce the cocoa powder to 0.5 cup to maintain balance. The espresso powder is key for depth, so don't skip it!
How do I prevent cracks on top of the brownies?
Cracks happen when the batter sets too quickly. Tap the pan gently on the counter after adding the second layer to remove air bubbles, and press down lightly on the center during the last 5 minutes of baking. Also, let them cool gradually in the pan for 15 minutes before transferring to a rack.
What if I don't have espresso powder?
Use 1 tsp instant coffee granules dissolved in 1 tbsp hot water instead. The caffeine enhances chocolate flavor, but even without it, your brownies will still taste rich and decadent. Just know the depth might be slightly less intense.
Can I make these brownies gluten-free?
Yes! Replace the 0.5 cup all-purpose flour with 0.5 cup gluten-free 1:1 baking flour (like Bob's Red Mill). For extra moisture, add 1 tbsp cornstarch to the dry ingredients. The texture will be slightly less dense but still chewy and delicious.