
Desserts
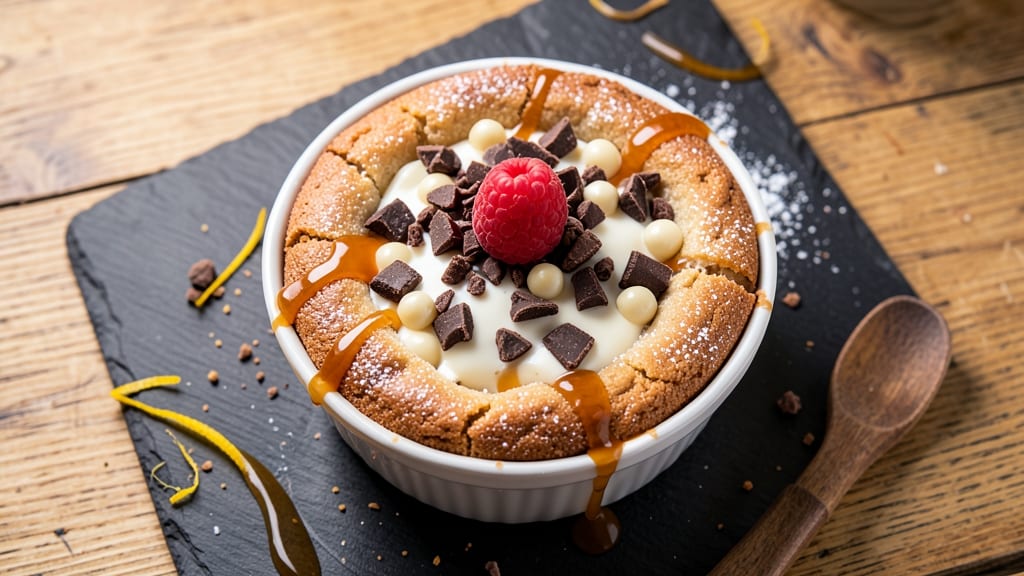
This Chili’s white chocolate molten lava cake recipe delivers that signature warm, gooey center that turns every bite into a decadent surprise. The secret lies in precise baking times and the perfect balance of rich chocolate and velvety white chocolate—just like the restaurant version, but with foolproof home-cook techniques. This recipe transforms a simple cake into a restaurant-worthy dessert that melts in your mouth with every forkful.
The key to achieving that signature lava effect is baking the cake just until the edges are set, then letting the warm center transform into molten goodness. With 30 minutes of active prep and 12-15 minutes in the oven, you’ll have a dessert that’s quick yet impressive.
The combination of dark chocolate and white chocolate creates a flavor profile that’s both rich and smooth, with a hint of vanilla that ties everything together.
What sets this recipe apart is the way the warm center creates that signature "lava" effect, turning every bite into a decadent surprise. The cake’s exterior remains tender and moist, while the inside stays warm and gooey—just like your favorite restaurant version.
Whether you’re serving it for a special occasion or a cozy dessert night, this recipe delivers on flavor and presentation.
For those looking to adapt the recipe, substitutions like gluten-free flour or dairy-free chocolate can be made without sacrificing the molten lava effect. The instructions will guide you through every step, ensuring you achieve that perfect balance of texture and flavor. Let’s get started on creating this crowd-pleasing dessert!
Ingredients for chili's white chocolate molten lava cake
These 14 ingredients create that signature warm, gooey center—just like Chili's but foolproof at home.
| Ingredient | Amount | Notes |
|---|---|---|
| All-Purpose Flour 🌾 | ¾ cup | Sifted for light texture |
| Unsalted Butter 🧈 | ½ cup | Cold, cubed for precise melting |
| Granulated Sugar 🍚 | ½ cup | White or light brown |
| Dark Chocolate Chips 🍫 | ¾ cup | Semi-sweet, 60% cocoa |
| White Chocolate Chips 🍫 | ¾ cup | High-quality, premium brand |
| Large Eggs 🥚 | 2 whole | Room temperature for blending |
| Pure Vanilla Extract 🌿 | 1 tbsp | Bottled, not imitation |
| Baking Powder 🧂 | ½ tsp | Aluminum-free for best results |
| Salt 🧂 | ¼ tsp | Fine sea salt preferred |
| Heavy Cream 🥛 | ½ cup | Cold for whipping |
| Powdered Sugar 🍚 | ¼ cup | For dusting, sifted |
| Dark Chocolate Bars 🍫 | 2 oz | 60% cocoa, broken into chunks |
| White Chocolate Bars 🍫 | 2 oz | Premium quality, broken into chunks |
| Vanilla Bean Seeds 🌿 | 1 tsp | Scraped from 1 pod (optional) |
The chocolate matters most here. Ghirardelli or Guittard chips are my go-to for that rich, melty texture—avoid store brands, they lack depth. For the white chocolate, Callebaut or Lindt are worth the splurge; they melt smoothly and don't seize. The butter should be cold and cubed when measuring—this prevents premature melting during mixing. Grab vanilla extract from the baking aisle, not the imitation stuff near the coffee. And if you're feeling fancy, scrape those vanilla bean seeds for an extra layer of flavor (trust me on this).
No dark chocolate chips? Substitute chopped chocolate bars at the same weight—just chop them finely. Running short on white chocolate? Cream cheese frosting mixed with powdered sugar mimics the richness, though it won't be as luxurious. Out of baking powder? Baking soda plus cream of tartar works at a 3:1 ratio, but adjust your measurements carefully. For a gluten-free version, swap the all-purpose flour for a 1:1 gluten-free blend—just don't skip the sifting step. The eggs can be separated if you're worried about richness, but I've never found that necessary for this recipe.
This cake is best served immediately, but if you must prep ahead, assemble the ramekins and refrigerate for up to 24 hours. Bake straight from the fridge, adding 2-3 extra minutes. The leftovers? Freeze the baked cakes for up to 1 month—thaw at room temperature before reheating. I always make a double batch for company; the second one disappears just as fast. Store powdered sugar in an airtight container to prevent clumping, and keep chocolate bars in a cool, dark place to maintain their snap.
Why You'll Love This Recipe
- Here’s what sold me: the dark chocolate chips stay just firm enough to bite into while the white chocolate melts into a gooey river. Honestly, it’s the kind of contrast that makes you close your eyes and groan—no fancy plating needed.
- I’ll be real: it uses pantry staples—flour, butter, sugar—and a bag of chips you already own. But the rich, decadent result? Feels like a splurge without the price tag. Leftovers? Microwave them—still delicious, just less dramatic.
Step-by-step instructions for Chili's white chocolate molten lava cake
Here's how to recreate that signature warm, gooey center at home—every time.
Prepare the Cake Batter
Preheat your oven to 375°F and position a rack in the center. In a medium bowl, whisk together the 0.75 cup all-purpose flour, 0.5 cup granulated sugar, 0.5 tsp baking powder, and 0.25 tsp salt until no lumps remain. This dry mixture is the foundation for that perfect cake texture.
In a separate large bowl, combine the 0.5 cup cold cubed unsalted butter, 2 whole large eggs, and 1 tbsp pure vanilla extract. Whisk vigorously for 2-3 minutes until the mixture is pale and fluffy—this incorporates air that creates the cake's structure. The butter should be fully melted but still cool to the touch.
Gradually add the dry ingredients to the butter mixture, whisking just until combined. Fold in the 0.75 cup dark chocolate chips and 0.75 cup white chocolate chips using a spatula, ensuring even distribution. The batter will be thick but smooth—this is ideal for creating that molten center.
Whip the Heavy Cream
In a chilled bowl, whip the 0.5 cup cold heavy cream to soft peaks using a hand mixer or stand mixer. You want the cream to hold its shape when the whisk is lifted, but it shouldn't be stiff. This whipped cream adds moisture and lightness to the cake, preventing it from becoming dense.
Gently fold the whipped cream into the chocolate batter in two additions, mixing just until fully incorporated. Be careful not to overmix—this could deflate the whipped cream and compromise the cake's texture. The batter should now be thick, glossy, and ready for baking.
Assemble the Cakes
Divide the batter evenly among four 6-ounce ramekins, filling each about ⅔ full. Place the ramekins on a baking sheet and refrigerate for 15-20 minutes to help the batter set slightly. This chilling step is crucial—it prevents the cakes from spreading too much in the oven.
While the batter chills, break the 2 oz dark chocolate bars and 2 oz white chocolate bars into small chunks and place them in the center of each ramekin. The chocolate will melt during baking, creating that signature gooey lava center. You can also sprinkle the 1 tsp vanilla bean seeds over the chocolate for an extra layer of flavor.
Bake to Golden Perfection
Bake the ramekins in the preheated oven for 12-14 minutes until the edges are set and golden brown. The tops should look slightly puffed, but the centers should still appear soft and slightly underdone. This is where the magic happens—the cake needs to stay slightly raw inside to create that molten center.
Remove the cakes from the oven and let them rest for 1 minute before carefully inverting each onto individual plates. The warm center should begin to ooze out immediately, creating that signature lava effect. Dust the tops with the 0.25 cup powdered sugar and serve right away while still warm.
Serve Immediately for Maximum Gooeyness
Serve the cakes immediately with a dollop of whipped cream or a scoop of vanilla ice cream to enhance the rich chocolate flavors. The contrast between the warm, gooey center and the cool topping is what makes this dessert truly special. Each bite should deliver a perfect balance of crispy edges, tender cake, and molten chocolate.
Real talk: If you let these cakes sit for even a few minutes, that lava center will start to set. That's why I always serve them straight from the oven—trust me, your guests will thank you. Enjoy your homemade version of Chili's famous dessert!
Pro Tips For Making Chili'S White Chocolate Molten Lava Cake
- Melt the Butter Slowly: I learned this the hard way—dumping cold butter into hot sugar makes a greasy mess that won’t emulsify properly. Instead, cut the butter into small cubes (about ½-inch) and add them one at a time to the sugar while stirring constantly. The butter should melt into a smooth, glossy paste, not clump like a sad, lumpy pancake batter.
- Chill the Batter Fully: This isn’t the prettiest method, but it’s the tastiest: after mixing, pop the batter in the fridge for at least 30 minutes. I used to skip this, thinking I was saving time, but the cakes would either sink in the middle or take forever to set. Cold batter = cleaner layers and a firmer structure so the lava stays molten when you cut in.
- Use Two Types of Chocolate: The recipe calls for both dark and white chocolate chips, but don’t just grab any bag off the shelf. For the dark chocolate, reach for 70% cacao or higher—it’ll give that rich, bittersweet contrast. For the white, splurge on a high-quality brand (like Guittard or Valrhona) if you can; cheap white chocolate turns grainy when melted and ruins the creamy lava effect.
- Prevent Overbaking with a Toothpick Test: Watch the heat—these cakes bake fast, and once they’re golden, they’re done. Stick a toothpick in the center; it should come out with moist crumbs, not dry flour. If you’re nervous (like I am), set a timer for 10-12 minutes max, then check immediately. Overbaking turns the lava into a sad, solid puddle, and no one wants that.
Creative variations of chili's white chocolate molten lava cake
Spiced Rum Variation
Add a boozy twist by mixing 1 tbsp spiced rum into the vanilla extract before folding it into the batter. The rum caramelizes slightly during baking, adding warm, aromatic depth that pairs beautifully with the chocolate.
For extra flair, brush the tops with an additional ½ tbsp rum after baking and dust with powdered sugar. 🌶️
Espresso Infusion
Boost the chocolate flavor by adding 1 tbsp instant espresso powder to the dry ingredients. The espresso enhances the bitterness of the dark chocolate, creating a sophisticated coffee-chocolate fusion.
I recommend using Starbucks Via or Nescafé Azera for consistent results. This variation is perfect for coffee lovers who want an extra layer of complexity.
Peanut Butter Swirl
Create a decadent twist by adding ¼ cup creamy peanut butter to the batter before baking. Swirl it in with a knife for a marbled effect that adds nutty richness.
Top with a drizzle of melted white chocolate after baking for a sweet-salty contrast. This version reminds me of a gourmet Reese's cup in cake form!
Salted Caramel Topping
Elevate the dessert with a salted caramel sauce drizzle. After baking, warm ½ cup caramel sauce with ½ tsp flaky sea salt, then drizzle over the warm cakes.
The salt enhances the sweetness while adding a sophisticated touch. I love using Trader Joe's salted caramel sauce for convenience and quality.
Matcha Green Tea
For a unique twist, replace ¼ cup of the white chocolate chips with 2 tbsp matcha powder mixed with 2 tbsp melted butter. This creates a delicate earthy flavor that complements the chocolate beautifully.
The matcha adds a subtle brightness that cuts through the richness. Use Ippodo Tea matcha powder for the best quality.
Seasonal Citrus Twist
Brighten the dessert with 1 tbsp orange zest added to the batter and a drizzle of orange glaze after baking. The citrus cuts through the richness of the chocolate, making it perfect for spring or summer.
Simmer ½ cup powdered sugar with 2 tbsp orange juice for the glaze, then drizzle over the warm cakes.
Nutrition facts
Frequently asked questions
Why does my molten lava cake not have a gooey center?
This usually happens when the cake bakes too long, causing the center to fully set. For that signature lava effect, bake until the edges are golden but the center still looks slightly underdone (12-14 minutes at 375°F). Remove immediately when edges are set—the center will continue cooking from residual heat.
Can I make these cakes ahead of time?
You can prep the batter and ramekins up to 24 hours ahead, but bake them fresh for the best lava effect. If you must store baked cakes, refrigerate for up to 4 hours, but they'll lose some gooeyness. For longer storage, freeze baked cakes (uninverted) for 1 month—thaw at room temperature before reheating.
What's the best way to serve these?
Serve immediately with a scoop of vanilla ice cream or dollop of whipped cream to contrast the warm lava. For extra presentation, dust with powdered sugar and add fresh berries. The contrast between the warm cake and cool toppings makes every bite magical—just like at Chili's!
Can I use a different type of chocolate?
For best results, stick with 60% cocoa dark chocolate and high-quality white chocolate like Callebaut or Lindt. Store-brand chocolates often melt unevenly. If substituting, use equal weight of chopped chocolate bars—just chop them finely for even distribution in the batter.
How do I fix cracked tops?
Cracked tops occur when the cake cools too quickly. To prevent this, let the cakes rest for 1 minute before inverting. If they crack, simply dust with extra powdered sugar and serve anyway—the flavor won't be affected! For next time, try baking at 350°F for 15 minutes to slow the cooking process.