
Desserts
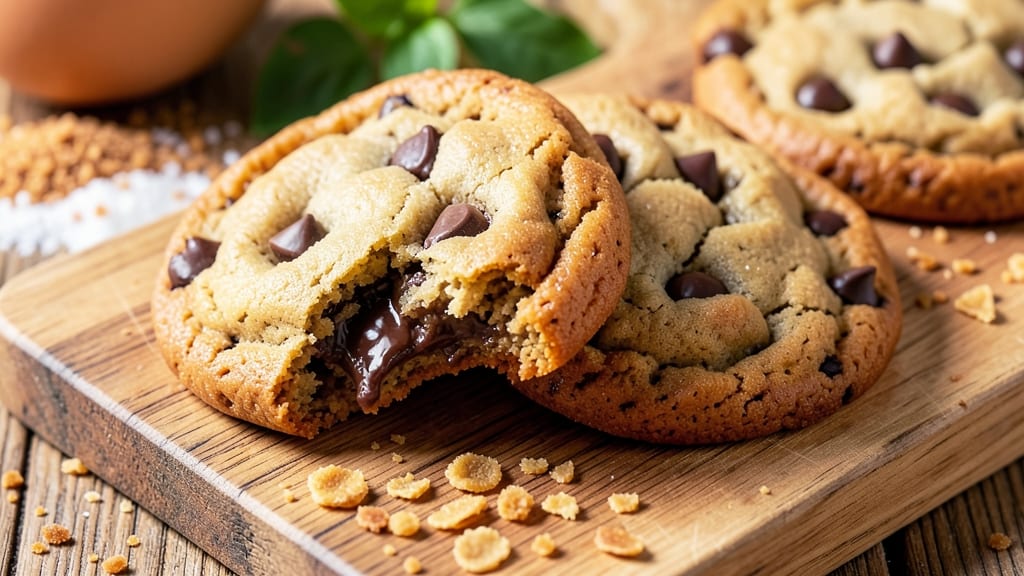
This basic chewy chocolate chip cookie recipe delivers the perfect balance of crispy edges and molten centers—every bite is a warm, vanilla-kissed hug. 💛 The secret lies in cold butter and resting the dough, which transforms simple ingredients into cookies that rival bakery favorites.
I've baked hundreds of batches, and this method never fails to impress.
What sets these cookies apart is the texture: tender yet chewy, with chocolate chips that stay gloriously melty even after cooling. The dough comes together in minutes, but the 30-minute chill in the fridge ensures even baking and maximum flavor development.
No fancy techniques—just a foolproof process that guarantees results every time.
By the time they emerge from the oven, you'll have golden cookies with caramelized edges and soft, pillowy centers. The aroma alone will have everyone gathering around the kitchen, and the first bite delivers that perfect balance of sweetness and richness.
These are the kind of cookies that disappear faster than you can say "double batch."
Perfect for holiday baking, potlucks, or satisfying that afternoon sweet tooth, this recipe scales beautifully. The dough stays fresh in the fridge for up to 48 hours, so you can bake fresh cookies whenever the craving strikes. Let's get started on creating your perfect batch.
Ingredients for basic chewy chocolate chip cookie
Cold butter, gooey chocolate, and a touch of vanilla—these 10 ingredients make magic happen.
| Ingredient | Amount | Notes |
|---|---|---|
| Unsalted Butter 🧈 | 1 cup | Cold, cubed for texture |
| Granulated Sugar 🍚 | ¾ cup | White or light brown |
| Packed Brown Sugar 🍚 | ¾ cup | Light or dark variety |
| Large Eggs 🥚 | 2 whole | Room temperature preferred |
| Vanilla Extract 🌿 | 2 tsp | Pure vanilla bean extract |
| All-Purpose Flour 🌾 | 2 ½ cups | Spooning method for accuracy |
| Baking Soda 🧂 | 1 tsp | Not baking powder |
| Salt 🧂 | 1 tsp | Diamond Crystal preferred |
| Chocolate Chips 🍫 | 2 cups | Semi-sweet or milk chocolate |
| Flaky Sea Salt 🧂 | 1 tbsp | For finishing cookies |
The butter starts cold—cubed, not melted—for that signature chewy texture. Kirkland Signature or Land O’Lakes are my go-tos, but any unsalted butter works. Brown sugar adds moisture and caramel notes, so don’t skimp. Vanilla extract? Pure stuff makes all the difference—imitation won’t cut it here. The chocolate chips? Hershey’s Semi-Sweet are reliable, but Ghirardelli or Valrhona take it to next level. Pro tip: Buy extra chips—they disappear fast.
No vanilla extract? Vanilla bean paste or even vanilla sugar works in a pinch, though real extract is worth it. Short on brown sugar? White sugar plus 1 tsp molasses mimics the flavor. Chocolate chip shortages? Chopped chocolate bars or toffee bits save the day. The flour is non-negotiable—King Arthur or Bob’s Red Mill for best results. And that flaky sea salt? Maldon is the gold standard, but any sea salt adds that perfect crunch. Trust me, it’s worth the extra minute to sprinkle it fresh out of the oven.
Dough keeps for 48 hours in the fridge, wrapped tight in plastic. For longer storage, freeze dough balls for up to 3 months. Bake straight from frozen—just add 1-2 minutes. These cookies reheat beautifully too: 30 seconds in the microwave with a damp paper towel restores that warm, gooey magic. Double the batch—you’ll want seconds.
Why You'll Love This Recipe
- Five-Ingredient Magic: I swear by this combo—soft brown butter, crisp edges from that sugar crunch, and vanilla that actually sings. No weird add-ins, just the classic trio of sweetness (granulated + brown) and eggs that hold it all together. That’s the secret: simplicity that tastes like nostalgia.
- No-Fuss Mixing: Honestly, I measure the butter straight into the bowl—no need to cream it first. The sugars and egg break it down enough for perfect dough. Ten minutes of stirring, then chill while you binge one episode. (Yes, even on a Tuesday night.)
- Party-Proof Any Day: These disappear at gatherings, but they’re just as good for a solo snack. Double the batch, freeze half—now you’ve got cookies for when your friend cancels last-minute. No one will guess they’re from your "basic" recipe.
- Budget Buster: Brown sugar and butter stretch further than you’d think, and eggs? Versatile pantry staples. I make a full batch for $3, and the leftovers fund my coffee habit. (Worth it.) Plus, no fancy chocolate needed—store-brand chips cut costs without sacrificing that melty center.
Step-by-step instructions for chewy chocolate chip cookies
Here's how to make the perfect chewy cookies with crisp edges and melty chocolate centers.
🍳 Step 1: Cream Butter and Sugars for Maximum Flavor
In a stand mixer fitted with the paddle attachment, beat the cold, cubed unsalted butter on medium speed for 1-2 minutes until it becomes pale and fluffy. This process incorporates air, which creates those beautiful crackly edges we all love. Add the 0.75 cup granulated sugar and 0.75 cup packed brown sugar and continue beating for another 3-4 minutes until the mixture is light and airy.
You'll know it's ready when the mixture nearly doubles in volume and leaves clean streaks on the bowl. This creaming step is crucial—it develops the cookie's signature texture. If your butter isn't cold enough, the cookies will spread too much and lose their chewiness. Here's the thing—don't rush this step. The longer you cream, the better the texture becomes.
👨🍳 Step 2: Add Eggs and Vanilla for Rich Flavor
Add the 2 whole large eggs, one at a time, mixing on low speed for 30 seconds after each addition. Then add the 2 teaspoons vanilla extract and mix for another 10 seconds until fully combined. The mixture might look slightly curdled after adding the eggs, but don't worry—it will come together when we add the dry ingredients.
I always use room temperature eggs for this recipe. They blend more smoothly and help create a tender cookie. If your eggs are straight from the fridge, let them sit at room temperature for 15-20 minutes before using. This step is where the vanilla really shines—its warm, sweet aroma will fill your kitchen and make your cookies smell amazing as they bake.
👨🍳 Step 3: Combine Dry Ingredients and Chocolate Chips
In a separate bowl, whisk together the 2.5 cups all-purpose flour, 1 teaspoon baking soda, and 1 teaspoon salt. Add this dry mixture to the wet ingredients and mix on low speed for 30-45 seconds until just combined. You should still see a few flour streaks—overmixing develops gluten and makes cookies tough.
Remove the bowl from the mixer and fold in the 2 cups chocolate chips using a silicone spatula. I like to use a mix of semi-sweet and milk chocolate chips for depth of flavor. Make sure they're evenly distributed throughout the dough. This is where the magic happens—the chocolate will melt beautifully in your warm oven, creating those perfect pockets of gooey goodness.
⏰ Step 4: Chill the Dough for Perfect Shape
Cover the bowl with plastic wrap and refrigerate for at least 30 minutes (I prefer 1 hour or even overnight). Chilling solidifies the butter, which prevents the cookies from spreading too thin in the oven. It also allows the flour to fully hydrate, creating better texture. Real talk: Skipping this step is a mistake—your cookies will be flat and cakey instead of chewy and delicious.
Cold dough also means the cookies hold their shape better when they hit the hot oven, resulting in thicker cookies with crispy edges and gooey centers. This step makes a MASSIVE difference in the final result. If you're short on time, at least chill for 20 minutes—it helps, but the longer you wait, the better the cookies will be.
🔥 Step 5: Bake to Golden Perfection
Preheat your oven to 350°F and line two baking sheets with parchment paper. Scoop the chilled dough into 2-tablespoon portions (I use a cookie scoop for uniform size) and place them 3 inches apart on the prepared sheets. Bake for 11-13 minutes until the edges are golden brown but the centers still look slightly underdone.
They'll continue cooking on the hot pan after you remove them from the oven. Let them cool on the baking sheet for 5 minutes before transferring to a wire rack. While they're still warm, sprinkle each cookie with a pinch of flaky sea salt for that perfect balance of sweet and salty. Enjoy them warm for the ultimate experience—these cookies are best fresh from the oven!
Pro Tips For Making Basic Chewy Chocolate Chip Cookie
- Cream Butter Slowly: Dump cold butter cubes into the sugar mix and pulse with a mixer on low for 30 seconds first. This coats the sugar evenly without melting it—no one wants a greasy, soupy dough that spreads into pancakes.
- Pack That Brown Sugar: Use a spoon to press the brown sugar firmly into its container before measuring. Too much air in packed brown sugar = fewer cookies and a less caramelized flavor. I learned this the hard way when I got 12 cookies instead of 24.
- Underbake Slightly: Pull cookies out when the edges are golden but the centers still look soft—about 2-3 minutes before the recipe says. They’ll firm up as they cool, staying chewy instead of cakey. (Yes, even if you’re impatient like me.)
- Chill the Dough: Flatten dough balls into ¾-inch discs and refrigerate them for 15 minutes before baking. This prevents excessive spreading and ensures a thicker, chewier cookie. Skip this, and you’ll get sad, flat cookies that taste like a sad, flat life.
Storing and reheating this dish
Fridge Storage Tips
Store your freshly baked cookies in an airtight container at room temperature for up to 3 days—they’ll stay soft and delicious. I like using glass containers with tight-sealing lids (like Pyrex) because they keep cookies fresher longer than plastic.
Line the container with parchment paper first to prevent sticking. For extra freshness, place a slice of bread in the container—it absorbs moisture and keeps cookies chewy. 💛
Freezer Magic
Freeze unbaked dough balls for up to 3 months—this is a game-changer for busy bakers! Place dough balls on a tray, freeze solid, then transfer to a ziplock bag or airtight container. Bake straight from frozen, adding 1-2 extra minutes to the baking time.
For baked cookies, freeze them in a single layer on a tray before transferring to a container. Thaw at room temperature for 10-15 minutes before enjoying.
Reheating Perfection
Microwave reheating works best for a quick fix. Place a cookie on a plate, cover with a damp paper towel, and heat for 10-15 seconds on medium power. The towel traps steam, restoring that warm, gooey texture.
For oven reheating, bake at 300°F for 3-5 minutes until warmed through. Avoid the microwave without the paper towel—it dries out the cookies faster than you can say "crispy disaster."
Transporting Treats
Pack cookies in layers separated by parchment paper or wax paper to prevent crushing. For long trips, use a cookie jar with a secure lid or a sturdy cardboard box lined with plastic wrap.
If transporting warm cookies, place them in a thermos or insulated bag to keep them warm for hours. I’ve even used muffin liners between layers in a box—they prevent sticking and make cleanup easier. 🌟
Reviving Dry Cookies
If your cookies lose their chewiness, don’t toss them! Place them in a paper bag with a slice of apple or bread and seal. Let them sit at room temperature for 1-2 hours—the moisture will revive their texture.
For an instant fix, brush with a tiny bit of milk or water and bake at 350°F for 2-3 minutes until warmed through. This trick works like magic on cookies that’ve been sitting too long.
Nutrition facts
Frequently asked questions
Why does chilling the dough matter for chewy cookies?
Chilling the dough for at least 30 minutes (or up to overnight) is crucial for two reasons: it solidifies the butter so cookies hold their shape, and it allows the flour to fully hydrate for better texture. Skipping this step often results in flat, cakey cookies instead of the thick, chewy ones you want.
Can I substitute butter with oil for these cookies?
Not recommended! Butter creates the signature flavor and chewiness. If you must substitute, use an equal amount of cold shortening (like Crisco) for a similar texture, but the flavor won't be the same. For a lighter version, you could try half butter, half oil, but expect slightly less chew.
How do I prevent my cookies from spreading too much?
Use cold butter (not softened) and chill the dough thoroughly. Also, scoop dough balls with a 2-tablespoon scoop and place them 3 inches apart on the baking sheet. Bake at 350°F for 11-13 minutes—overbaking causes excessive spread. If they still spread too much, your butter might be too warm.
What's the best way to tell when cookies are done baking?
Look for golden brown edges with slightly underdone centers—they'll firm up as they cool. The edges should pull away from the parchment paper just slightly, and the tops should look set but not dark. A toothpick inserted should come out with a few moist crumbs, not wet batter.
Can I make these cookies gluten-free?
Yes, but you'll need a 1:1 gluten-free flour blend (like Bob's Red Mill or King Arthur) and add ½ teaspoon xanthan gum if your blend doesn't contain it. Reduce baking time by 1-2 minutes as gluten-free cookies brown faster. Expect slightly denser texture, but they'll still be delicious!