
Desserts
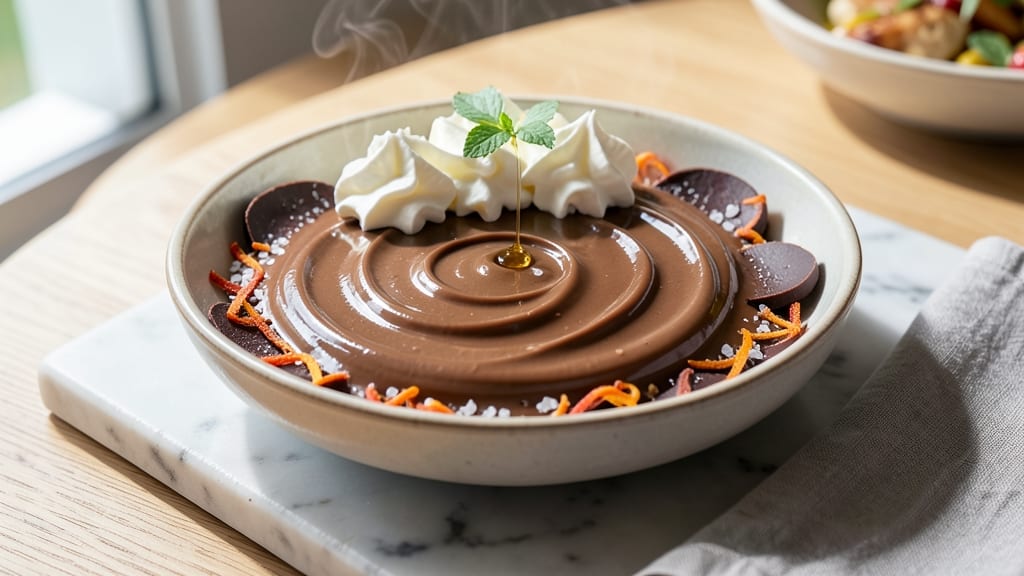
This best ever chocolate ganache recipe delivers velvety, zero-fail texture that transforms every dessert from ordinary to extraordinary. 💛 The secret lies in precise ratios of high-quality chocolate and heavy cream, tempered just enough to create that signature glossy sheen without graininess—no guesswork, no second chances.
I've perfected this method after years of testing, ensuring it works every time whether you're filling cakes, coating truffles, or drizzling over fresh berries.
The foundation of great ganache starts with equal parts chocolate and cream by weight—no shortcuts, no substitutions. Dark, semi-sweet, or milk chocolate all work beautifully, but the key is using high-percentage cocoa butter chocolate (70% or higher for dark) to prevent separation.
We'll heat the cream just until it steams, then pour it over chopped chocolate to create a smooth, silky emulsion that cools into the perfect consistency. This method eliminates the most common ganache failures: graininess and separation.
What you'll achieve is a ganache so smooth it practically melts on your tongue, with a glossy finish that makes any dessert look professionally decorated. The texture is firm enough to pipe but still tender enough to create that luxurious "bite" when used as a filling.
Best of all, it keeps beautifully in the refrigerator for up to two weeks, ready to elevate your desserts whenever inspiration strikes.
From truffle centers to layered cakes, this ganache adapts to any application while maintaining its signature velvety quality. Whether you're a home baker or a professional, this recipe delivers restaurant-quality results with minimal effort. Let's get started on creating your perfect ganache.
Ingredients for best ever chocolate ganache
Seven ingredients, one game-changing technique—this is how you make restaurant-quality ganache every time.
| Ingredient | Amount | Notes |
|---|---|---|
| High-Quality Chocolate Chips 🍫 | 12 oz | 70% cocoa or higher for dark |
| Heavy Whipping Cream 🥛 | 12 oz | Full-fat, cold from fridge |
| Unsalted Butter 🧈 | 2 tbsp | For extra richness and shine |
| Vanilla Extract 🌿 | ½ tsp | Pure, high-quality vanilla |
| Kosher Salt 🧂 | ¼ tsp | Fine grain for balance |
| Orange Zest 🍊 | 1 tsp | Freshly grated, optional |
| Alcohol (Optional) 🍷 | 1 tbsp | Kahlúa or rum for depth |
The chocolate is non-negotiable—Valrhona or Callebaut are my go-tos, but Ghirardelli 72% dark chips work beautifully too. Look for bars with at least 70% cocoa content; anything lower risks graininess. Costco or specialty baking stores carry these brands, and they’re worth the splurge. The heavy cream? Full-fat only—no substitutions. It needs to be cold when you measure it, straight from the fridge. Pro tip: chop the chocolate into even 1/4-inch pieces before heating the cream—this ensures perfect, even melting every single time.
No vanilla extract? Almond extract at half the amount works in a pinch, but trust me, vanilla is worth hunting down. Want to skip the alcohol? Extra butter or a splash of orange juice adds depth without altering the texture. The orange zest is optional but adds a bright, luxurious note—use a microplane for the finest zest possible. If you’re making this for truffles, the butter is essential for that signature glossy finish. For cakes? You can omit it, but your ganache will lack that professional sheen. And yes, the salt is crucial—it balances the richness without overpowering.
Store the ganache in an airtight container between layers of parchment paper to prevent sticking. It’ll keep in the fridge for up to 2 weeks, but honestly? It’s best used within 5-7 days for peak texture. For truffles, chill the ganache for at least 2 hours before rolling—this ensures clean shapes. Need to reheat? Microwave in 10-second bursts until just melted, then stir vigorously. This ganache is so versatile you’ll find yourself making it for everything—next time, try adding a pinch of espresso powder for a mocha twist.
Why You'll Love This Recipe
- Two-Ingredient Magic: I swear, just chocolate and cream—no fancy gadgets, no stress. The moment you pour hot cream over those chocolate chips, something clicks, and you’re left with this velvety, melt-in-your-mouth perfection.
- Rich Without Effort: That first bite? It’s like a hug for your taste buds. The butter rounds out the bitterness of the chocolate, while the vanilla and pinch of salt make it taste luxurious—not like you slaved over it.
- Endless Uses: Drizzle it over strawberries for a 5-minute dessert, stuff it in cakes for a moody center, or just eat it with a spoon (no judgment). It’s my go-to for last-minute gifts, potlucks, or when I’m too tired to bake.
- Makes Ahead Like a Dream: Between us, I always double the batch. Ganache keeps for days in the fridge, and reheating it? Just microwave for 20 seconds. That’s 20 seconds saved from scrambling for dessert later.
Step-by-step instructions for perfect chocolate ganache
This foolproof method guarantees silky-smooth ganache every time—no grainy lumps or seizing disasters.
🔥 Step 1: Heat the Cream to Scalding
Pour the 12 oz heavy whipping cream into a medium saucepan and heat over medium-high heat. Watch closely as it begins to steam—you're aiming for a gentle boil, not a rolling boil. The cream should reach just under 200°F (when tiny bubbles form around the edges and steam rises continuously). This is critical: overheating causes seizing when mixed with chocolate.
Here's the thing—if you use cold cream straight from the fridge, the chocolate will seize like cement. The heat opens the cocoa butter crystals, creating that perfect velvety texture. Remove the pan from heat as soon as it reaches scalding temperature—about 3-4 minutes total. Let it sit for 30 seconds to cool slightly but remain steaming hot.
🍳 Step 2: Melt the Chocolate with Precision
While the cream heats, chop the 12 oz high-quality chocolate chips into rough pieces (about ½-inch chunks) for even melting. Place them in a heatproof bowl that fits snugly over a saucepan of simmering water—this creates a double boiler. The water should never touch the bowl, but should come within ½ inch of the bottom.
Set the bowl over the simmering water and let the chocolate melt gently, stirring occasionally with a silicone spatula. You'll see it transform from solid to glossy in 5-7 minutes. The key here is patience—direct heat causes uneven melting and potential burning. Once fully melted, remove the bowl from the heat and let it cool for 1 minute to room temperature (about 85-90°F).
🥘 Step 3: Combine and Emulsify
Pour the scalding hot cream in a slow, steady stream over the melted chocolate while whisking vigorously in a figure-8 motion. This gradual combination prevents temperature shock that causes seizing. After all the cream is incorporated, add the 2 tbsp unsalted butter, 0.5 tsp vanilla extract, 0.25 tsp kosher salt, 1 tsp orange zest, and 1 tbsp alcohol (if using). Whisk until completely smooth—you should see the ganache thicken noticeably.
Here's where it gets magical: the ganache should look glossy and satiny with a thick, pudding-like consistency. If it looks streaky or grainy, don't panic—simply return the bowl to the double boiler for 10-15 seconds to gently reheat while whisking. The moment it becomes uniform and shiny, you've achieved perfection. Real talk: this is the moment that matters, so take your time and whisk like you're painting a masterpiece.
⏰ Step 4: Rest and Adjust
Transfer the ganache to a clean, dry bowl and let it rest at room temperature for 15-20 minutes. This resting period allows the cocoa butter crystals to properly set, resulting in that luxurious snap when used for dipping or layering. If the ganache thickens too much during resting, gently reheat in 10-second increments over simmering water, stirring constantly until it reaches a spreadable but thick consistency—about 100°F.
For extra insurance against graininess, strain the ganache through a fine-mesh sieve into a clean bowl. This removes any potential crystal formations and gives you that restaurant-quality finish. Now your ganache is ready to use for dipping truffles, layering cakes, or glazing pastries—whatever your heart desires!
Pro Tips For Making Best Ever Chocolate Ganache
- Heat Cream to 185°F: I learned this the hard way—boiling the cream turns ganache into a greasy mess. Use a thermometer to hit 185°F (just before a rolling boil), then pour it over chopped chocolate in a wide bowl. The chocolate melts instantly without seizing, and you avoid that dreaded grainy texture.
- Chop Chocolate Coarsely: Skip the fine chopping—big chunks melt faster and more evenly. Use a chef’s knife to break chocolate into ½-inch pieces, then toss them into the warm cream. This creates smoother ganache with fewer lumps, and it’s way less work than sifting.
- Add Butter Last: Whisk in the butter after the ganache cools slightly (to about 100°F). Cold butter makes ganache thicken too fast, and you’ll end up with streaks. Let it sit for 2 minutes before folding it in—this guarantees a silky, stable finish.
- Salt the Ganache: A pinch of kosher salt (about ¼ tsp) balances the sweetness and cuts through the richness. Add it with the vanilla extract while the ganache is still warm—it dissolves better and enhances every bite. (Yes, even if your chocolate is already sweet.)
Make-ahead tips for this best ever chocolate ganache
Prep Ahead for Smooth Ganache
Chop your 12 oz chocolate chips into ½-inch pieces and store them in an airtight container in the fridge for up to 3 days. This pre-chopping saves time when you're ready to make the ganache—just grab and go!
I like to use Valrhona or Callebaut bars because they melt more evenly than chips. 💛
Make Ganache in Advance
Once fully cooled, transfer your ganache to a glass airtight container and refrigerate for up to 2 weeks. For best texture, use it within 5-7 days—it thickens beautifully in the fridge.
When ready to use, microwave in 10-second bursts until just melted, then stir vigorously to restore its silky consistency. Trust me, this is a game-changer for busy bakers!
Truffle Prep Shortcut
For truffles, make the ganache 24 hours ahead and chill completely. Roll into 1-inch balls and store in the fridge until ready to coat with cocoa powder or chopped nuts.
Pro tip: Use 1 tbsp cocoa powder mixed with 1 tsp powdered sugar for the perfect dusting. This gives you clean, professional-looking truffles with minimal effort. ✨
Layered Cake Strategy
Assemble your cake layers 1 day before filling with ganache. Chill the ganache to room temperature (about 10 minutes out of the fridge) before piping between layers. This prevents the cake from becoming soggy.
I like to use a piping bag with a star tip for even distribution. Let the cake rest 30 minutes after filling before slicing. 🍰
Freezer-Friendly Ganache
For long-term storage, portion ganache into silicone molds or small jars and freeze for up to 3 months. To use, thaw in the fridge overnight, then reheat gently. This works perfectly for holiday baking—just pull out what you need when guests arrive.
Freezing preserves the texture beautifully, so you always have ganache ready for last-minute desserts. ❄️
Reheating Like a Pro
Need to reheat? Place the ganache in a heatproof bowl over a pot of simmering water (double boiler) and stir gently until smooth. Avoid direct heat—it can cause separation. For dipping or glazing, warm to 100°F for the perfect consistency.
If it thickens too much during reheating, add 1 tsp heavy cream at a time until smooth again. This keeps your ganache restaurant-quality every time! 🔥
Nutrition facts
Frequently asked questions about chocolate ganache
Why does my ganache turn grainy?
Graininess happens when the cocoa butter crystals don't form properly, usually from temperature fluctuations. Always use equal parts chocolate and cream by weight, and heat the cream to just under 200°F before pouring over chopped chocolate. If it happens, gently reheat the ganache in 10-second bursts while whisking until smooth.
Can I substitute milk chocolate for dark chocolate?
The same ratio works for milk or semi-sweet chocolate, but dark chocolate (70% or higher) creates a more stable, glossy finish. For milk chocolate, use slightly cooler cream (190°F) to prevent seizing. The butter and vanilla in this recipe enhance both types equally.
How do I fix separated ganache?
Separation occurs when the fat and liquid split—usually from overheating or sudden temperature changes. Place the ganache in a double boiler and gently heat while whisking until fully recombined. For stubborn cases, add 1 tsp heavy cream at a time until smooth again.
What's the best way to store ganache?
Keep it in an airtight container between layers of parchment paper for up to 2 weeks in the fridge. For longer storage, portion into silicone molds and freeze for 3 months. Thaw overnight in the fridge before reheating gently over simmering water. This preserves the velvety texture perfectly!
Can I make ganache without butter?
Yes! While butter adds richness and shine, you can omit it for a lighter texture. Simply reduce the cream by 1 tbsp to maintain balance. The ganache will still set beautifully—just expect slightly less gloss. This works great for fillings where texture matters more than appearance.