
Desserts
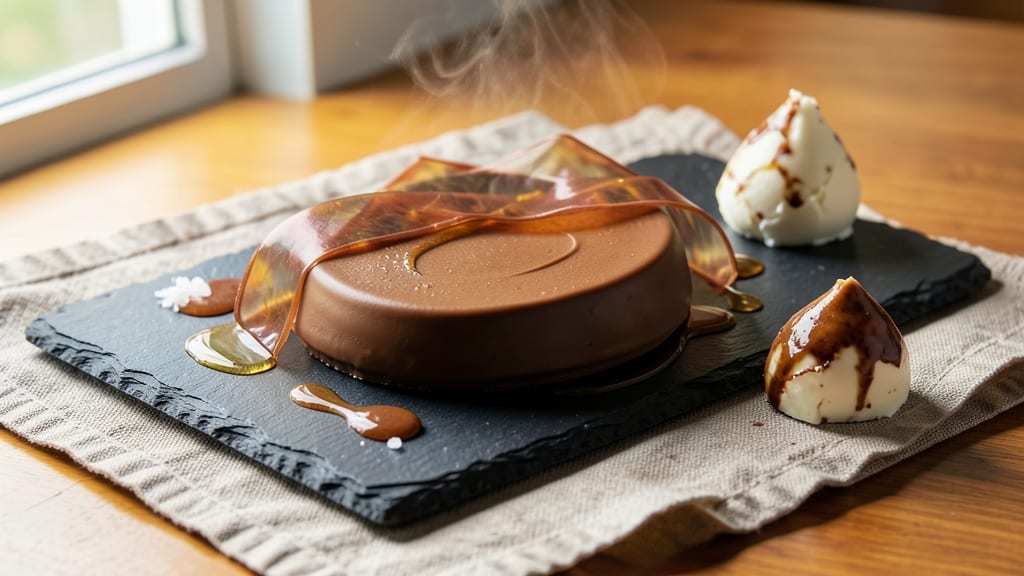
This cacao paste chocolate recipe unlocks intense cocoa depth without the bitterness that often plagues homemade chocolate. The secret lies in tempering raw cacao paste with precise ratios of sweetener and fat, creating a velvety, restaurant-quality spread that elevates everything from toast to baked goods.
I developed this method after years of experimenting with cacao nibs and pastes—finally achieving a balance that's both rich and approachable for home cooks.
The process is simpler than you might think, requiring just three core ingredients: high-quality cacao paste (the star), a neutral fat like coconut oil or refined coconut butter, and your choice of sweetener (maple syrup or coconut sugar work beautifully).
What sets this apart is the tempering technique, which ensures smooth texture and that signature chocolate sheen without needing specialized equipment.
By the end, you'll have a luxurious chocolate spread with complex, fruity cocoa notes and a velvety finish—ideal for spreading on warm bread, drizzling over fruit, or using as a glaze for desserts.
The best part? It keeps beautifully in the fridge for up to two weeks, making it perfect for batch prep.
This isn't just chocolate—it's a versatile condiment that transforms simple ingredients into something extraordinary. Whether you're a baker, a coffee enthusiast, or just someone who loves great chocolate, this recipe will become your new go-to.
Ingredients for cacao paste chocolate
Precision-tempered ingredients for velvety chocolate with restaurant-quality depth and approachable sweetness.
| Ingredient | Amount | Notes |
|---|---|---|
| Raw Cacao Paste 🍫 | ½ cup | High-quality, 100% cacao paste preferred |
| Refined Coconut Oil 🫒 | ¼ cup | Neutral fat for tempering |
| Pure Maple Syrup 🍯 | ¼ cup | Grade B for robust flavor |
| Unrefined Coconut Butter 🥥 | ⅛ cup | For added richness and creaminess |
| Vanilla Extract 🌿 | 1 tsp | Pure Madagascar vanilla preferred |
| Sea Salt 🧂 | ¼ tsp | Fine grain for delicate balance |
| Cacao Nibs 🍫 | 2 tbsp | For texture and extra cacao depth |
| Orange Zest 🍊 | 1 tsp | Freshly grated for bright citrus note |
The raw cacao paste is the foundation—look for high-quality, 100% cacao paste from specialty stores like Whole Foods or Nuts.com, where the flavor profile is rich and complex. Refined coconut oil (not virgin) ensures neutral fat for proper tempering, while Grade B maple syrup adds depth without overpowering. For coconut butter, Trader Joe's or Costco offer the best value in unrefined versions that maintain creaminess. The vanilla extract should be pure Madagascar—imitation extracts lack the nuanced aroma that elevates the final product.
No refined coconut oil? Avocado oil works as a neutral fat substitute, though it may slightly alter the final texture. Short on maple syrup? Coconut sugar or agave nectar provide similar caramel notes, though maple's complexity is ideal. Vanilla extract unavailable? Orange blossom water (½ tsp) adds floral depth, though it's harder to find. For the cacao nibs, Navitas Organics or Lake Street Chocolate offer premium options—if using lower-quality nibs, toast them lightly in a dry pan to enhance flavor. The orange zest can be omitted entirely if citrus isn't your preference, but it brightens the bitterness beautifully.
Store the finished chocolate in an airtight container in the fridge for up to two weeks, where it develops deeper flavor. For longer storage, freeze in portions for three months—thaw at room temperature before use. The tempered texture is best enjoyed within one week of making, though it remains stable in the fridge. When using, allow the chocolate to soften slightly at room temperature for 10-15 minutes before spreading or drizzling for optimal texture.
Why You'll Love This Recipe
- No-Fuss Ingredients: I swear by this combo—just melt the cacao paste with coconut oil, stir in maple syrup, and you’re done. No tempering, no fuss, no waiting for chocolate to set properly.
- Deep, Rich Bite: That raw cacao paste? It’s got a complexity you won’t find in store-bought bars—earthy, slightly tangy, with a velvety finish from the coconut butter. The vanilla ties it all together like a secret handshake.
- Endless Uses: Spread it on toast, drizzle it over oatmeal, or roll it into truffles—this stuff works for breakfast, dessert, or even a quick gift. Honestly, I’ve used it in smoothies when I’m lazy.
- Budget-Friendly Luxury: You’re getting restaurant-quality chocolate for a fraction of the cost. A little goes a long way, and what’s left? Freeze it for next week’s treats. No waste, just pure satisfaction.
Step-by-step instructions for rich cacao paste chocolate
Transforming raw cacao paste into velvety chocolate requires precision and patience—this method delivers intense cocoa flavor without bitterness.
Temper the Cocoa Base
In a heavy-bottomed saucepan, combine the 0.5 cup raw cacao paste and 0.25 cup refined coconut oil over low heat. Stir gently until the mixture reaches 115°F, then remove from heat. This temperature ensures proper tempering without burning the delicate cacao compounds. The paste will begin to soften and blend smoothly with the oil—stir continuously until fully incorporated.
I like to use a thermometer for accuracy here. If you don't have one, watch for the moment when the mixture loses its grainy texture and becomes uniformly smooth. This typically takes about 5-7 minutes of gentle heating and stirring. The goal is to create a stable base that will set properly when cooled.
Incorporate Sweetener and Fat
Return the saucepan to low heat and gradually whisk in the 0.25 cup pure maple syrup and 0.125 cup unrefined coconut butter. Heat just until the coconut butter melts completely, then immediately remove from heat. The mixture should be thick but pourable, with a rich, caramel-like aroma. If it thickens too much, add 1 teaspoon of hot water to restore smoothness.
This is where the balance happens—the maple syrup provides sweetness while the coconut butter adds body and creaminess. The unrefined coconut butter contributes subtle nutty notes that complement the cacao's intensity. Stir constantly to prevent scorching, as the natural sugars in the maple syrup can caramelize quickly at higher temperatures.
Add Aromatics and Texture
In a separate bowl, gently fold in the 1 tsp vanilla extract, 0.25 tsp sea salt, 2 tbsp cacao nibs, and 1 tsp orange zest using a silicone spatula. The vanilla and orange zest brighten the deep chocolate flavor, while the cacao nibs add satisfying crunch. Work quickly to maintain the chocolate's temperature—ideally between 100-110°F—to prevent the fat from separating.
I press the cacao nibs lightly into the mixture rather than stirring vigorously, which helps distribute their texture evenly without breaking them into powder. The sea salt should be finely ground to dissolve completely, enhancing rather than overpowering the flavor. This step is where the chocolate's complexity develops—each ingredient plays a distinct role in the final profile.
Set the Chocolate Properly
Pour the chocolate into a greased 4x4-inch loaf pan or silicone mold, tapping gently to remove air bubbles. Place in the refrigerator for 2-3 hours until fully set but still firm enough to hold its shape when unmolded. The chocolate should have a glossy sheen and snap cleanly when broken—a sign of proper tempering.
If your kitchen is warm, you may need to chill for up to 4 hours. Avoid freezing, as this can cause the coconut fat to separate. For best results, store any leftovers in an airtight container at room temperature, protected from humidity. The chocolate will keep for up to 2 weeks this way, maintaining its rich texture and flavor.
Test and Refine the Texture
Once set, remove the chocolate from the mold and test its texture by breaking off a small piece. It should snap cleanly with a satisfying crack, indicating proper crystallization of the cocoa butter. If it feels grainy or dull, gently reheat the entire batch to 110°F and stir until smooth before resetting.
For serving, I recommend tempering the chocolate slightly by holding it in your hands for 10-15 seconds before breaking or cutting. This softens the edges just enough to create clean, professional-looking pieces. The final product should deliver layers of flavor—deep cocoa, subtle citrus brightness, and a lingering vanilla warmth—with a satisfying contrast between the smooth chocolate and crunchy nibs.
Pro Tips For Making Cacao Paste Chocolate
- Melt Slowly, Stir Often: I learned this the hard way—dumping everything into a pot and walking away leads to scorched cacao paste. Keep the heat low and stir every 30 seconds once the coconut oil starts to shimmer. The paste burns faster than you think, and once it does, you’re left with bitter, grainy chocolate.
- Toast the Cacao First: Skip the raw paste straight into the pot, and you’ll miss out on depth. Lightly toast the cacao paste in a dry pan for 2-3 minutes until it smells rich and nutty (yes, even if you’re impatient like me). This step cuts through the grassy notes and makes the final chocolate taste more complex—like the difference between store-bought and homemade.
- Balance the Sweetness: Maple syrup is liquid gold here, but don’t eyeball it. Start with 2 tablespoons per ¼ cup cacao paste, then taste as you go—unrefined coconut butter adds creaminess, not sweetness. If it’s too cloying, add a pinch of sea salt to highlight the chocolate’s natural bitterness. Trust me, your taste buds will notice the difference.
- Temper the Coconut Butter: Unrefined coconut butter is your friend, but it’s also stubborn. Warm it gently (no microwave—it separates) until it’s just melted, then let it cool slightly before mixing it into the cacao blend. This keeps the texture silky smooth instead of grainy. Sounds weird, but it works: your chocolate will set properly without cracking.
Common mistakes when making great cacao paste chocolate
Overheating the Mixture
Heating your cacao paste and coconut oil beyond 115°F is a common mistake that can scorch the delicate cacao compounds, resulting in a bitter, burnt flavor. I’ve ruined batches by getting impatient and cranking the heat too high—always use low heat and monitor the temperature closely with a thermometer.
If you don’t have one, watch for the moment the mixture transitions from grainy to smooth, which should happen at around 5-7 minutes. 🔥
Skipping the Tempering Step
Tempering isn’t just optional—it’s what transforms your chocolate from grainy to velvety. Without it, your cacao paste chocolate will lack that signature sheen and snap, and may even develop a waxy texture. I learned this the hard way when I rushed and skipped the 115°F tempering phase.
The key is patience: let the mixture cool slightly between steps to ensure proper crystallization of the cocoa butter.
Using the Wrong Fat
Not all fats are created equal! Using unrefined coconut oil (which has a strong flavor) or butter (which can spoil quickly) will overpower the delicate cacao notes. Stick with refined coconut oil for a neutral base that lets the cacao shine.
If you’re out of options, avocado oil works in a pinch, but it may alter the final texture slightly. Always measure carefully—too much fat makes the chocolate greasy, while too little leaves it dry and crumbly.
Adding Ingredients Too Early
Introducing vanilla, salt, or cacao nibs while the mixture is still hot can cause the fat to separate or the flavors to mellow out. I’ve made this mistake by folding in aromatics too soon, resulting in a dull, one-dimensional chocolate.
Wait until the mixture has cooled to 100-110°F before adding these ingredients. This ensures they integrate smoothly without compromising texture or flavor.
Improper Storage Conditions
Leaving your chocolate at room temperature for too long or exposing it to humidity can turn it grainy or cause mold. Always store it in an airtight container in the fridge for up to 2 weeks, or freeze for longer storage.
I’ve had batches go bad when I forgot to refrigerate them immediately—don’t make the same mistake! When ready to use, let it soften slightly at room temperature for 10-15 minutes to achieve that perfect spreadable consistency. ❄️
Ignoring the Sweetener Ratio
Balancing sweetness is crucial—too much maple syrup can make your chocolate cloying, while too little leaves it harsh. Start with the 0.25 cup called for, then adjust in 1-teaspoon increments to taste.
I’ve had to rescue batches by adding a pinch of salt to enhance the chocolate’s natural sweetness, but it’s better to get the ratio right the first time. If your chocolate tastes too sweet, try adding a splash of orange zest to brighten the profile naturally.
Nutrition facts
Frequently asked questions
What's the difference between cacao paste and cacao powder?
Cacao paste is the thick, fudgy byproduct of pressing cacao beans to extract oil, containing both cocoa solids and fat. It's richer and more intense than cacao powder, which is defatted and lighter in color. For this recipe, cacao paste delivers that deep, velvety chocolate flavor without needing extra fat—unlike powder, which requires additional oils to create a spreadable texture.
Can I make this recipe without coconut oil?
Yes, but refined coconut oil is ideal for its neutral flavor and tempering properties. Use avocado oil or coconut butter in equal amounts, though they may slightly alter the texture. Avoid butter or olive oil—they can cause separation or overpower the delicate cacao notes. For a dairy-free option, refined coconut oil remains the best choice.
How do I know when the chocolate is properly tempered?
Properly tempered chocolate will have a glossy sheen and snap cleanly when broken. If it feels grainy or dull, reheat the entire batch to 110°F and stir until smooth before resetting. A quick test: rub a small amount between your fingers—it should feel smooth and cool slightly, not waxy or sticky. This ensures that delicious restaurant-quality texture.
What are the best ways to use this cacao paste chocolate?
Spread it on warm toast, drizzle over fresh fruit, or use it as a glaze for desserts. It's also perfect for making truffles, stuffing dates, or pairing with coffee or tea. For a decadent treat, melt a small piece and dip strawberries or pretzels. The possibilities are endless—it's a versatile condiment that elevates any sweet or savory dish.
Why does my chocolate taste bitter even after following the recipe?
Bitterness often comes from overheating the mixture beyond 115°F or using low-quality cacao paste. Always use high-quality, 100% cacao paste and monitor the temperature closely. If the bitterness persists, try adding a pinch of salt or a splash of orange zest to balance the flavor. The tempering process is key—don't rush it!